 |
|
|
|
|
|
|
|
|
|
|
|
|
|
|
|
|
|
|
|
|
|
|
|
|
|
|
|
|
|
|
|
|
|
|
|
|
|
|
|
|
Replacing a C4 Transmission Front Pump Seal |
|
|
|
Once I started driving the 66' I found that the C4 Automatic transmission had a strange fluid leak between the bellhousing and the main case. The fluid was red, so it had to be transmission fluid plus it would only leak when the car had been driven. After a cleaning, the transmission would remain dry as long as the car was not going anywhere. I checked the dipstick tube and found the area around its base stayed dry.
I removed the torque converter inspection cover and found that it was dry in there also. This meant that the new torque converter seal was doing its job so the leak was from somewhere outside the bellhousing. That left only the transmission front oil pump O-ring. Unfortunately the transmission must come out in order to replace it.
I gathered up both an inch and a foot pound torque wrench, a transmission overhaul kit, 9 quarts of type F Transmission Fluid, lots of lint free rags, my 66' Mustang shop manual, and a copy of Haynes "Ford Automatic Transmission Overhaul" book. Don't attempt any internal transmission work without having good reference materials at hand. I highly recommend the Mustang shop manual as it has excellent instructions and photos to guide you through transmission rebuilding.
I put the car up on jackstands and removed the transmission oil pan so as to drain the fluid. I also drained the torque converter hoping to make less of a mess. Don't let anyone fool you, automatic transmission work is a messy job. Luckily the fluid is also a cleaner that will easily wash off you hands, hair, and most clothes.
I unbolted the transmission, placed a plug in its rear where the driveshaft goes, and then lowered it using a floor jack and a block of wood. Next I slid the transmission out from under the car and then laid it across a couple of saw horses for cleaning and general disassembly. It was later mounted on my engine stand since this job is easiest if the transmission is held vertical.
Follow along below as the transmission is disassembled in order to replace the O-ring. |
|
|
|
 |
|
|
 |
|
|
|
|
|
| Always clean the outside of the tranny before disassembly. Be sure to plug any holes that might allow water to get inside. Proper cleaning is important because it helps prevent dirt and other foreign materials from getting inside the tranny. A clean tranny is a happy tranny. |
|
|
Here is the torque converter still mounted in the bellhousing. |
|
|
|
|
 |
|
 |
|
|
|
|
|
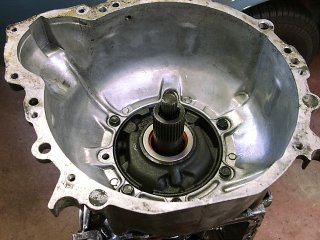
After removing the converter, you can now see the oil pump and the front pump seal. |
|
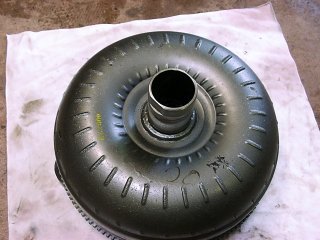
| The torque converter. |
|
|
|
|
|
|
 |
|
 |
|
|
|
Oil pan is removed and the filter and valve body are visible. |
|
| Here is the bottom of the C4 tranny. |
|
|
|
|
|
 |
|
|
 |
|
|
|
|
| The filter has been removed. |
|
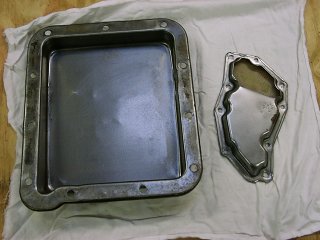
Here are the removed oil pan and filter. |
|
|
|
 |
|
|
|
The valve body has been removed. From left to right you can see the intermediate band assembly, the input shell, and the low reverse band. Also visible are the shifter lever and the kickdown lever. Both of these levers connect to the valve body when it is installed. NOTE: Be sure to double check these levers for full movement before installing the pan. |
|
|
 |
|
 |
|
|
| Here is the top of the valve body. It is setting inside the oil pan. |
|
|
The tranny is being mounted to the head of the engine stand. |
|
|
|
|
|
 |
|
 |
|
|
|
|
| The tranny is being held vertical in the stand and the bellhousing has been removed. There is no trick to removing the small shaft at the top of the tranny--simply pull it straight out. |
|
The pump has been removed. It was released from the case by prying the input shell upward from inside the case as was shown in the shop manual. Only pry the shell enough to expose the O-ring on the side of the pump. |
|
|
|
|
 |
|
|
 |
|
|
|
|
|
The input shell has been removed. Full removal is not necessary and should be avoided if possible. |
|
|
|
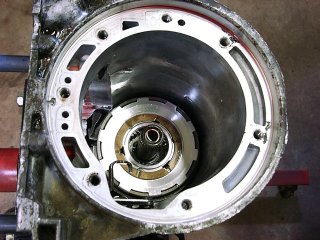
Looking in the front of the casing with the input shell removed. |
|
|
|
|
|
 |
|
|
|
 |
|
|
|
|
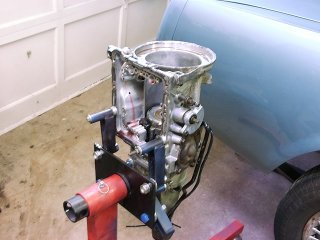
| The tranny case is shown mounted on the engine stand. All operations (except pan removal) can be completed this way. |
|
|
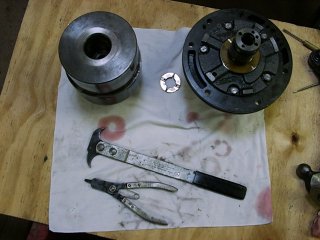
The input shell, oil pump, and #2 thrust washer. Also pictured is a seal puller and an outside snap ring remover. |
|
|
|
|
 |
|
 |
|
|
| Removing the 5 bolts from the rear of the pump shows the pump sun gears. Both gears must be installed with the bevel on the teeth toward the front of the tranny. In other words, you can't see the bevel in this picture because they are face down. |
|
This is the pump cover, the offending O-ring, the oil pump gasket, and the converter tail bushing from in the pump. |
|
|
|
 |
|
 |
|
|
| It is easy to install a new front pump seal with the pump disassembled. I used a driver, but a large socket or even a block of wood can be used when the pump is apart. |
|
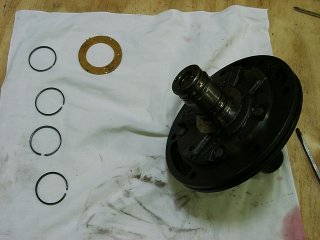
The oil pump is being reassembled using the new seal rings found in the rebuild kit. The #1 fiber thrust washer is also shown. |
|
|
|
In order to reassemble the transmission, I only needed to reverse the steps shown above. The bands will need to be adjusted to specifications as found in the shop manual. Use automatic transmission fluid on the O-ring and any other items that need to be lubed. If the front pump has been disassembled and cleaned, you should pack the gears with vaseline prior to assembly. Try not to use silicone sealant on any of the gaskets since it can plug the tiny passages of the valve body. Make sure the oil pan is straight and that the bolt holes are flush with the rest of the gasket surface and be sure to use a good quality pan gasket. |
|
|
|
Return to Home Page |
|
|
|
� August 31, 2001 |
|
|
|

|
|