TrailBlazer Fog Lamp Install
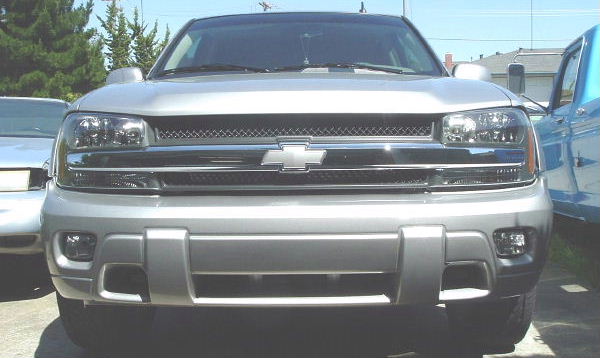
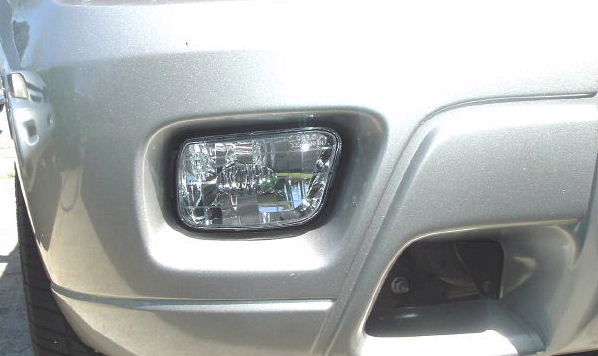
These Fog Lamps have been installed on an LS model TrailBlazer. The LT and LTZ come with the Fog Lamps from the factory. To install these lights on an LS, a set of brackets will need to be fabricated and the openings need to be cut out from the Bumper cover. The other models have a space for the built into the Bumper cover itself. They will also need to be wired up to work correctly. This can be accomplished in a few different ways. I have chosen to add a switch so they can be turned on at any time.
If a stock type setup is desired, they can be wired into the factory location in the fuse panel, and a new Light switch panel for the dash will be needed in addition to having the PCM re-flashed by the dealership to recognize the fog lamp function. Using the factory setup, the Fog lamps will be turned off when the High beams are used.
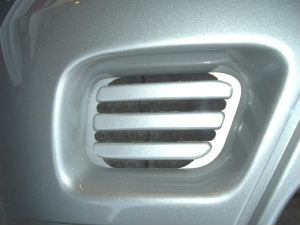
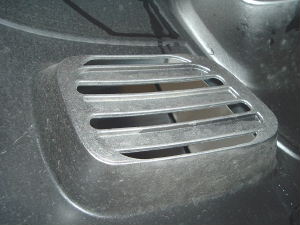
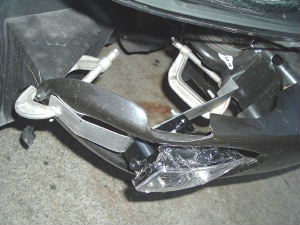
First, the Bumper cover has is removed from the front end. I have written the removal procedure in another article : Front Bumper Cover Modification. Once the Bumper has been removed, the opening may be cut out. I trimmed it from the back using a Dremel cutoff wheel starting from the inside to remove the center section, then trimming outwards along the edges to clean it up. It is best to cut away a little at a time so not too much material is removed.

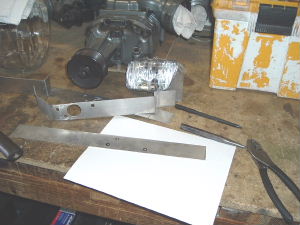
Once the section is cut out from the Bumper, the Brackets for the Fog Lamps can be fabricated. I have used a strip of Aluminum which is thick enough to hold the brackets firmy in place. The position of the lamp is determined while the bumper cover is in place. From there, I made a mock set of brackets to get the angles and bends correct for the final set of Mounting Brackets.
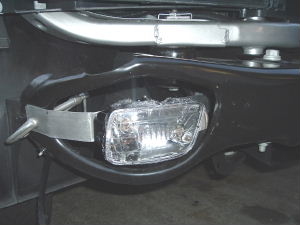
After the brackets have been finished, the Lights are mounted to the Brackets, and the Brackets have been held in place on the Bumper. The Bumper cover is re-installed so the brackets can be adjusted at this point to achieve the correct setting and angles for the Lights. It may be necessary to remove and reinstall the bumper and brackets several time to get everything setup, as the bumper will shift positions when it is bolted and clipped in place, rather than just being installed loosely on the front end. Once the final position has been determined, a couple holes are drilled through the brackets and the bumper for a set of 1/4" bolts, washers and nuts with Nylon to keep them from shifting after installation. The inner mounting bolts were installed using a pre-existing hole on the vehicles Front Bumper. I leave the plastic wrap over the lights during the installation to keep them from being scratched during the process.
Once the bumper cover is re-installed, the lights may be wired up. I will add more to this article soon.
Back To Main