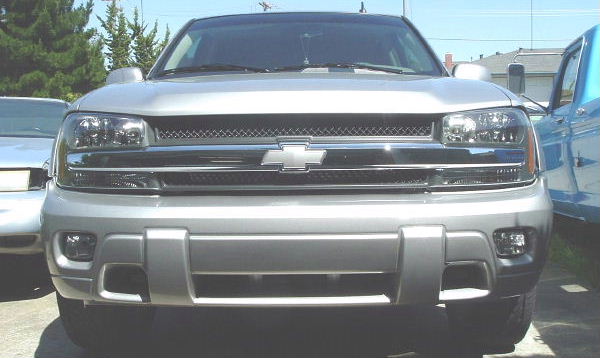
Most new vehicles come with a Front Lisence plate bracket which can be very distracting from the front end appearance. Many states require front plates and are installed by the Dealership before Delivery of vehicle. I have chosen to remove my front plate and repair the damagecaused by the Dealership.
Bumper Cover Removal
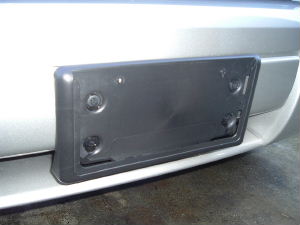

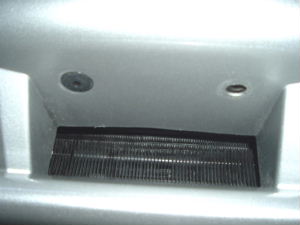
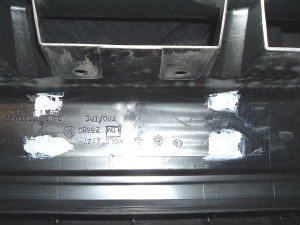
Here is the Bracket, which is held in place with 4 plastic push pins. When removed, four holes are left behind which were drilled into the front Bumper. Two small indentations have also been left by the screws that hold the lisence plate to the bracket.
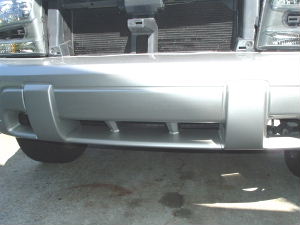
The Bumper cover is removed by first taking off the Grille, which is held in place with several clips. Take care in removing the grille and the clips as they can be broken. There are two bolts and one push pin on the top side holding the bumper cover to the Bumper support. On the bottom, the plastic shield and sides of the Bumper cover are held in place with push pins. The push pins are removed by taking out the center plastic pin and the rest of the push clip.
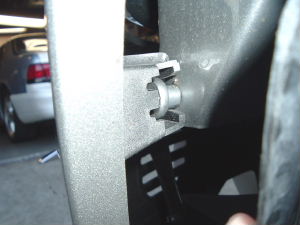
Each side of the Bumper cover is clipped onto the fender. They are removed by pressing the middle part and pulling the Bumper cover forward. In the middle, four more flush push pins are holding the cover in place.
Bumper Repair
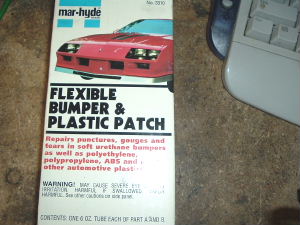
To fill the holes in the Bumper covers, a Flexible repair is required. I am using Mar-Hyde brand Plastic Patch ( Made by Bondo Corporation ), which is a two-part epoxy and sets up quickly and can be sanded within 30 minutes. The bumper cover is first wiped clean using a solvent like Acetone, Laquer Thinner or Alcohol to prep the surface for adhesion, on both sides of the holes. The Front has been covered with Duct tape to hold the patch in place for the first part of the patch which will be done from the rear.
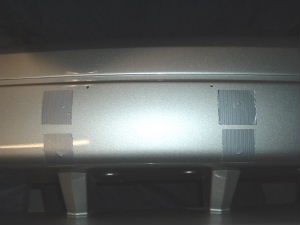
The holes have been filled with Plastic patch and allowed to dry. They were then painted Black from the back even though it will never be seen. Once the patch is dry, the tape is removed from the front.
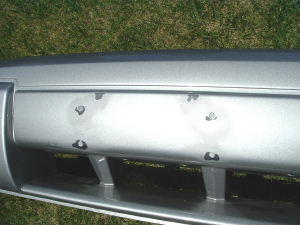

The areas around the holes were lightly sanded down evenly down to the plastic about 1 inch around the holes using 400 grit paper. When the holes were drilled and push pins installed into the Bumper cover, the plastic is pulled outwards raising the area around the holes. Once they were filled and sanded, they were covered with a small, thin coat of patch from the front to even out the low spots that were made where the tape covered the openings. After it dried, it was sanded lightly to achieve a uniform shape, and wet sanded with 600 grit paper to a smoother finish. Then it was wiped clean with solvent, and masked off in preperation for painting.
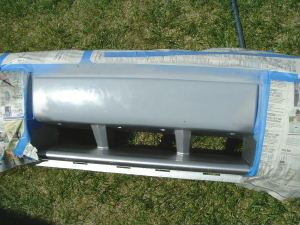
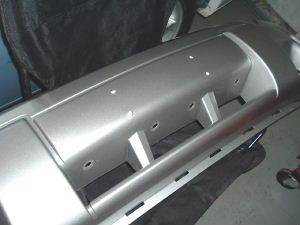
The first coat to be sprayed is Plastic Adhesion Promotor. This will help the paint stick to the plastic much better. Then the bumper is painted with Primer paint to build up a layer, it is wet sanded again using 600 grit to make the bumper perfect. It may be necessary to sand and re-coat with primer several times to achieve a uniform finish. Once a desired shape is achieved, it is wiped clean and re-painted using the factory color to match the rest of the bumper and coated with Clear. It is best to keep a light even coat of paint with several minutes of drying time in between coats to get a good finish. After it is cleared and buffed, the Bumper cover is re-installed on the vehicle with a much cleaner front end appearance.
Back to Main
Bumper Cover Removal
Bumper Repair
To fill the holes in the Bumper covers, a Flexible repair is required. I am using Mar-Hyde brand Plastic Patch ( Made by Bondo Corporation ), which is a two-part epoxy and sets up quickly and can be sanded within 30 minutes. The bumper cover is first wiped clean using a solvent like Acetone, Laquer Thinner or Alcohol to prep the surface for adhesion, on both sides of the holes. The Front has been covered with Duct tape to hold the patch in place for the first part of the patch which will be done from the rear.
The holes have been filled with Plastic patch and allowed to dry. They were then painted Black from the back even though it will never be seen. Once the patch is dry, the tape is removed from the front.
The areas around the holes were lightly sanded down evenly down to the plastic about 1 inch around the holes using 400 grit paper. When the holes were drilled and push pins installed into the Bumper cover, the plastic is pulled outwards raising the area around the holes. Once they were filled and sanded, they were covered with a small, thin coat of patch from the front to even out the low spots that were made where the tape covered the openings. After it dried, it was sanded lightly to achieve a uniform shape, and wet sanded with 600 grit paper to a smoother finish. Then it was wiped clean with solvent, and masked off in preperation for painting.
The first coat to be sprayed is Plastic Adhesion Promotor. This will help the paint stick to the plastic much better. Then the bumper is painted with Primer paint to build up a layer, it is wet sanded again using 600 grit to make the bumper perfect. It may be necessary to sand and re-coat with primer several times to achieve a uniform finish. Once a desired shape is achieved, it is wiped clean and re-painted using the factory color to match the rest of the bumper and coated with Clear. It is best to keep a light even coat of paint with several minutes of drying time in between coats to get a good finish. After it is cleared and buffed, the Bumper cover is re-installed on the vehicle with a much cleaner front end appearance.
Back to Main