|


This tutorial was totally created by me and any resemblance to other tutorials is completely coincidental. Please do not send this tutorial through e-mail. Do not copy it in any manner without my permission. Lists or groups may provide the URL to this tutorial page only. This tutorial may not be placed on any site without my written permission. This tutorial assumes you have a working knowledge of PSP.
MATERIALS REQUIRED FOR THIS TUTORIAL
Jasc Paint Shop Pro This tutorial was written originally for PSP7, but has been modified to make it compatible with PSP8.
A black and white tube of your choice. (This tutorial works best with an image that is black and transparent.) If you would like to use the image I used, click here.
Let's get started!
1. Open a new image 500 x 500, transparent.
2. Add a new layer and name it "Tube". Add your tube in the center (or close to it) of your transparent image and size it according to your liking. Don't worry about the positioning, you will be moving it later.
3. Choose a color and make it your foreground and background. For the tag above I used #FF0000. Click on your Text tool and choose a font you like and size it appropriately. The font used above is Saginaw sized at 72. Make sure Floating and Antialias are both checked. Position your text in the bottom third portion of your transparent image. (You can move your text by clicking on the Mover tool and holding down your left mouse button. When it is positioned where you want it, let go of the mouse!)
4. Add an inner bevel with the following settings: 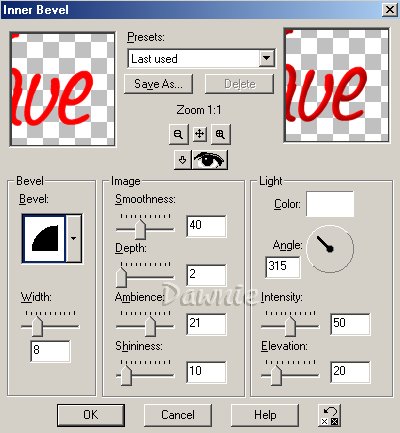
5. While the text is still selected, go to Selections and Promote to Layer. Deselect. On your layer palette, rename the layer named Promoted Selection to "Text". With the Text layer active, right click on it and Duplicate. Turn off the visibility of all layers except your Copy of Text layer. You should have something like this: 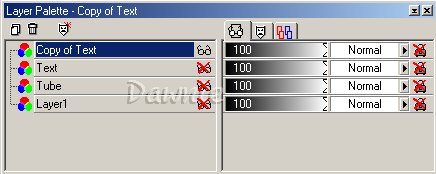
For the next part, you will need to use your Deformation tool and your Arrow from your Tool Palette: This is the deformation tool  and this is the Arrow and this is the Arrow  . .
6. Click on your Deformation tool and stretch your text to within 75-80 pixels of all four sides of your transparent image. Once you have stretched your text, click on the arrow on your Tool Palette. Then click on Effects, then Blur, then Gaussian Blur with 5.00 as your radius. Click OK. Click on Effects, then Geometric Effects, then Wave with the following settings for PSP7:
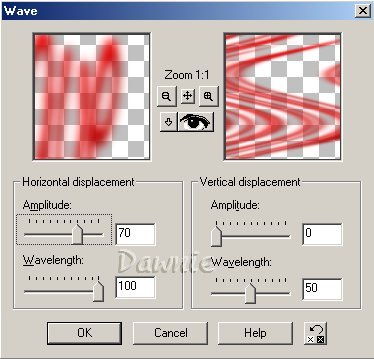
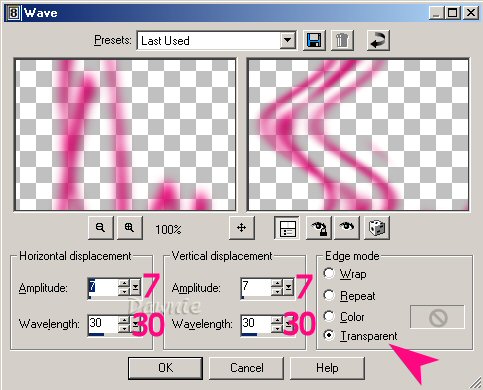
These are the settings if you are using PSP8:
Feel free to play with the wave settings and find something you really like.
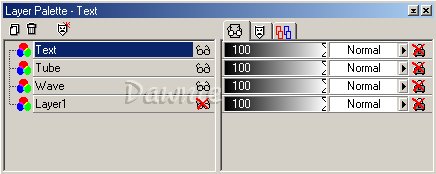
7. Rename the Copy of Text layer "Wave" in your Layer Palette. Make all layers visible, except for Layer 1. Rearrange your layers so that they are in this order:
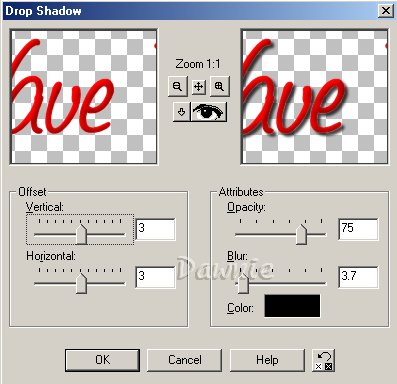
8. Use your Mover tool to position your text, tube, and wave where you would like them. If you want your text to be a different size, just make your Text layer active and use your Deformation tool to make it the length and height that you want it. You can also decrease the opacity of the wave layer if you like. Make your Text layer the active layer and add a drop shadow with the following settings, or with the settings you prefer:
9. With Layer 1 visibility still turned off, go to Layers, Merge, then Merge Visible. Click on Image and then Resize at 75% and make sure Resize all layers is NOT checked. Click on OK. Right click on the top of your image and then click Copy. On your empty workspace, right click and then click Paste As New Image. Click on Layers, Merge, then Merge All. At this point, you can add a new layer and add your watermark. You are done! Here is an example of a different color:

Here is an example of one made in PSP8:

Tutorial Index
Thank you for trying my tutorial. I hope you enjoyed it! If you have any questions, feel free to email me!
Special thanks go to the best friends anyone will ever find on the internet! Thank you Ginny, Dana, and Char for testing this and giving me your input. I appreciate you all!
|