
This is the latest computer in my collection, arriving on Tuesday 10th May 2005. It is a Commodore PET 2001-8 BS, and this particular machine was built in 1978.
This PETMake and Model: Commodore PET 2001-8 BSBuilt: probably late 1978 Serial Number: 1005153 Where bought: Ebay When bought: 10 May 2005 Cost me: �67.00 + �20.00 postage Condition at arrival: Broken |
PET FactfileManufacturer: Commodore in USAIntroduced: 1977 Processor: 6502 at 1MHz Memory: 4K or 8K bytes of RAM, 14K of ROM OS or Language: Microsoft BASIC Display: monochrome 40 by 25 text Graphics: graphics characters only Keyboard: Chiclet (calculator style 73 keys) Sound: none I/O Ports: IEEE488, and user port Mass storage: built-in cassette recorder |
Useful links:PET ArchiveThe Amazing Commodore PET PET index V0.9.2 oldcomputers.net has a PET page |
I thought it might be interesting to document the restoration process on this computer. Maybe I'll do the same for any future ones too.
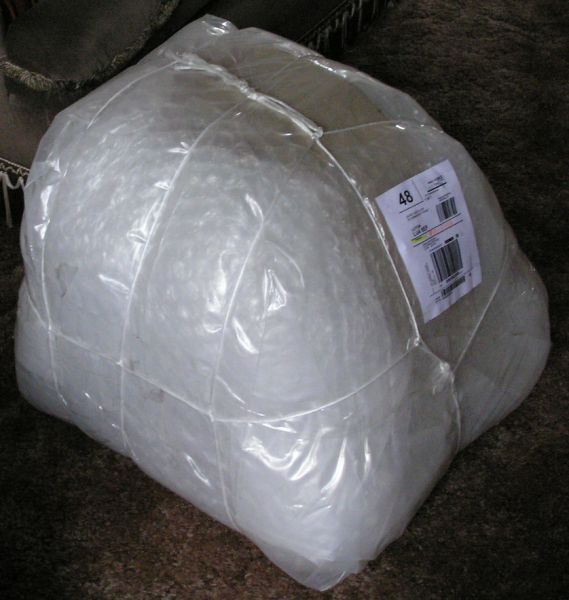
| This is how it arrived in the post. |
|
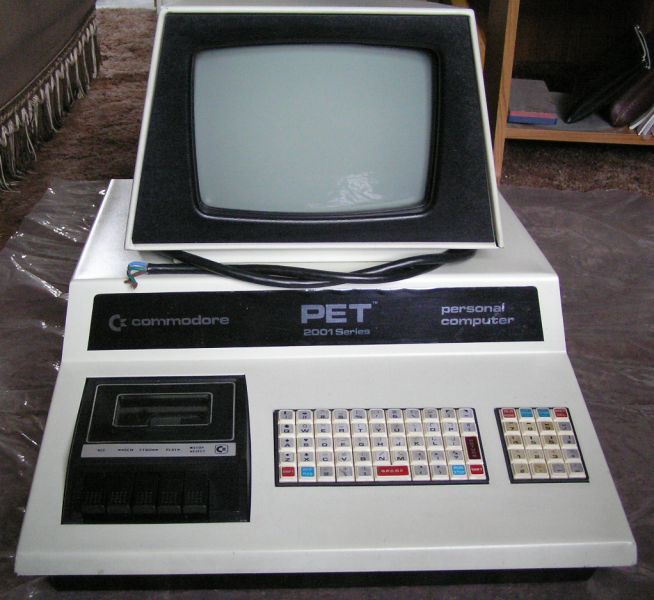
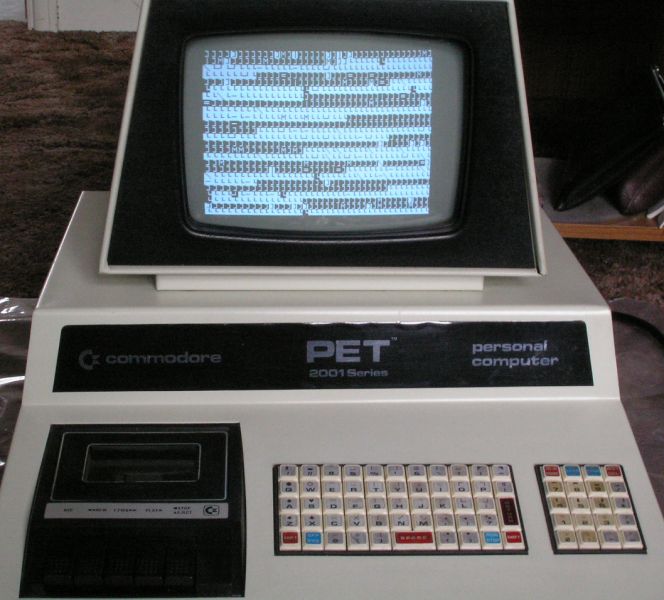
| Thirty metres of bubble-wrap later: The PET is revealed! The case is made from sheet steel painted sort of creamy beige. It has got very few chips in the paint, and the display screen looks unmarked. The keyboard will need cleaning. |
|
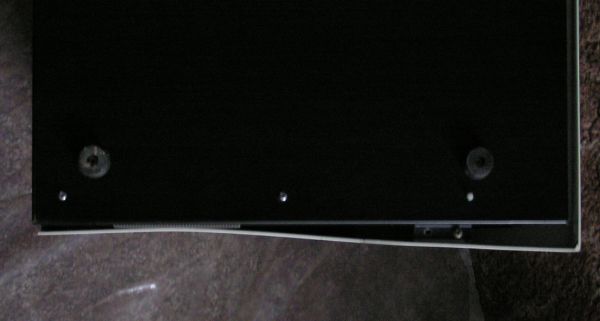
| The only sign of real damage is the side which has been forced inward, probably during shipping. This needs to be bent back outward before the PET can be opened up. By using bits of wood and masking tape to protect the paint, I can use a big screwdriver to lever the side away from the base. |
|
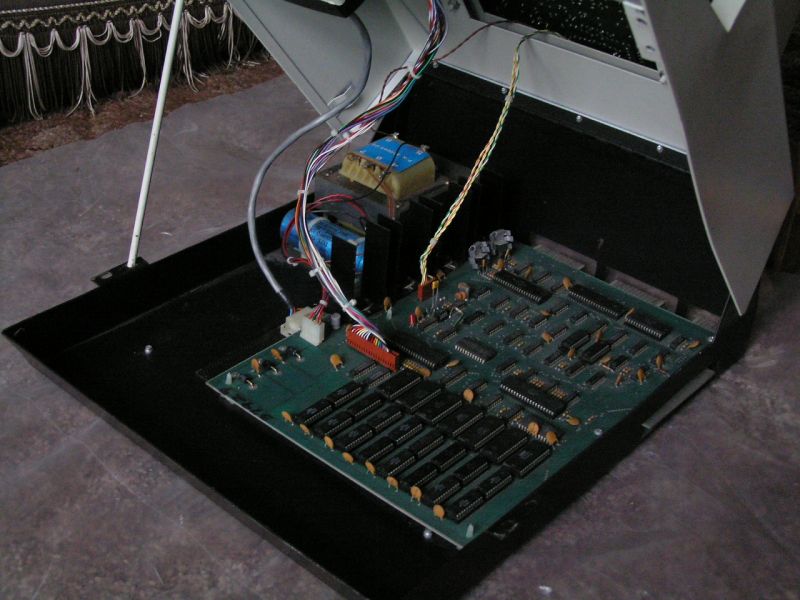
| The case was easily bent outward enough to allow it to open up. I will need to straighten it properly but the can wait until all the components are removed. Inside there is an early circuit board with MOS MPS6540 ROM chips and some RAM chips I don't recognise: MPS 6550. They will be 1K by 4 bit chips, but they are in a 22pin layout I have not seen before. |
|
|
I had to put a plug on it before I could power it up. No nasty burning or fuse blowing when it powers on. I get this display: The display memory is full of random characters showing that the computer has not booted up, or not far enough to clear the screen anyway.
|
|
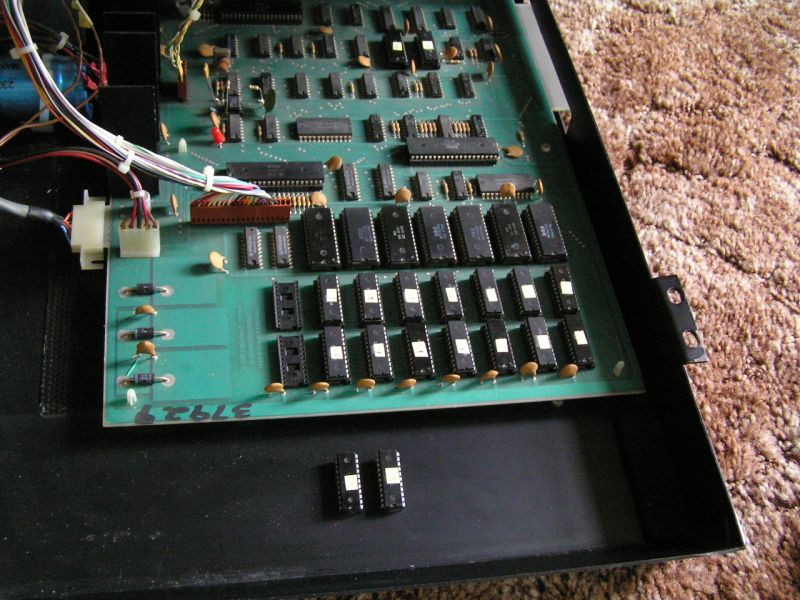
But the display is not as random as it should be. A lot of the characters are '[' characters. On these PET computers, by some good fortune, the 2 RAM chips used for the display memory are the same parts as the main memory chips. This means I can plug main memory chips in the video RAM sockets and test them by seeing what kind of display I get. I also suspect that one of the video RAM chips is already faulty, hence the '[' characters. So I begin by swapping a couple of main memory chips with the video RAM, and I was right: the display changes and becomes more random, with quite a few characters now blank. So I start testing all the RAM chips and labelling them OK or BAD.
About half way through this testing, I notice that when the power is turned on I am getting random characters for about a second then the display abruptly changes. This looks to me like the computer is performing some of the BOOT code. A couple of chip tests later, I have now got only 6 main memory chips left in and I get a proper boot screen! Very good news! I didn't expect to get it working this quickly.
| But its not that easy. I continue with the RAM chip tests, and eventually find I have 2 bad chips out of the total of 18. I put all the good ones back in, leaving the left hand pair of sockets empty (the highest memory address). But now it doesn't boot any more. |
|
Now I try reseating the RAM chips, I haven't pulled anything else so it can't be a serious fault since a few minutes ago. I get lucky and it boots again at power on. Looks to me like I have either a dry joint on one of the chip sockets or a crack in the PCB because the fix is to flex the board a little then power it up.
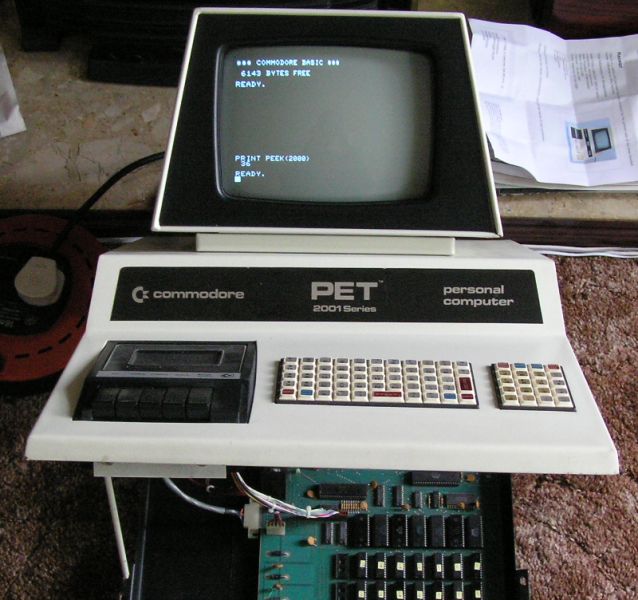
| 6143 bytes free. Its not a lot of RAM. As you can see, I have typed in a simple command, and found some keys are a bit sticky so the keyboard will need some work. On impulse, I put a blank cassette in and find that it will save and load correctly! Things are looking good so far. |
|
|
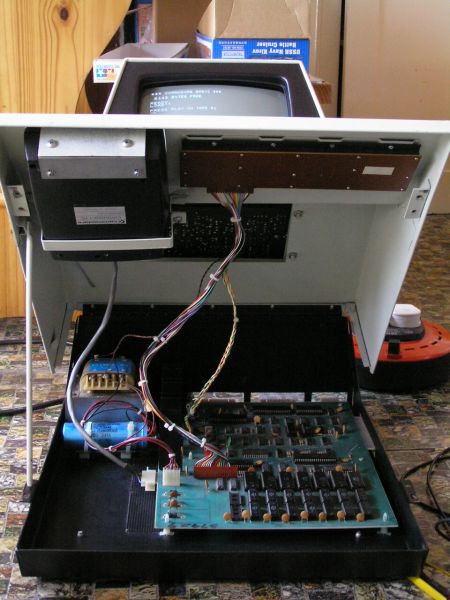
So far today I have taken out the PCB, keyboard and cassette drive, and taken the monitor off. This leaves just the metal case with the power supply still in. This has allowed me to fix the big dent in the side and to wash the case inside and out.
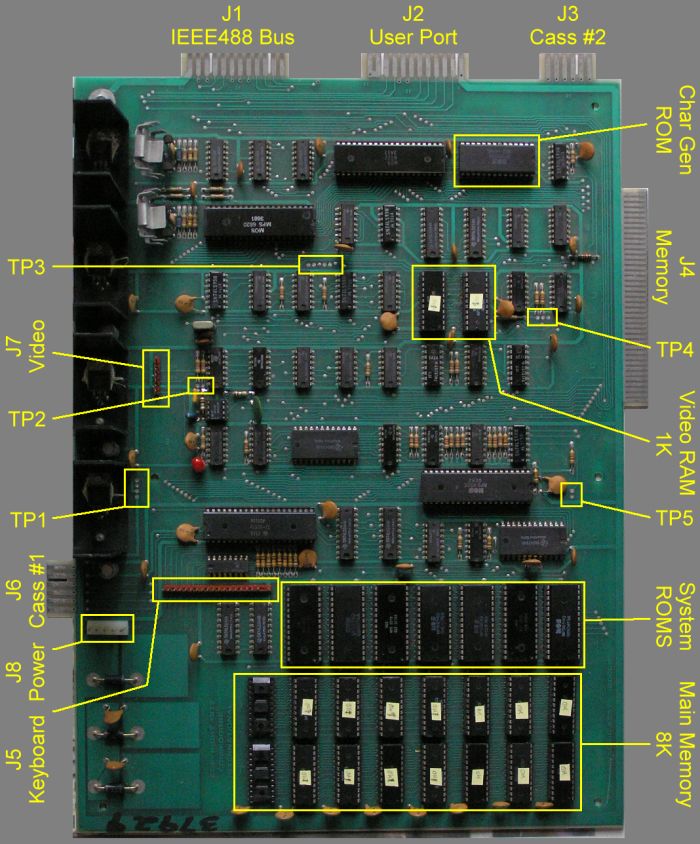
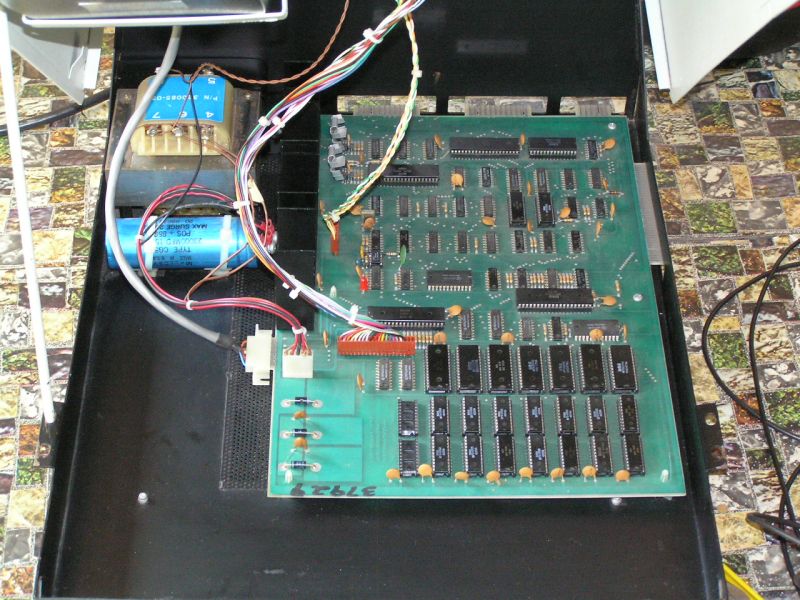
On the PCB there were some components near the 555 timer chip that had been untidily soldered on: the old ones had been just cut away and new ones tacked on. I have done a better job by first clearing solder out of the holes and putting the components in properly. I checked the PCB over for dry joints or cracks but couldn't find any. Looks like the intermittent connection is one or more of the chip sockets. I downloaded the schematics last night and was able to trace my way round the PCB with them. I have found a load of test points which should be helpful. Here is a picture of the PCB. It is part 320008 and the soldered-in chips date from 77 week 21 to 78 week 40. So the board must have been made in october or november 1978. |
|
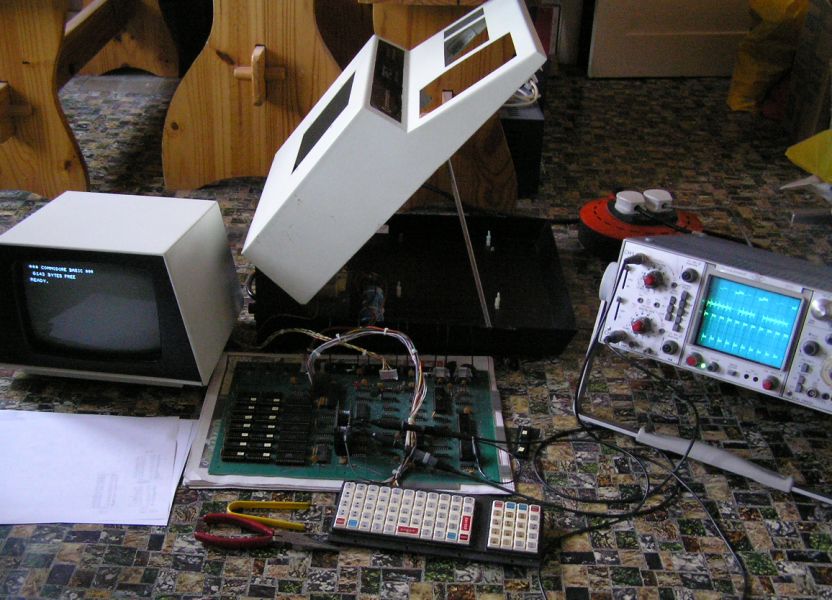
| Not much progress today. I have moved the machine off the carpet so I can lay the PCB on a firm surface while I try to find the bad connection. So far I haven't found one. I tried prodding each memory chip in turn to see if I could get a crash but it stubbornly remained running. I have also tried gently flexing the board and also reseated all the socketed chips and made sure the legs are not bent in any way. I'm still looking for a bad connection. I might have to try putting the board back in the case to see if the problem comes back. |
|
|
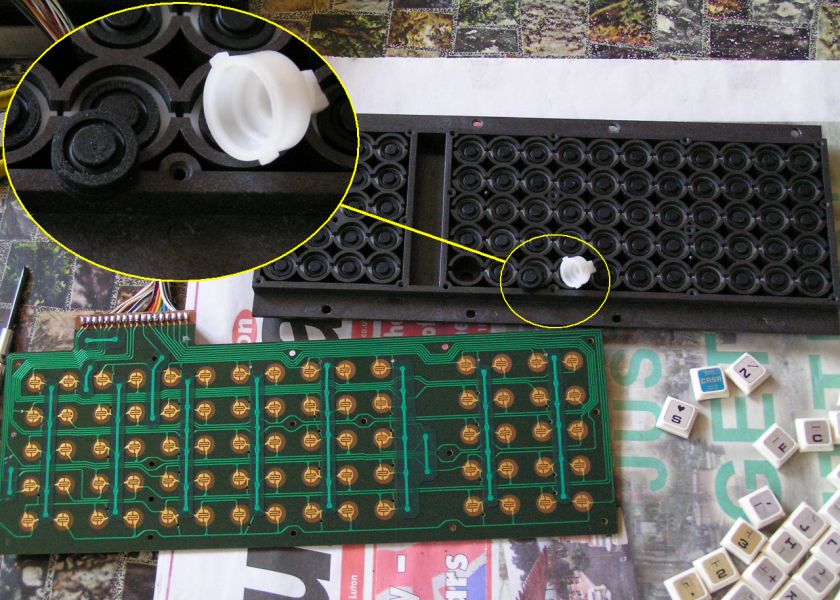
Not a great deal has happened over the weekend. I have put the PCB back in the case and the monitor is back on top too. I have disassembled the keyboard and cleaned everything. That took a while, and time to dry off too. I have partly reassembled it, but I'm looking for some clear plastic film to re-cover some of the keytops. Over half still have the original covering plastic film and I want to re-cover the rest to protect the lettering.
I have had the machine on running my primitive memory test program for hours and hours and it does not want to crash or lock up, so I think I must have fixed the bad connection when I reseated the chips. |
|
|
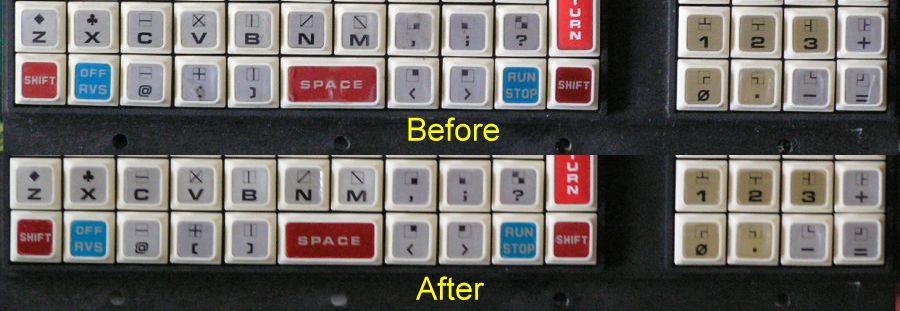
Last night I finished the keyboard. I bought some clear plastic film (the famous sticky backed plastic) and spent a while cutting small squares of it to fit onto the keytops that had lost their original plastic covering. It took a while but I think the results look good. Time will tell if I have made a mistake, but I don't want to risk rubbing the painted lettering off the keys. I have tested all keys and they seem to work reliably, so I refitted the keyboard in the PET case.
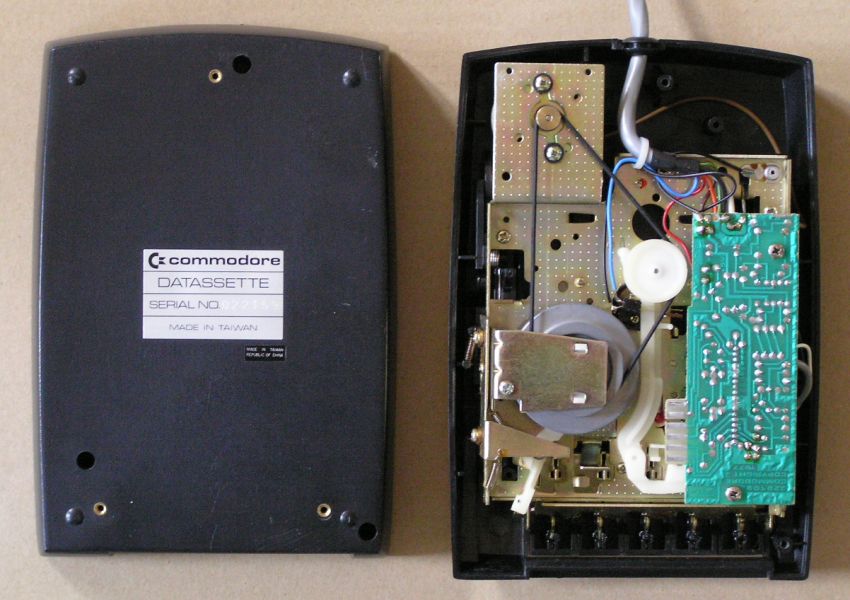
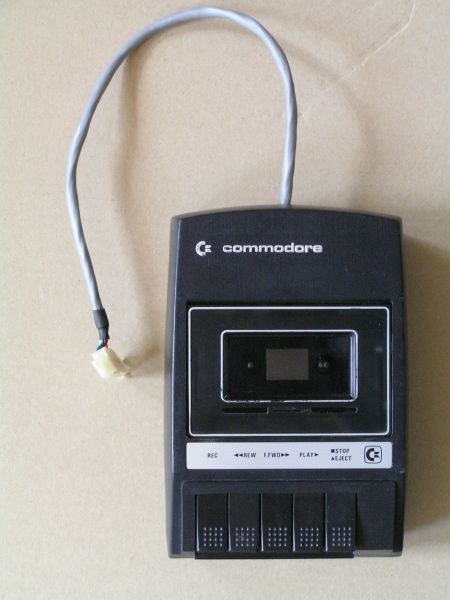
Today I have cleaned the cassette player, which was pretty dusty inside. The case comes off very easily and I was able to take the works out while I washed the case in detergent. Its now reassembled and refitted in the PET. |
|
One cause for concern is that last night it started to play up on power-on. When the power is turned on the PET would go through reset but then display a totally blank screen. If you cycle the power a few times it would eventually boot properly, and then stay working for hours. Today its doing the same thing, and I am thinking its possibly a poor connection on one of the ROM sockets.
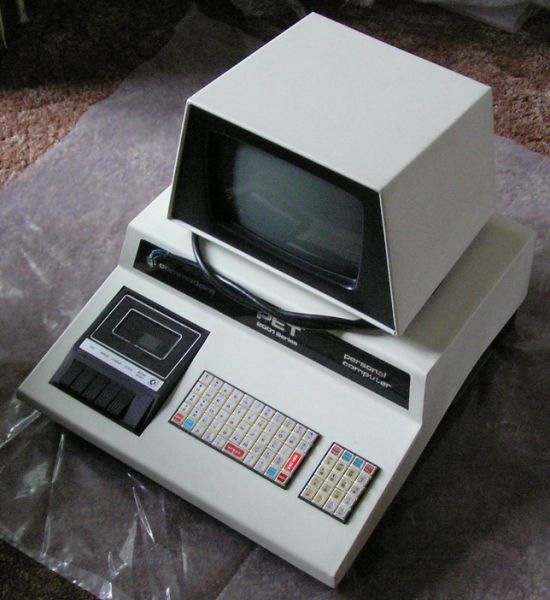
Anyway, these pictures show the cleaned and assembled machine. For now I will leave it as it is.

| Back to my home page Email me |

|