Making a Backup of a DVD-9 Movie
with Nero 6 Ultra Edition
-Date added: 1/20/2004
Overview:
This guide will show an alteranative way to making a backup copy of your dvd movie (dvd-9, dual layered) using only DVD Decrypter and Nero 6 Ultra Edition.
NOTE: You must have a Nero 6 Ultra Edition licensed version for this guide!
Software:
-DVD Decrypter
-Nero 6 Ultra Edition w/NeroVision Express2 installed
Step 1. Ripping movie to harddrive using DVD Decrypter
The first thing we need to do is to copy the movie we want a backup of onto our harddrive so we can remove the macrovision and CSS encryption (if we do not do this, Nero 6 willl not let us edit or modify the movie or back it up).
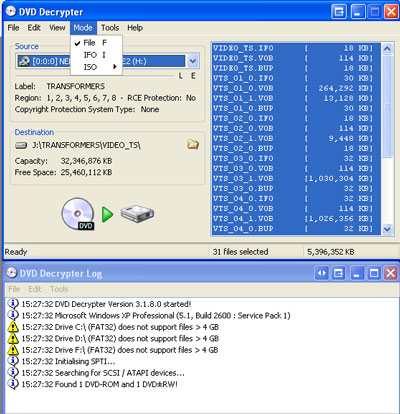
Pop in your movie, in my example I am using my Transformers Season 1 Vol 1 DVD (has multiple episodes) and open DVD Decrypter.
Make sure you have it set to Mode Set to File and make sure to Select All files (that way, you can keep your menus if you want to or not).
Then save it somewhere on your harddrive (in my example, i save my files to J:\TRANSFORMERS\VIDEO_TS\) and click the Rip button.
This will take about 10 minutes or so.
Step 2. Using Nero 6 Ultra Edition and Recoding the movie to fit onto a Blank DVD (DVD-5, 4.7GB disc).
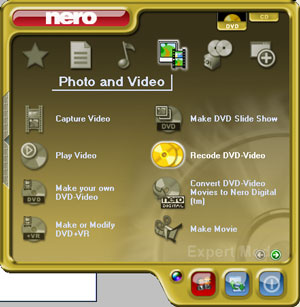
Open Nero StartSmart
Click the DVD tab on the upper right, then go to Photo and Video button, then choose Recode DVD-Video
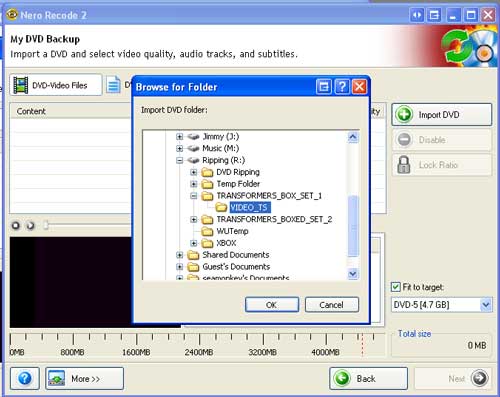
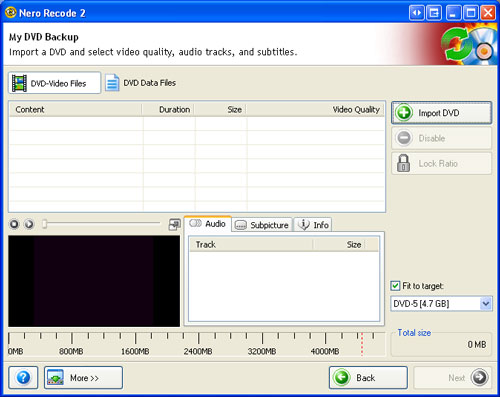
A Nero Recode 2 window will open (see right pic).
Click the Import DVD button to import the dvd we just ripped.
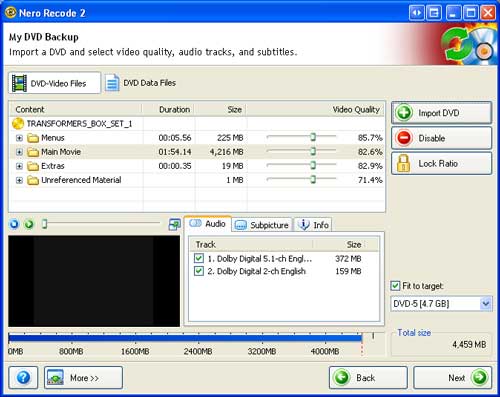
Now browse to the folder where we ripped our movie to (in my example, J:\TRANSFORMERS\VIDEO_TS\) and click OK.
Nero will bring up a box that says analyzing video, let Nero do its thing, it should only take a few minutes.
Once it finishes, it will bring you back to your Nero Recode 2 window but the movie we are backing up will now be there.
In the lower right, check the box that says Fit to target and choose DVD-5 (4.7GB).
Nero will now adjust the video quality sliders so it fits onto a blank dvd, if not, you might have to disable menus or extras.
Once you get the movie to fit, click Next
Nero Recode 2 will now let you choose to either:
1. Burn the movie to a blank DVD
2. Create the movie files for later burning
or
3. (if you have nero image drive installed), you can create an Image of the movie for later burning
Once you make your choice, click the good ole Burn button
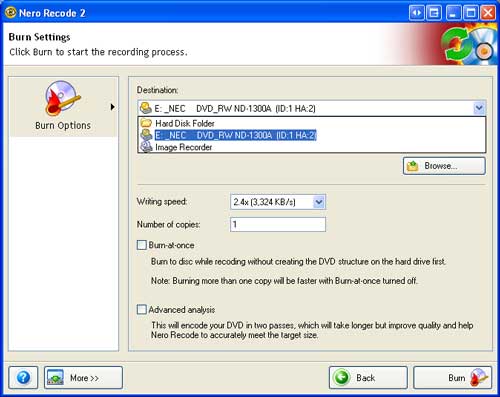
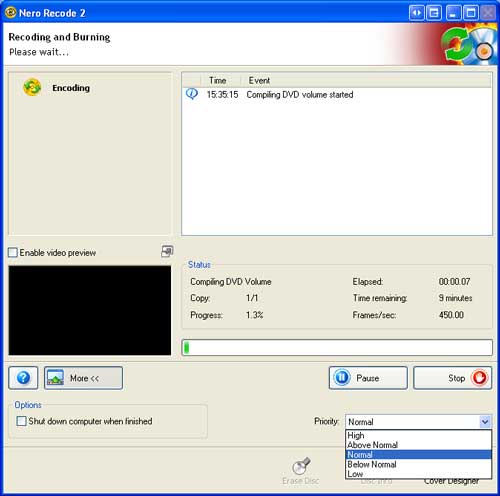
Finally, the burning dialog window.
You can adjust the priority of the encoding by clicking the More button and changing the priority option. The higher the priority the more processing power nero will use to encode. So higher priority will encode it faster, but won't let you really use your computer for anything else.
So there it is, my first Nero 6 guide.
Enjoy, comments/questions find me at www.afterdawn.com
user: seamonkey
Peace