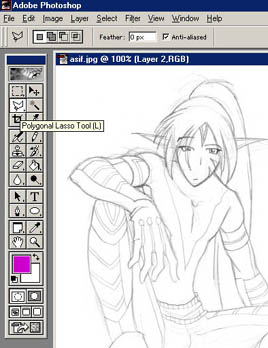
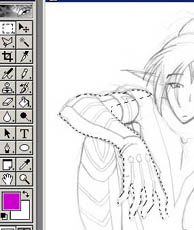
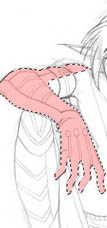
Next, select the Polygonal lasso tool (NOT the freehand select tool or the magnetic select tool)and select the part of the character's body closest to the 'camera'. In this case, it was the character's arm and hand. Stick closely to the line. To use the Polygonal lasso, you click on your first point, then a straight line follows your mouse to the next point you click on. Keep following the outline clicking points until you've selected the entire area. To finish the selection, you have to return to the original point you chose. A small circle will appear next to the crosshairs. If two body parts overlap, each should be selected seperately so that you can see the different shapes when you outline it later. Notice in the image that the forearm and the upper arm overlap, so I left the upper arm for later. If at anytime you mess up, DO NOT press the undo key. Finish selecting whatever you wanted to select, then you can add to the selected area by holding the Shift key and selecting or subtract from the selected area by holding the Alt key and selecting. If you press undo, it will deselect the ENTIRE thing and you'll have to start over completely.
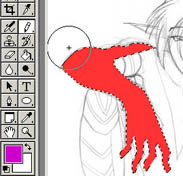
Now, switch to the paintbrush. Chose a nice big brush (but not so big that it covers the entire screen and takes forever to load) and run it over the area you selected. Make sure that you're on a layer different from the original image! If you did the selecting right, you can scribble all you want and no paint will go out of the selected area. Color the whole area one color that is not black and couldn't easily be mistaken for tan. Bright colors like green, blue, and pink work well, but don't make it so bright that it hurts your eyes. You will be looking at it for a while.
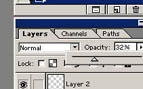
Go to the layers menu and click the box that says "lock transparency" it will look like a checkerboard. Then go to the button that says "opacity" click it and move the slider down so that the image is dark enough that you can tell the color is there, but light enough that you can easily see the lines underneath.
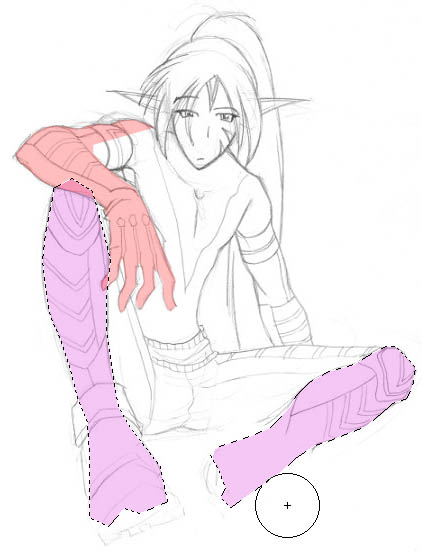
Now create a new layer and in the layers box drag it so that it's underneath the first layer. Now repeat this procedure for the area of the body the next closest to the camera. Remember, if they overlap, they should be on two seperate layers in two seperate colors. Repeat all the above steps until the next selection is selected, colored, and translucent. In the image below, I did the lower legs next. Notice how the feet weren't finished by the artist. I had to guess the outline here.
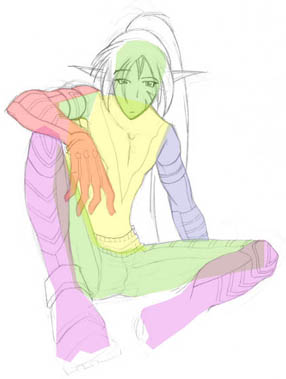
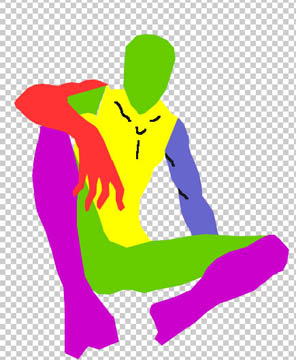
Continue the process of making new layers, selecting, and coloring until you've done the entire body with each overlapping limb in a different color (I know this is annoying, but it will make your job SO much easier later on. Trust me.) When you're done, it should look something like this:
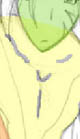
Now take either black or some other color that you haven't used yet and draw on each layer any lines that are on the inside, such as a collar bone, or muscle definition. It's ok if the lines are a little shaky. They're going to be shrunk down so much it most likely won't matter anyway. It's usually a good idea to use a brush that looks the right size for the job, usually the 4-pixel one. The 1-pixel one most people (including me) use for drawing their dolls won't work here because it'll shrink down so small you won't be able to see it.
Remember when you turned down the opacity of all your layers? Turn 'em back up again ^_^ All the way to 100. If you put the layers in the right order, the layers you did first should be on top, and the layers you did last, the ones furthest back, should be on the bottom. There shouldn't be any overlap of the lower layers onto the upper ones. If there's any problems, fiddle with the layer order until you get it right. Once you're confident it looks good, delete the background layer, the one with the original picture on it. Save this as a NEW FILE. SEPERATE from the original picture file. You might want to save that one for future reference.
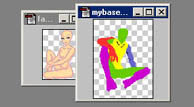
Now you need to take the muticolor person you just made and open up another base, either of your own or by someone else, that is around the size you'd like yours to be. They should either be of similar stature or in a similar pose (if you can get both, great!) I managed to find a base by Veriria that was in a similar pose. Since her pose was female and mine was male, I needed to adjust accordingly. Guys are usually a bit taller than girls. I figured in that since Veriria's girl was sitting up straight and my guy was slouching, they should be about the same height. I zoomed out until it was the size I wanted.
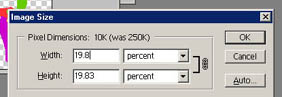
Now, look at the magnification in the top of the window that says how much you zoomed out. Mine said that the image was 19.8% of the original size.
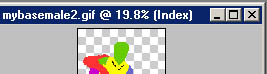
Now, go up to the Toolbar and select Image-->Image Size... Then input the percent you got from resizing the image, in my case 19.8%
Now for the annoying part! Here's where you do the actual outlining! Simply go around the outside of the image, making sure that there's no sharp corners. You might want to redraw some things. The head and feet on mine looked pretty bad. All pixels should touch eachother on ONE vertical or ONE horizontal, and other connections should be diagonal.
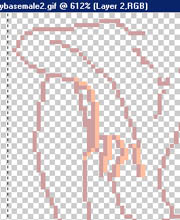
Now, I'm guessing you're wondering "Why don't you just outline on the picture directly?" The whole reason for selecting and coloring everything is that it maintains the shape of the image better when you shrink it. If you trace large images in one-pixel lines, it gets quite shaky. If you shrink it down, then trace it, it's quite difficult to interpret, especially with clothed models and photographs. When you select things all in one bright color and shrink them down, it maintains its shape better when you shrink it, resulting in prettier bases. Sure it's more time consuming, but it works quite nicely and prevents 'lumpy' bases. Once you've outlined it, you can shade it however you like, either with the airbrush and blend tools, or pixel by pixel, like I like to do. Enjoy your doll!