Here's how to do it:
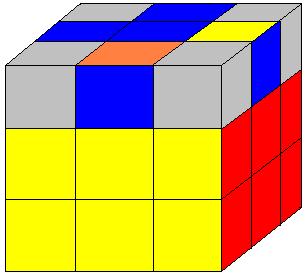
1) Choose a side that you will use as a referance point through out this whole step (this will be the side that you look at - notice that you are still holding the cube upside - down), I chose yellow - figure 1. IN THIS STEP IT IS VERY IMPORTANT TO ALWAYS LOOK AT THE SAME SIDE OF THE CUBE!
2) Locate one of the sides that has to be flipped (in figure 1 the yellow side or the orange side) and rotate the top so that this piece is now in the top - right position as in figure 2 - (the yellow-blue piece).
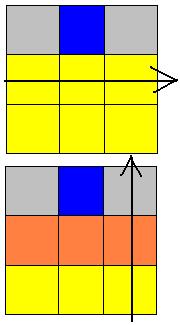
3) Now, while looking at the side that you chose in part 1, (I chose the yellow side) do the following step 4 times. - figure 3
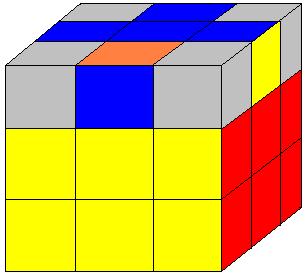
After doing that step 4 times the cube
in figure 2, will now look like the cube in figure 4.
- Explanation of figurre 3:
this figure has two steps:
1) rotate the middle to the right.
2)rotate the right side clockwise.
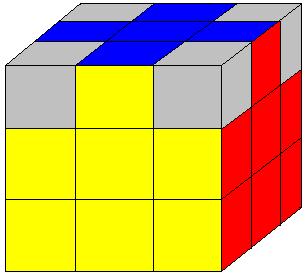
4) Now, still looking at the cube from the same side rotate the top so that the next piece that has to be flipped (in this case the orange piece) is in the top-right position(same as part 2) and do part 3 again. - figure 5
5) Keep on doing parts 2 and 3 untill all of the top-middle sides (they're really the bottom-middle sides) are in the right orientations.
6) Rotate the top so that all of the top-middle pieces are also in the right positions. - figure 6