A few of you have asked me for help with problems you've been having with player pictures so I decided to put together this tutorial to help you all out. To begin with, Links only supports 2 types of files as player pictures, Bitmaps (BMP) and JPEG File Interchange Format (JPG). Those of you that have pictures in other formats have to convert them into one of the above two formats. There are many shareware programs out there that can help you with this process. I'm an old-timer and kinda stick to using stuff that worked for me years ago so I like to use LView. You can get it at http://www.lview.com. It is shareware but I'm sure you can find some other freeware programs to use as well.
When deciding on what format to use or convert your pictures to, consider the following:
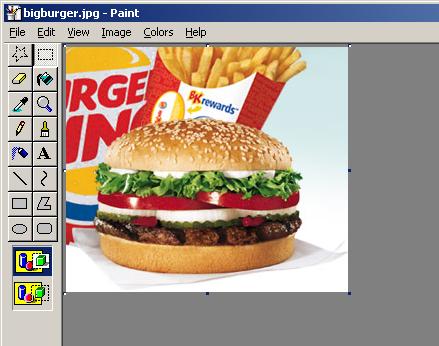
There are many ways to import, crop and resize a picture and hundreds of programs to do it in but I'll stick to using as many standard windows tools as possible so to begin with, open up your picture using Windows Paint (usually in Start->Programs->Accesories->Paint). As you can see I've loaded my "large" picture here
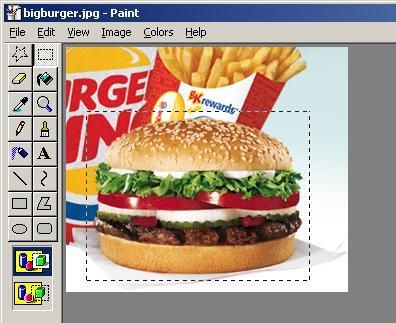
Next I need to "Select" the portion of the large picture that I
want to crop out. I do this by making the "Select" tool active by
clicking on the ![]() icon in the tool bar on the left. Next I click and drag the mouse to form a
square selection region around the part of the picture I want to crop like so:
icon in the tool bar on the left. Next I click and drag the mouse to form a
square selection region around the part of the picture I want to crop like so:
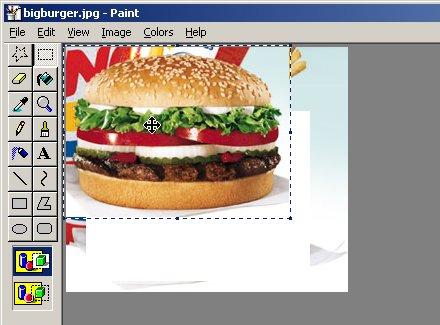
Now click in the middle of the selected portion and drag it to the upper left corner of the large picture like this:
Next, adjust the right and bottom edges of the picture to be just big enough to frame the cropped portion that we moved like so:
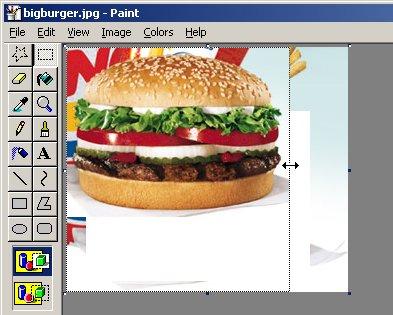
and
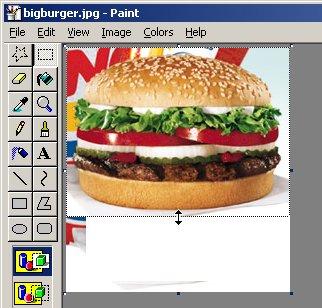
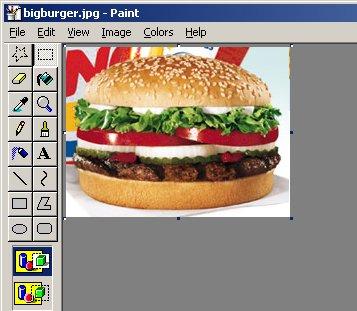
The picture should now look like this:
Now that we have the cropped part of the picture that we want to use as our Links player picture, we need to get it down to the proper size. Unfortunately Windows Paint isn't the best program to use for the job but ultimately, it get the job done. Click on the Image menu and click the Stretch/Scew menu item. Enter values in the Horizontal and Vertical Stretch values to grow or shrink the respective dimension.
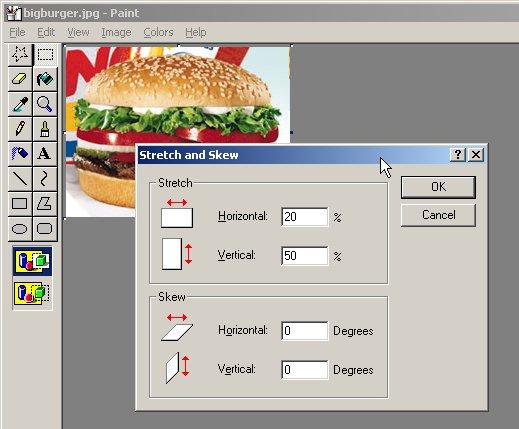
After each adjustment, Click on the Image menu item and then the Attributes option. You should see the following dialog box:

You ideally want to have the picture be 50 pixels wide by 60 pixel high. Repeat the Horizontal and Vertical Stretch until you get a picture with these dimensions or at least close to them but never greater than 64x64 pixels.
Once you get the desired dimensions, you need to save the picture in the Players folder of the Links directory. Click on the File menu item and then Save As. Browse to the path where you installed Links, usually in c:\Program Files\Microsoft Games\Links 2001, and look for the Players folder there. Save the picture in there. It should look something like this:
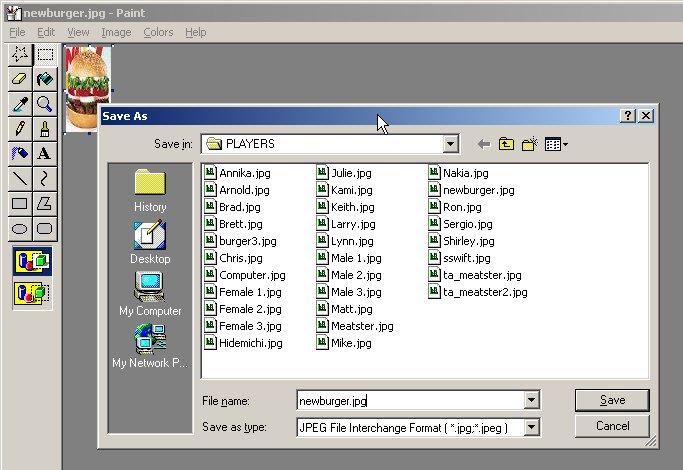
It's up to you whether you save the picture out as a Bitmap or JPEG but in my experience, I've found that the JPEG format is less troublesome.
The final step is to assign the picture to the player of your choice in the Links program. Launch Links and go to the Players screen. Select the player that u want to assign the new picture to and click on the Appearance tab. Click on the combobox that has the pictures listed in it and select the new picture.
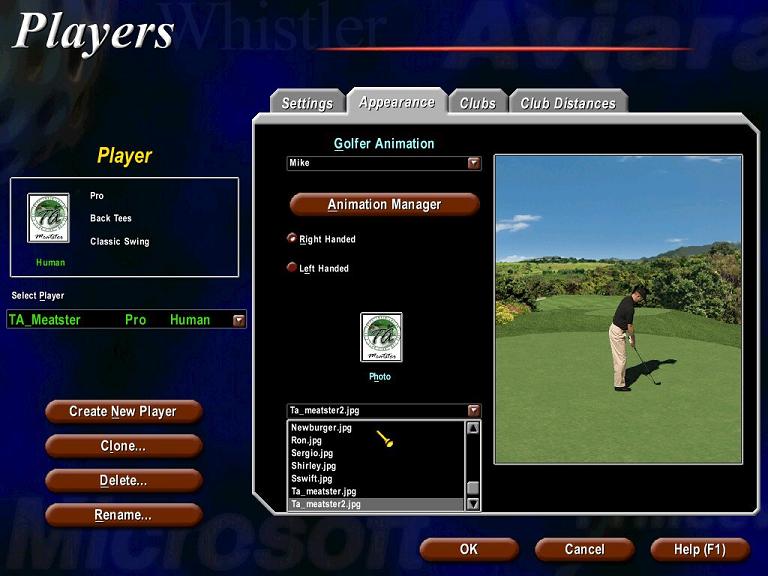
Once you select the new picture, you should see it displayed in the small photo above the combobox:
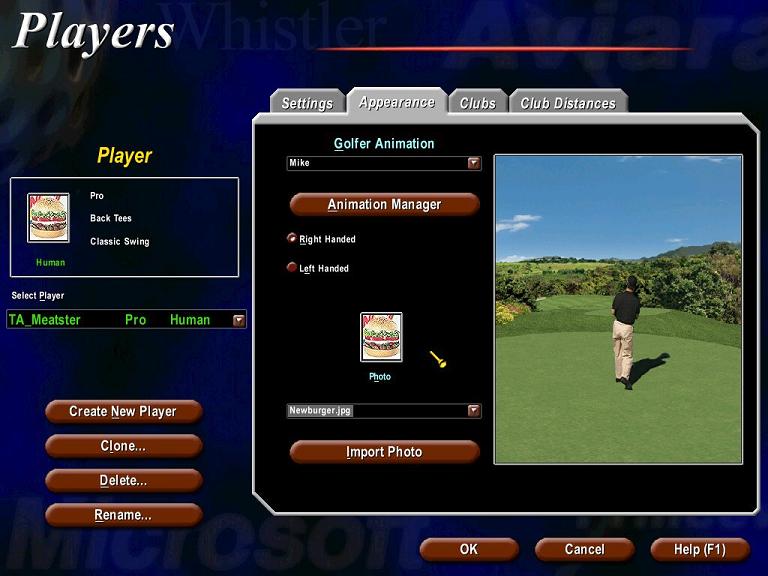
Finally click on the OK button and that's it. I know a lot of you will point out that it can be done easier, in far fewer steps using a different graphics editor than Windows Paint but not everyone has other programs and some are reluctant to install them. The purpose of this tutorial was to show people a way that works for everybody using the most common programs that we all have. A number of steps can be saved by using programs such as LView or PaintShop Pro or any other programs that have a one-step Crop option and a one step Resize option that can resize an image to a specific width and height. I recommend you use these if you are familiar with them, otherwise the above steps will work.
If you notice, I completely left out the Import Photo button in the Players screen in Links. While this is useful if you have the image in the proper dimensions and all you want to do is assign it to a player, most time you will be editing the picture first and will end up doing a Save As anyways so you might as well just save it in the Links Players folder anyway and save a step.