BAM making with BAMWorkshop v1007
By: Death
Basic Usage - Advanced Usage
**Note: The color palettes might/will be messed up on BAMWorkshop, but you can edit the pallette by going up to Edit, Edit Palette.**
Introduction
First things first, we must define what a BAM is.
A BAM is a speacial image file that was created by Black Isle. It's a file
format for store bitmap graphics that can be formed into smooth running
animations using specific sequences of images. BAMs are used through out the
game, they are your inventory pictures, your item description images, spell
icons, avatars, spell animations, and some of your ground images.
Step One....Decide what you are going to
make/draw. The best thing is something that isn't very complicated, as when it
is the proper size you won't be able to see the details well.
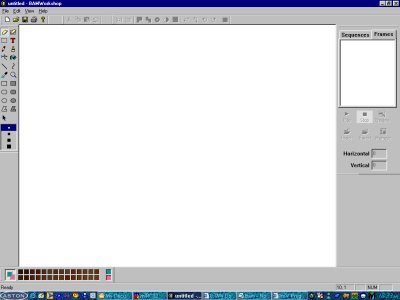
Step Two....Open BAMW, click the little icon that looks like a blank piece of paper. Go up to Edit, Sequence, Add Sequence(or ctrl-A), then Edit, Frame, Create New Frame. The new frame will start out as the "pink" transparency color. You will have the Pencil tool by default, it has the "green" transparency on the left button(righthand mouse setup is assumed) and the "pink"(doesn't work right) on the right button. Black is the pallette entry on the upper left. Draw/outline what you are going to make with black. After that you can start to add you basic item colors.
Step Three....Add your details, minor colors, shadows, etc. Once that is done, go over to the left hand side and click the Paint Can tool, and then select the "green" transparency color, pour the paint out along the outside of your BAM, this way that area will be clear in the game(for Description BAMs, use Black or Brown for the picture, filled and sorrounded with the "green" transparency).
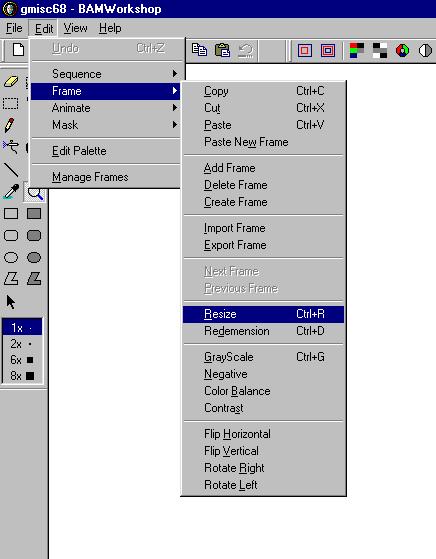
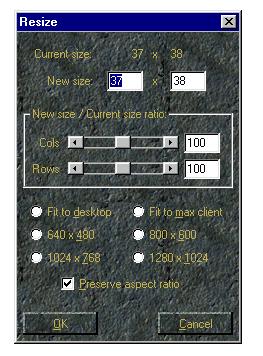
Step Four....Resize your BAMs and set coordinate offset. Go up to
Edit, Frame, Resize. This will bring up a pop-up menu with your resize options.
Ground BAMs should be 40x40 or smaller, Description BAMs 200x200 pixels, Item/Inventory BAM Sequence 0, Frame 0 should be 64x64, and Sequence 1, Frame 1 should be 32x32 pixels, and Spell Icon BAMs(for Spellbook, Cleric Spell scroll, and Innate ability icons) should be 32x32.
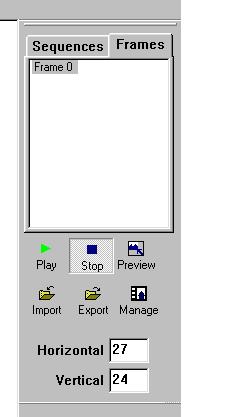
Step Five....Go all the way to the upper right hand side of the screen and click Frames. If this is a ground BAM then put in for Horizontal 27, and for Vertical 24. If this is
for a Description BAM then put in for Horizontal 80, and for Vertical put in
112. If this is for an Inventory BAM then leave this blank.
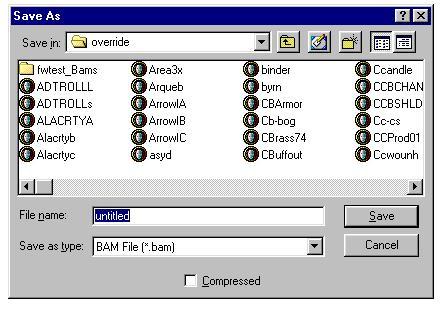
Step Six....Save you work, go up to File, Save As. Choose your save
location (should choose your Override folder), name the BAM (something that
is different from others so you won't get confused, see the TeamBG Prefix thread
for more info) and click Save. BAMs can only have up to 8 characters (Note: the Compressed checkbox will make it a compressed BAM, which takes up less space, BUT can only be used in IWD or BG2).
 *Note: the Compressed box will make compressed BAMs that can only be used with Icewind Dale and
Baldur's Gate II: the Shadows of Amm*
Multiple Frames and Sequences
Step One....Once you
have your first Frame made the rest should be easier(not really). Go over to
where it says Frames and click it so that you are viewing the Frames page. Right
click anywhere in that white area and select your Frame option.
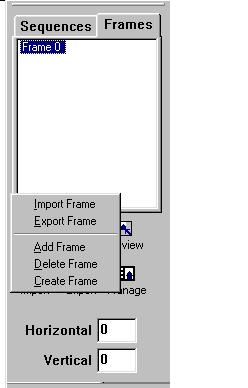
If you are working
from premade images you can use the standard Import button , edit the new frames
and be set to go. You can easily create entire sequences of frames by Importing
an animated .GIF or other acceptable animated file. If the Sequences menu is being viewed(default) then the Imported image will be a new Sequence, if the Frames menu is being viewed(you can see the boxes for XPos and YPos) then the image will be a new frame in the same sequence.
Step Two....Create your image in the new frame.(see Basic Usage for
details)
Step Three....Add your transparency to each Frame.
Play, Stop, Preview, and other buttons
Play....This button will play your entire sequence of Frames in the editing area, good if you want to see what you have made so far, bad if you want to see what it will look
like in-game.
Stop....Pretty self explanitory, it stops the sequence from playing.
Preview....This button brings up a sample game screen and plays you sequence on it. This is good for seeing what the final BAM will look like in-game. The size of the BAM will not be in proportion to the background.
Import....With this button you can Import or open other image file types including .GIF, animated .GIF, .AVI, and .BAM. These Imported files will be added as new Frames. If the Sequences menu is being viewed(default) then the Imported image will be a new Sequence, if the Frames menu is being viewed(you can see the boxes for XPos and YPos) then the image will be a new frame in the same sequence.
Export....Allows you to Export you images to a different file format, if you are looking at a BAM you can export the curret frame as say a .GIF, or a few other file
formats.
Manage....View all your frames at once, they will be next to each other, you can also delete frames from this window.
My Advice: Make your image in another program, like Paint Shop Pro, save it as a .GIF file, then Import the .GIF with BAMW. Add your transparency and do some final image tweaking. Save As, and save it as a BAM.