| Wood Deck Plans |
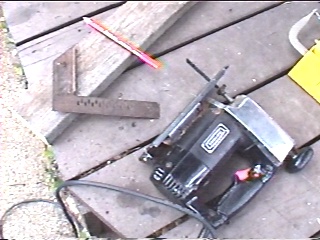 |
| Step 1 Materials needed for mold: - 2X4 block of wood - Pencil - Jigsaw - Carpenter's Square |
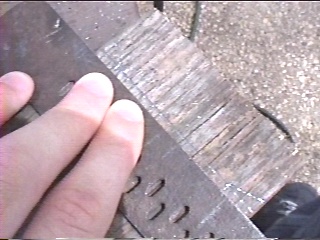 |
| Step 2 Draw the shape of the side view of a fingerboard about an inch down from the top of the 2X4 (make sure it's square). Go down another inch from where you drew the fingerboard and draw a straight line using the square. |
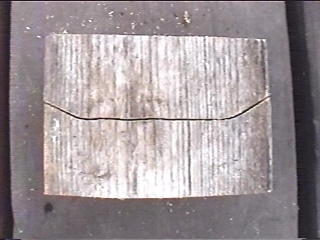
| Step 3 This should be what the mold looks like after you've cut everything out . . . the two pieces are against each other, but believe me, they really are two pieces . . . . . seriously. |
 |
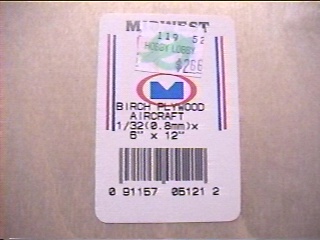 |
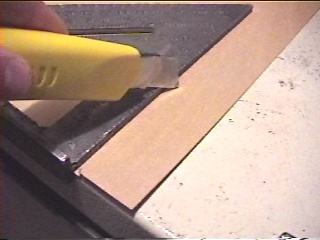
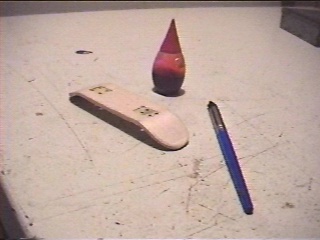
| Step 4 Go get yourself some aircraft plywood from your most favoritest hobby store, I got a 3 ply 1/32" sheet that was 10" X 12" Next, use a utility knife or razor blade to score it about an inch in from the outer edge (or more if you want a wider deck, up to you). Run it across the surface several times until you cut through it. |
 |
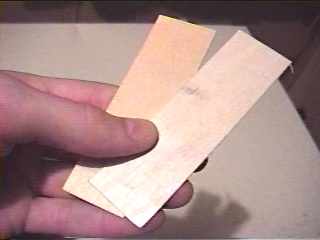
| Step 5 Now you should have a 12" long X 1" wide piece of plywood. Cut 4" sections from that piece so that you have 3 sheets of 4" X 1" of plywood . . . use two of these for the fingerboard (6 ply fingerboard). Use a Tech Deck Baseplate to trace a rectangle where the trucks will go so that the deck will not be too thick for screws. Score it several times until the square breaks out until you now have a countersunk bottom layer (see step 9 . . .) |
 |
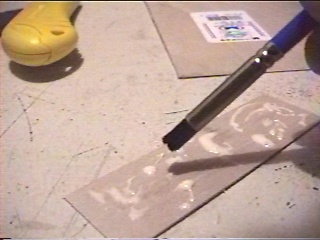 |
| Step 6 Next, you will spread a decent layer of wood glue across the surface of one of the decks. You can use a paint brush, but using your finger is easier (be sure you have a wet towel nearby, dried wood glue isn't fun and smells not so good) |
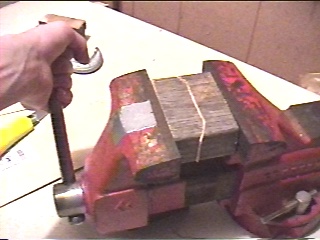 |
| Step 7 Position the two pieces directly over each other then lay them between the two mold pieces. Use a bench vise, a C clamp, a squeeze grip clamp, or anything else that will press the two layers together so that they conform perfectly to the mold without any gaps so that you get good shape, good concave, and so it dries stiff. |
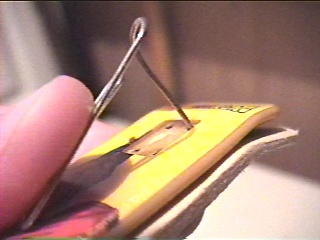 |
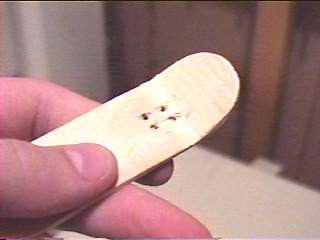
| Step 8 After allowing at least 2 hours to dry, remove the deck from the press. Use a jigsaw to roughly round of the corners, and fine tune the round using a belt sander or even just a sheet of sandpaper by itself. Place a Tech Deck on top of the tech and use a paperclip (or better yet, a pushpin or thumbtack) to mark the truck holes. Use a 1/16" drill bit to create the holes. |
 |
 |
 |
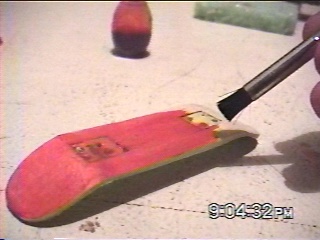 |
| Step 9 Wet the bristles of a paintbrush, place ONE drop of food coloring directly on the brush bristles, then brush on the color. You can also either use a stencil or silk screen after this to paint on some graphics, or you can do the classic print n' stick method of sticker paper graphics . . . |
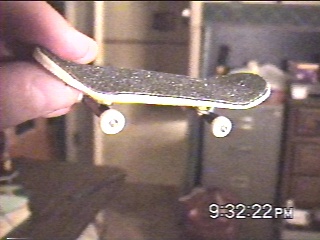
| Step 10 Slap some Tech Deck trucks and skateboard griptape on the deck and you are ready to go! . . . . . so git! GO ON, GIT!!!!!!!!! |
| DISCLAIMER: By reading these plans, the person(s) viewing this site assume full responsibility for any injuries resulting from not taking necessary safety measures such as using safety goggles, respecting the danger of power tools, and everything else that goes along with constructing these ramps, obstacles, and every other item on this site. |