 |
| Grind Rail Plans |
|
 |
 |
| Step 1 Cut these pieces out. The rail I am building is 1/2" X 2" X 22" The legs are 1" X 1" X 3" The feet are 1/2" X 1 1/2" X 6" |
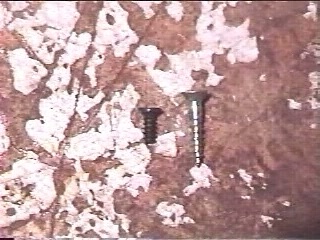
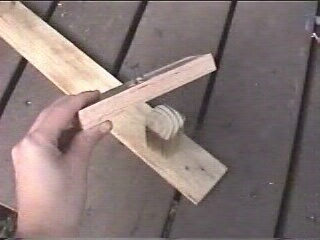
| Step 2 Pre-drill 2 holes through the rail into the each of the legs. Make sure the legs are centered underneath the rail. After pre-drilling, screw the two pieces together with 1" screws. |
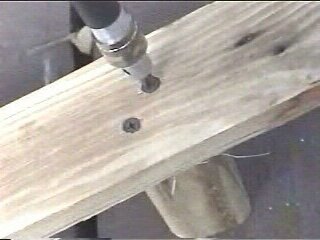
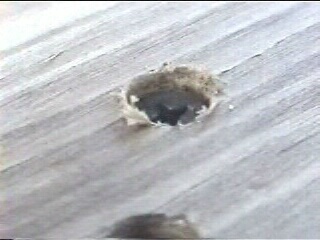
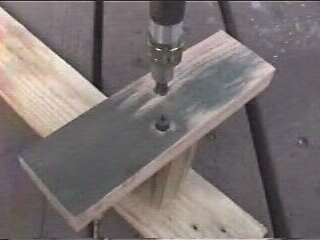
| Step 3 If you want to give the rail a cleaner look, be sure to countersink the pre-drilled holes so the screw head sits below the surface. You will later apply wood putty or glue wood plugs in the holes. |
 |
 |
 |
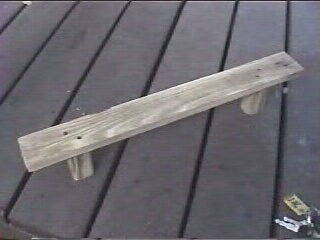
| Step 4 The rail should look like this after both of the legs have been attached. Be sure the bottom part of the legs are square and don't rock back and forth. |
| Step 5 Pre-drill holes through the feet into each of the legs. What I like to do (to ensure accuracy) is drill holes through the feet first, fasten a screw into it so it pokes out the other side, then place it on the leg and tap it down with a hammer. This will mark where you need to drill into the legs so the screws go in perfectly |
| Step 6 Fasten each of the feet to the legs with 1" screws and be sure the rail doesn't rock back and forth. If it does, you will need to take off the feet and sand down the leg so it is level (nice and flat). |
 |
| Final After everything is screwed together, your rail should look like this. Bust out the handboard and drink some milk since you accomplished a fantastic feat. |