 |
|
|
|
|
|
|
|
|
|
|
|
|
|
|
|
|
|
|
|
|
|
|
|
|
|
|
|
|
|
|
|
|
|
| HowTo : Images from Video |
|
|
|
|
|
| Introduction |
|
|
| This note describes the steps required to extract snap-shots from a video. |
|
|
| Method |
|
|
|
One-time configuration : Configure video software. This step required for Windows Media Player (other players seem OK) |
|
|
|
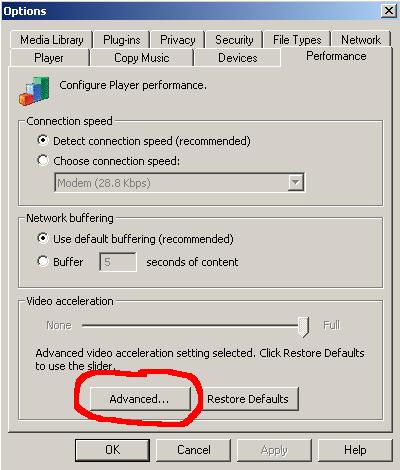
1. Start up Windows Media Player.
2. Click on Tools -> Options . Then, select the Performance tab. You should see the following |
|
|
|
 |
|
|
|
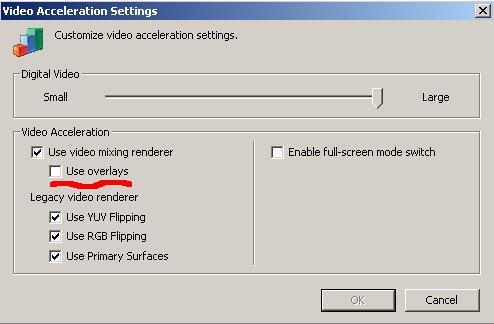
3. Click on Advanced. You should see the following |
|
|
|
 |
|
|
|
4. Ensure that the Use overlays checkbox is unchecked, as shown above.
5. Once that's done, click on OK (repeatedly) to exit. That's it for the one-time setup. |
|
|
|
Getting the Image : Get the image and save it to a JPG file using your favorite image-viewing software. JPG provides an excellent quality image using very little space. Also, saving it to a file is important because when images are 'inserted' into documents rather than pasted in, the resulting document is remarkably smaller in size. Paint (under Accessories in Windows) will be used for the following example. |
|
|
|
CTRL-Print Screen : 'Pause' the video at the spot you want. Keeping the CTRL key depressed, press Print Screen. [The Print Screen key is normally near the top right of the keyboard]. This will place the entire screen as you see it into the clipboard. |
|
|
|
Open Paint (within the Accessories menu) |
|
|
|
Paste the clipboard (CTRL-V or Edit - Paste or Right click - Paste). You should now see the entire screenshot within Paint. Use the scrollbars if necessary. |
|
|
|
Copy out the portion you want. From the entire screen image that you see, copy out a rectangle that best contains the image you want into the clipboard. Use the Select tool to create the rectangle to be copied, then copy it (CTRL-C or Edit -; Copy or Right click - copy). |
|
|
|
1. Clear the existing image by clicking on Edit-Clear Image |
|
|
|
2. Reduce the size of the 'viewing board' to something really small by 'selecting' the right hand bottom corner and dragging it
close to the top left corner |
|
|
|
3. Paste the clipboard (CTRL-V or Edit -Paste or Right click- Paste) |
|
|
|
4. Paint should return the following message "The image in the clipboard is larger than the bitmap. Would you like the bitmap
enlarged". Click on Yes. If it doesn't prompt you, you did not reduce the 'viewing board' enough. If you save this file, the 'viewing
board' will also be saved. |
|
|
|
5. You should now see your image, and nothing else beside it (not even white space). |
|
|
|
6.Save it as a jpg file. Paint's default is bmp (which creates a biggish file). Change the file type to jpg |
|