
Furdaggers Frame and Background
This tutorial was created by my playing in psp8, but can also be made in psp7, any
similarities to any other tutorial is purely coincidental. Feel free to
share this tutorial with a text link, but do not remove this tutorial and post
any where else. This tutorial is NOT to be scripted into a PSP8Script.
It is for learning purposes only. Thank you.
For this tutorial you will need:
- Jasc Paint Shop Pro, you can download a trial version here.
- The Daggers Done 8bf filter, which you can download here.
- Xero Plugin with the Artgrain Filter, download set twohere.
- This brush, I do not know where I got it from but I would love to credit the person who made it. You can get it here.
- A graphic of your choice, I have used this beautiful art by Josephine Wall,
you can visit her site here.
Now let's get started and make our background pattern first, as we will use
it as a fill pattern in our frame.
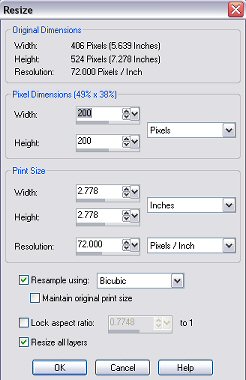
- Open your image you wish to frame, Shift+D to make a duplicate and
minimize the original. Resize your image to 200 x 200 pixels using these
settings.
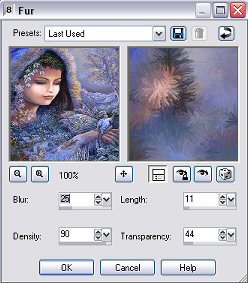
- Go to Effects/Texture Effects/Fur and use these settings.
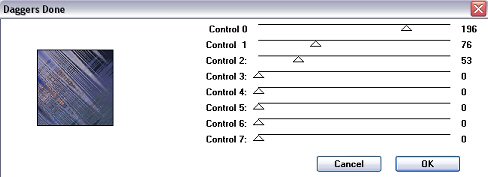
- Now go to Effects/Plugins/BKg Designer sf10 II-Daggers Done and apply
these settings.
- Go to Effects/Image Effects/Seamless Tiling and apply this setting.
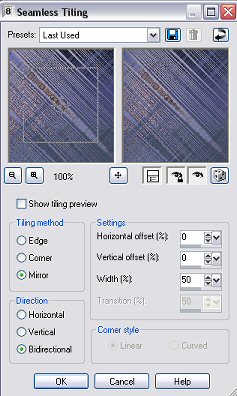
- Now you have completed your background and it should look like this.

Save and keep minimized in your workspace.
Now let's make our Frame!
- Shift+D to duplicate your image and close original. Pic a colour from
your image,I have used #232354. Have your furdagger background pattern
you made earlier minimized in your workspace.
- Add a symmetrical border of 1 px.
- Selections/select all, selections modify/contract by 1px.
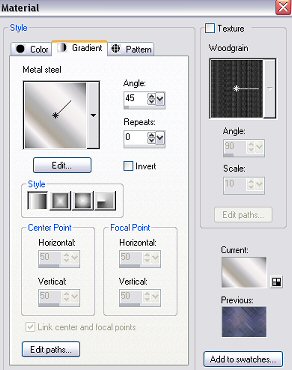
Selections/invert and floodfill with metal steel gradient, angle set at
45 degrees.See picture
- Selections/invert and go to effects/3d effects/cutout and apply a cutout
using these settings.
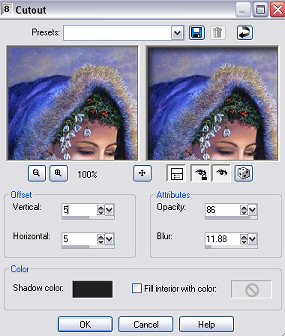
Then re-apply cutout but change your vertical and horizontal to -5.
Select/select none.
- Add a border of 1px, select all,selections modify, contract by 1px,
Selections/invert and floodfill with your colour. Deselect.
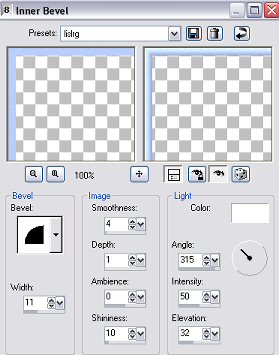
- Add a border of 1px and floodfill with metal steel gradient. Apply an inner
bevel using these settings.
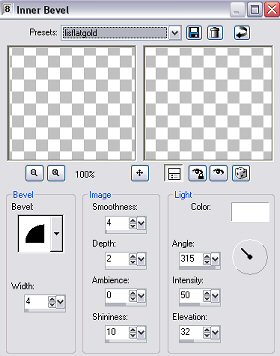
Save your bevel settings as flatgradient, as we will be alternating
between two bevels.
- Add a border of 5px. Floodfill with your colour.
- Add another 5px border and floodfill with metal steel gradient and apply
the same inner bevel as before.
- Add a 10px border and floodfill with your colour. Go to
effects/plugins/xero and apply the artgrain filter as shown.
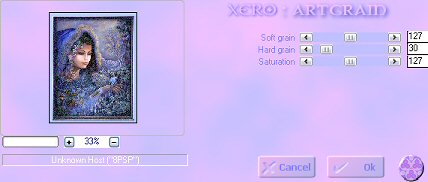
Do not deselect.
- Apply this inner bevel as shown and save as lrgbevel.
- Add a 3px border and floodfill with gradient. Then apply flatgradient
bevel.
- Add a border of 25px and floodfill with your furdaggers background pattern
with the angle set at 45 degrees and the scale set to 50.
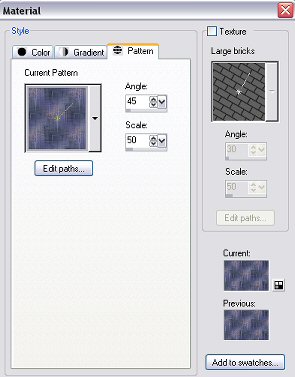
Apply an inner bevel using your lrgbevel setting from earlier.
- Add a 3px border and floodfill with gradient, then apply flatgradient inner
bevel.
- Add a 10px border and floodfill with your colour you had picked earlier.
Go to effects/plugins/xero and apply the artgrain filter using the same
settings as before. Then apply an inner bevel using the lrgbevel preset you
saved earlier.
- Add a border of 3px, and floodfill with gradient. Then apply the
flatgradient inner bevel.
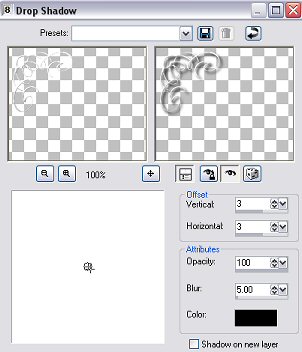
- Add a new raster layer and click on your paintbrush tool. In the drop down
box select ss-corners03 and adjust the size according to your graphic.

- Holding your hand very still, click on the paintbrush 4 to five times,
apply the flatgradient bevel and apply a drop show with this setting.
- It should look like this now.
- Duplicate this layer in your layer pallette and go to Image/mirror.
Duplicate this layer and go to Image/Flip. Then duplicate again and go
to Image/mirror.
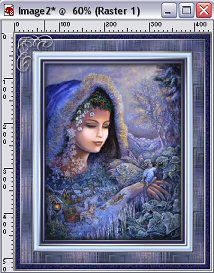
- Now you can go to Layers/merge/merge all flatten. Resize your image to
suit your needs. Now you are done! You now have a framed picture with
a matching background ready for a stationery :)


Web Design �Creations by Lis 2004
|