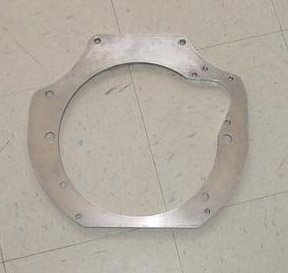
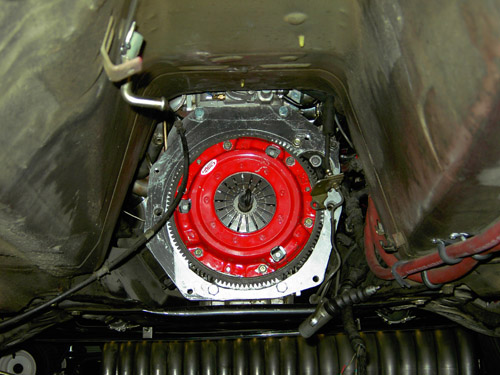
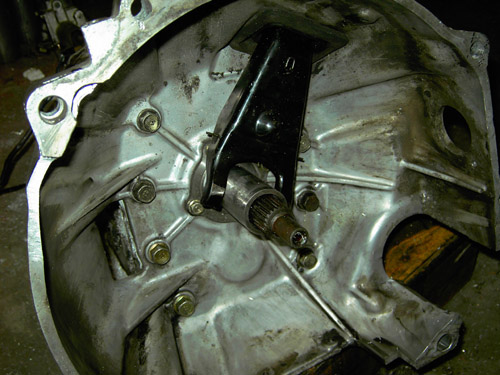
This pic, taken by Danny Godefer(sp?) is a finished adaptor, which was used to hold a TII tranny to Ric Stephans original purple drag car named "MiniMonster"
Unfortuanatly, life isnt easy for me while building this car. Miatas tend to grenade trannys and diffs when they get high HP. The common answer to this is either to *not* drag race your miata (hahahahahahahaha) or to replace trannys as they blow with cheap junkyard alternatives. (this isnt really an "answer")
I opted instead to take the road less traveled and install a driveline from a TII Rx7. To this date, I know of 4 people who have had this setup. Ric Stephens (www.racingmazda.com) Mark Kulak (www.turbomiata.net) and Skyler Shmitt (www.MXfab.com), all of which are cars that are capable of 10 second 1/4 passes or faster!(If you have a work in progress or have a running car with this setup, please email me! I'll put your name on here, and possibly add some of your conversion pics)
The TII driveline install is a complex one and I DEFINATLY dont recomend it to the beginer. In fact, I only reccomend it to the experienced fabricator, or anyone that is willing to spend ALOT of time and learn ALOT.(along with buy alot of new power tools!)
Here is what will be needed to do the TII swap to your miata along with approximate prices:
Your first major hurdle will be making your adaptor plate. This is probably the hardest, most time consuming, and most teeth grinding item in the entire setup. Its also one of the most important because if you dont get it "right" you have a chance of your starter not working correctly, or the plate not lining up right when you go to bolt that heavy tranny above your head.
This pic, taken by Danny Godefer(sp?) is a finished adaptor, which was used to hold a TII tranny to Ric Stephans original purple drag car named "MiniMonster" |
|
|
The way myself, Marc Kulak, and Skyler Shmitt(SP?) all did it was by using an extra engine block outside of the car and getting our templates from it. This makes the process ALOT easier to say the least. I cant imagine even thinking about using the engine in the car to make it. If you dont have one, I suggest you get one or pull the engine in the car to use as a template. (ick!)
What you will do is first purchase a 1/2 plate of aluminum. I got a 14 X 12 X 1/2 piece of 6061-T6 from a local metal place. You'll have to look up in your phone book to find someone that sells it. Good luck, it took me about an hour on the phone calling places. My plate cost me $109 to initially purchase.
You will have to find a way to get the BP bellhousing holes over to the 1/2 plate. The idea I had was to use the stock bellhousing gasket off of my motor. These gaskets arent 100% spot on, they have holes that are too large so that they can move slightly so expect to have your holes not line up "perfectly" when you go to try to bolt it up to your test motor you conveniently have sitting on its side in the shop. You want to get the starter holes as good as you can though, as if they are off alot in comparison to the bellhousing bolts I believe you will be asking for trouble from your starter... Please note that I HIGHLY reccomend you use a drill press to drill out these holes. Using a hand drill and "eyeing it" could end up with you buying ANOTHER $108 plate.
| This is a picture taken by Marc Kulak of his plate of aluminum already drilled where the holes needed to be, and marked off where it needed cut in the middle. He reportedly paid around $20 to have the middle plasma cut out. Click to see larger version. | 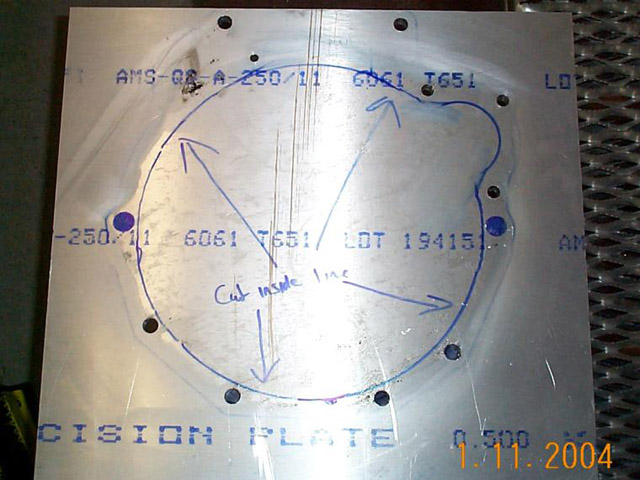
|
Next, you need to get a hole cut in your plate. I HIGHLY advise you pay someone to plasma cut it. Initially I was going to cut it with a jigsaw. Lets just say if you cheap out and try this route you'll probably be paying someone as well unless you are just one stubburn person :) (Notice Skyler @ mxfab.com did jigsaw his out, so it is possible!) I personally took my old BP tranny gasket and bolted it onto the plate with the holes I had in place and outlined the hole I needed cut in the center. There should be a half a circle on the outside for the starter as well.
| This is a picture taken by Marc Kulak of his plate of aluminum after it being plasma cut in the center. Notice the half a circle so that the starter has room to bolt onto the plate and contact the ring gear of the flywheel. | 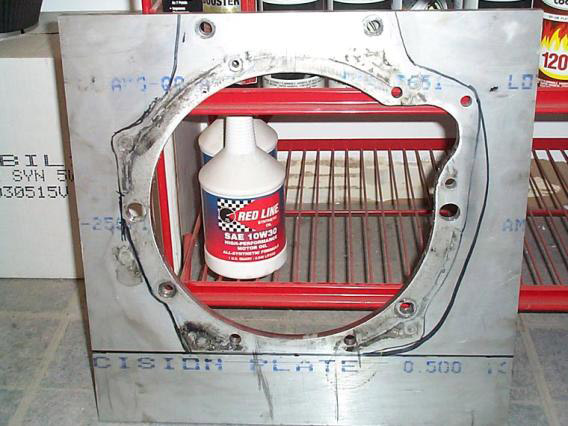
|
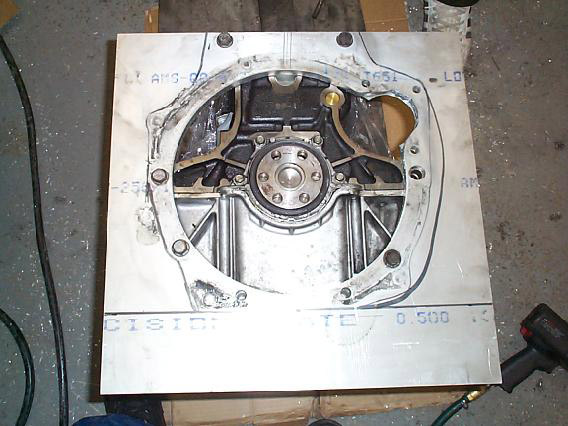
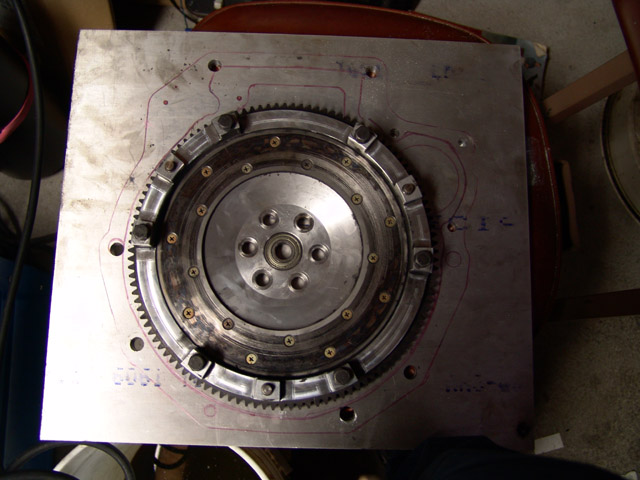
Now that you have a hole cut in your plate, you should be able to bolt it up to your "test" engine and then bolt your flywheel, clutch disk, and pressure plate over it. Woohoo, aint that pretty? Your halfway there. :)
Here are a couple pics of this process taken by Mr Kulak...
|

|
These pics show the plate bolted up to the test motor. |
| This pic shows the flywheel bolted onto the motor | 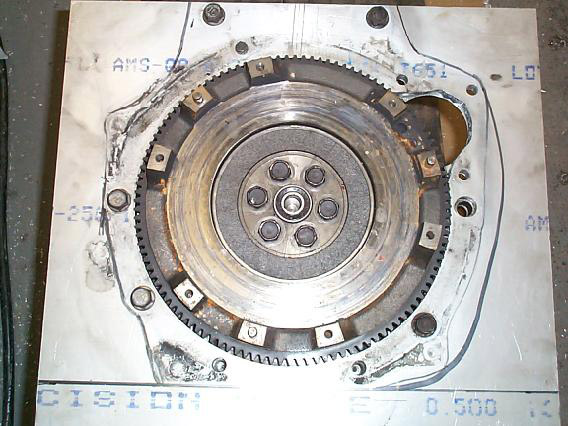 |
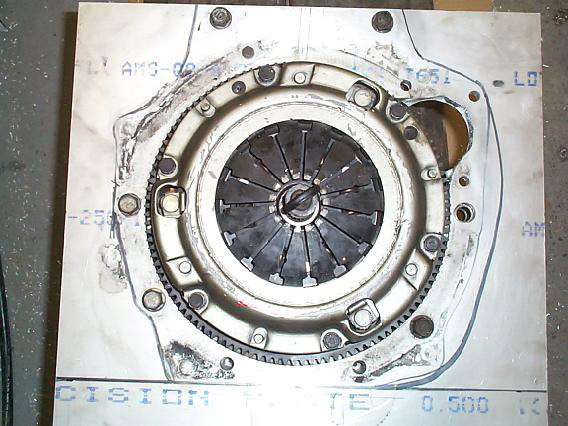
...and the clutch assembly bolted to the flywheel..
|
Next up is test fitting the TII Tranny onto your clutch disk/adaptor plate combo! What your going to do here is to sit the engine on its "face" with the front of the motor on the ground, and the clutch/flywheel side facing upwards. Now, with the plate and flywheel/clutch assembly on, you will be picking up the TII tranny and sticking the input shaft into the clutch assembly. I personally used 4 of the 5 bolts Kulak used on my adaptor plate. I used the top two, and the bottom two. The bottom right bolt there hits the bellhousing of the TII tranny. You will have to grind off a bit of the inside of the TII bellhousing to clearance this. I cant say about the middle left bolt since I didnt personally us it. Worse case scenario if you do use it, you'll just be grinding to fit it. If all is well the tranny will go flat with the plate. If it doesnt, you might try clamping on it lightly with some small clamps. For reference, I wasnt able to get mine flush without small clamps. Just make sure you arent clamping too hard and bending it to fit!
Here is a pic from Marc showing what I am talking about...
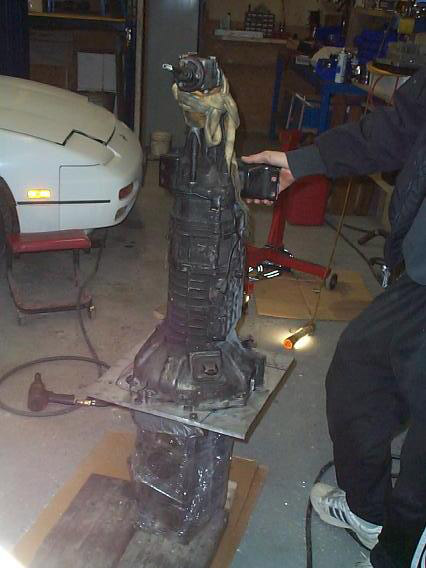
Once you have the tranny on there and sitting vertically next to you, you're going to want to position the shifter facing correctly. This is important because if you're off the shifter is going to sit weird when it makes it into your car! I referenced the block deck when I was lining mine up.
Now, if you have attempted to put your starter on just yet then you know it interfers with the TII bellhousing. Well....thats why you're going to have to do some cutting on the bellhousing to clearance this! Mark where you need to cut with a big black marker, pull the tranny, and go for it. Grind the edges smooth to avoid a potential stress area due to a sharp edge. Put the tranny back onto the motor/plate. Now that you have the tranny lined up correctly, take a big marker and outline the tranny on the aluminum plate.
| This is a picture was taken by Skyler where he cut his tranny to give you an idea. Click to see larger version. | 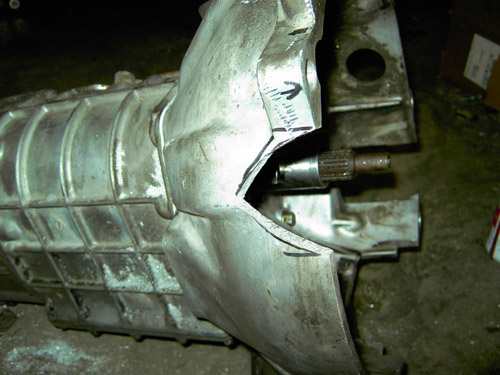
|
My next step was to pull the tranny and have my plate plasma cut on the marker marks. Cost to plasma cut this time was $30. Sorry...no pics for those of you following along at home. I do have a pic showing where Skyler bolted the finished plate into his car with the clutch to give you an idea though.
Now that the plate has been cut, its time to get down and dirty. Your next step will be reinstalling the tranny and deciding how your attaching the TII tranny to the plate. I figured in that only 4 bolts would be used in the end, I'm not exactly sure how many the "others" used. The stock TII tranny has 6 10mm bolts holding it to the TII motor in stock form. Cutting down to only 4 10mm bolts scared me somewhat given the immense abuse I intended to dish out to this tranny, and I REALLY like my legs in working order. There was plenty of "meat" around the holes on the TII bellhousing, so what I did was to drill out the holes to accept 12mm bolts. I then installed the TII tranny onto my test engine, and aligned it to my now cut plate. I clamped it down, and grabbed my trusty drillbit that matched the tap I had bought for 12mm bolts. Using the holes in the tranny as a way to keep myself in the right spot, and to stay vertical, I drilled the 4 holes out with a 1/2 hand drill (and whatever bit the 12mm tap required).
After drilling holes for the 4 bolts that are usable, I removed the TII tranny once again and pulled out my tap wrench. What fun this will be. These holes are MIGHTY important. If these are off much then all of your bolts wont thread in. They must be PERFECTLY straight up and down. NO ANGLES HERE. If you've never tapped a hole before I highly reccomend someone else do this for you. I used 12X1.75 as that was the easiest 12mm bolt to find locally. I believe the drill bit was 13/32, but I'd follow whatever the tap package says as thats what I did. Slowly I tapped the holes, and amazingly when I put the tranny back up there vertically, they were correct! VICTORY!!! :)
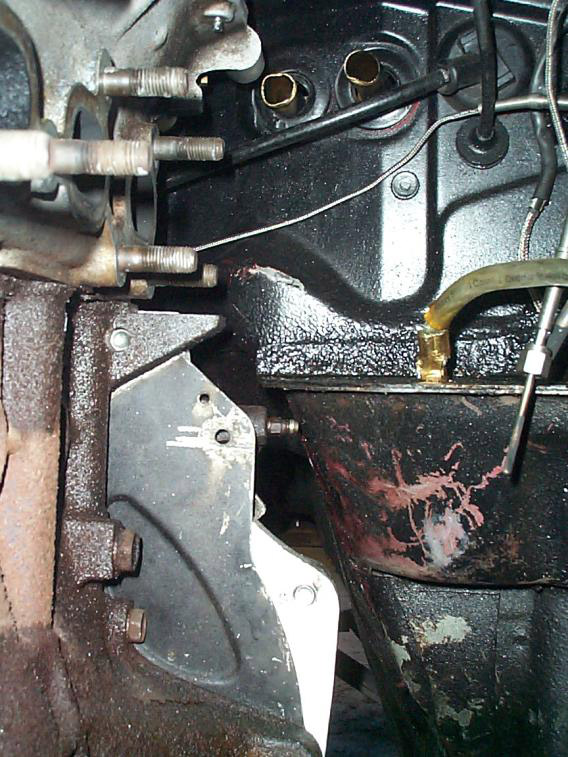
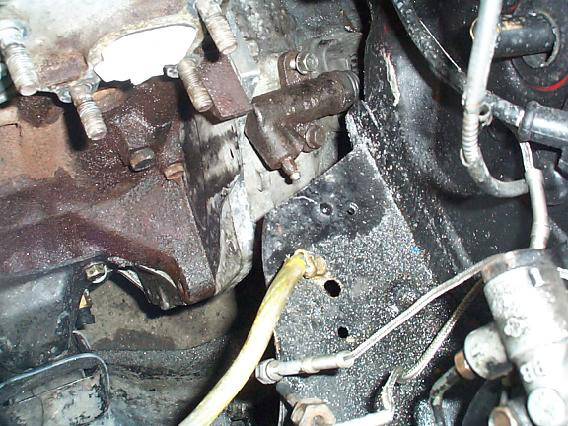
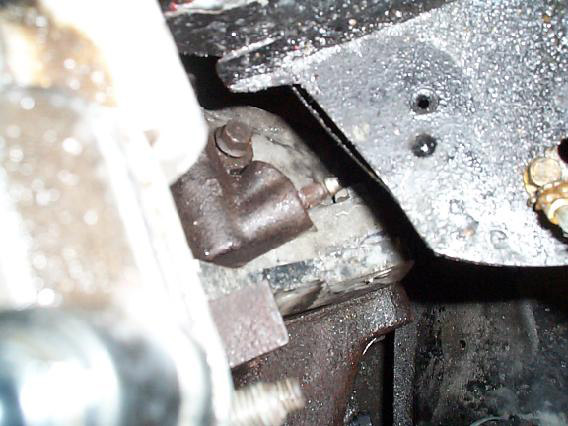
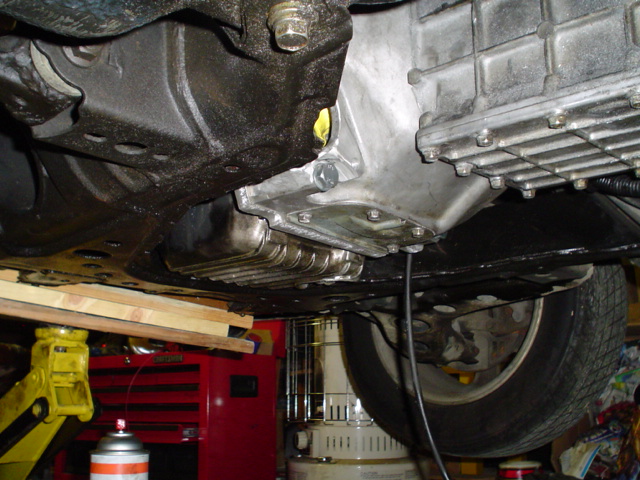
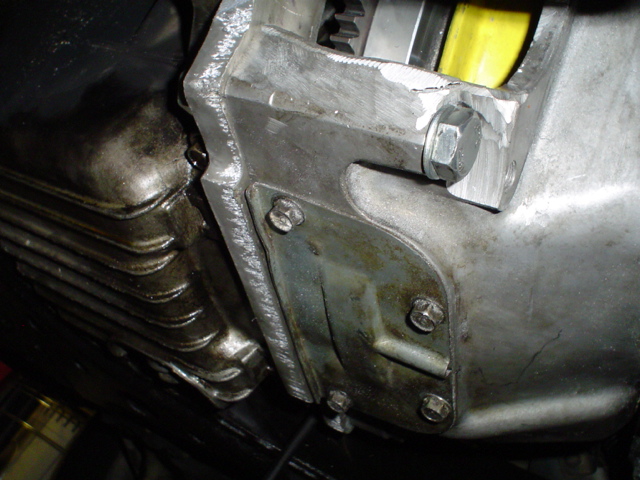
Next up, you'll notice on the drivers side of the TII tranny you have two holes. One is a starter hole, and the other is..well...I dont know per say. To clearance whatever downpipe you are using right now these will need some cutting too. Reference my picture down below for an example from my car, or check out these couple of pics from different peoples cars. I cut too much off as at this point in time I had installed the tranny enough and was tired of doing it. (this step came when the tranny was going into the car) You will need to do most of what I cut off though, just dont go so high towards the top of the tranny and so deep into the bellhousing. A cut like marc K's, or DannyG's will suffice.
|
||
|
|
|
|
||
You're ready to put the tranny in, but first you need to modify the pivot of the clutch fork. Take off the clutch fork, then screw out the pivot bolt, and find a way to make it sit 1/2 farther out when screwed in the hole all the way. I just got some threaded section of a bolt that was 1/2 longer and welded it to my bolt. This will be up to you on how you go about it...FWIW, Marc K modified a throw out bearing to sit 1/2 farther forward (towards motor) Myself and Skyler did the pivot mod. (thanks to skyler for coming up with the idea!) All seem to work thus far...I couldn't say how DannyG accomplished it.
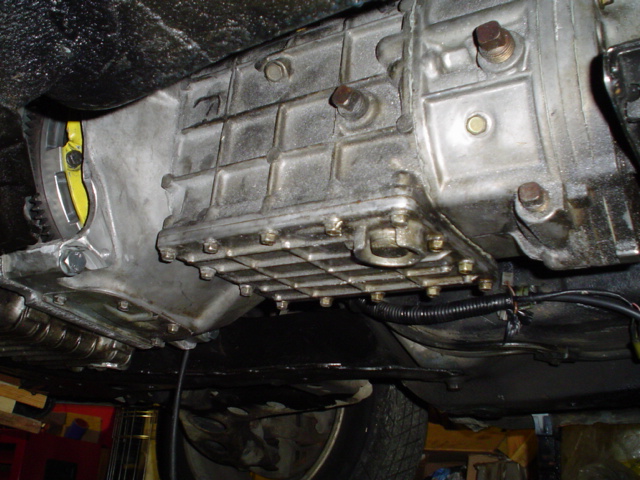
Now, install your TII tranny into your car. Put the stock BP bellhousing gasket between the plate and
the motor. If you dont, you wont have a place to mount your oil dipstick, and you will also be able to see the back of the
flywheel from the front of your car. Both probably aren't "good" things ;-)
Good luck here, because invariably there will be a reason you have to yank it back out! lol
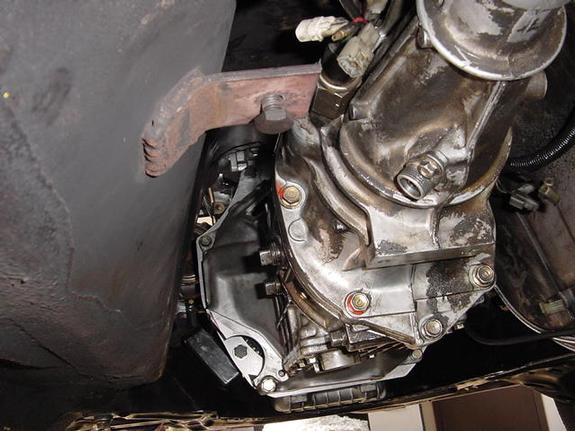
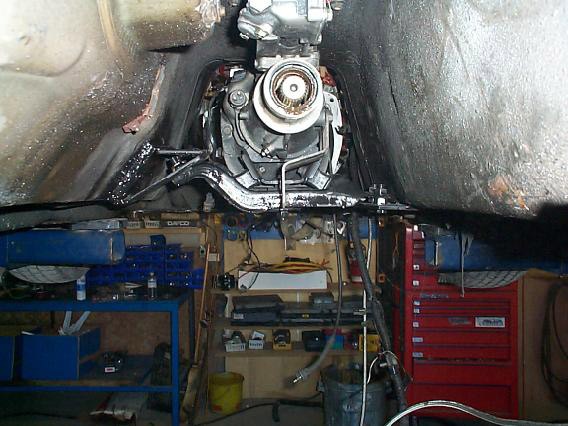
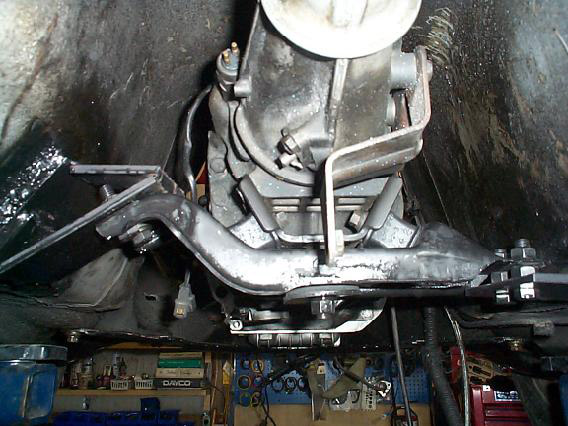
Next you'll want to make brackets to hold the tranny to the chassis using the stock TII tranny crossmember. These will have to be welded in. This isnt too bad at all....Just make sure you dont heat the metal up *too* hot or else you'll catch your carpet on fire right there like I did :-( (Worse part is I KNEW I should pull up the carpet, but after getting out from underneath the car to do it, being all tired, and realizing I would have to unbolt the seat in order to pull it up, I got lazy and decided "It'll prolly be ok". DONT BE LAZY LIKE ME!!!) Its probably best you just pull the carpet up right there in the interior....

|
|
|
|

|
|
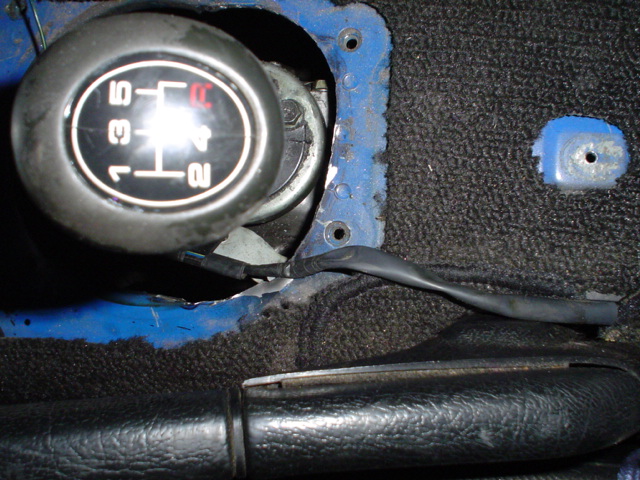
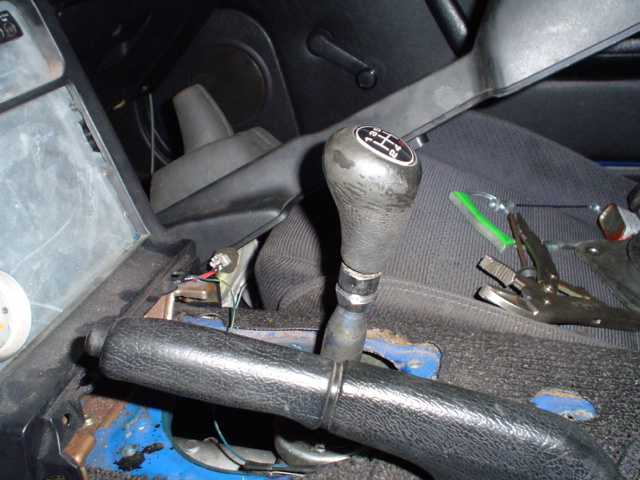
Notice that when you get into the passenger area that the shifter sits farther back. You will have to cut some of the sheet metal there and enlarge the hole so that the shifter can fit through. I took a couple of pics of this, as did Skyler and Marc K, the pics can be seen below.
 |
 |
I felt that rounding off the edges was a better idea. I doubt much stress gets put in this area of the chassis, but sharp edges always lead to cracks at the corner when stress is applied in an area. You own personal preference I suppose...
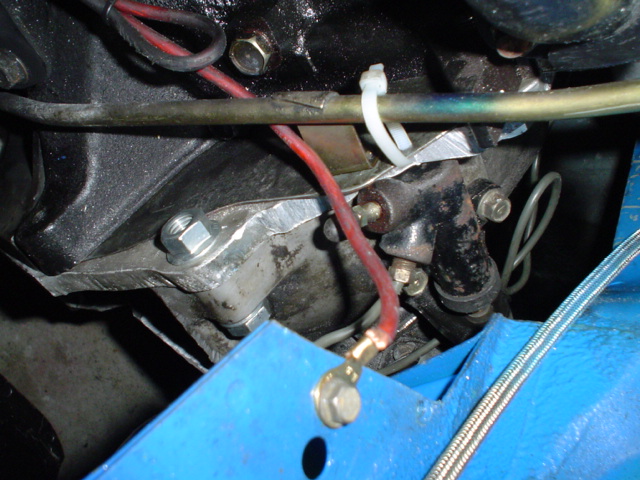
Next up on the agenda is what you plan to do about your clutch slave cylinder. By now, if you haven't noticed,
the slave cylinder is NOT in the same place as the stock miata one. In fact, its pretty much on the opposite side of the
bellhousing right behind your exhuast manifold. (NOTE: when making your adaptor plate, if you dont plan for a place for
the slave cylinder to sit you will be yanking your tranny BACK out of the car along with your plate so that you can do this.
Guess how I know.... What Skyler, Marc, and myself all did was to use the stock miata slave cylinder. I'm not sure about
Skyler and Marc, but I shortened the rod in my miata slave cylinder slightly because the modified pivot bolt sits the
clutch fork 1/2 farther forward in the hole, and this means the rod must also be 1/2 shorter. I doubt this issue will pop
up if you have modified the throw-out bearing in some way instead. I'm pretty sure if you do go the modified pivot path
that without shortening the rod, or somehow positioning the miata slave 1/2 farther back that the clutch will never be
released all the way.
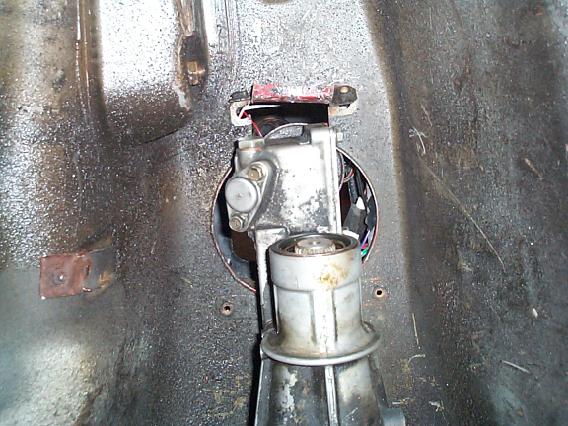
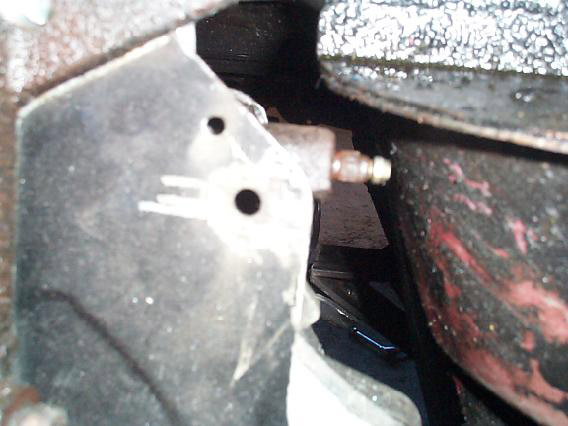
Now, before you go bolting that slave cylinder onto the car you're going to have to get out the trusty cutting tool once again.
By now I would imagine it, and a grinder have become your best friends. I have a picture of this, and good 'ol camera
crazy mark has 5 for you to look at. They are below.
 |
||||

|
||||
Once you have the slave bolted up, simply bend your stock clutch line over to it. I just unbent the stock miatas "loop" in the clutch line and ran it over to my slave cylinder. I believe the others did something similiar, if not the exact same thing.
CONGRATES. Unless I have forgotten something, you now have a TII tranny bolted onto your BP motor, and in your Miata!!!
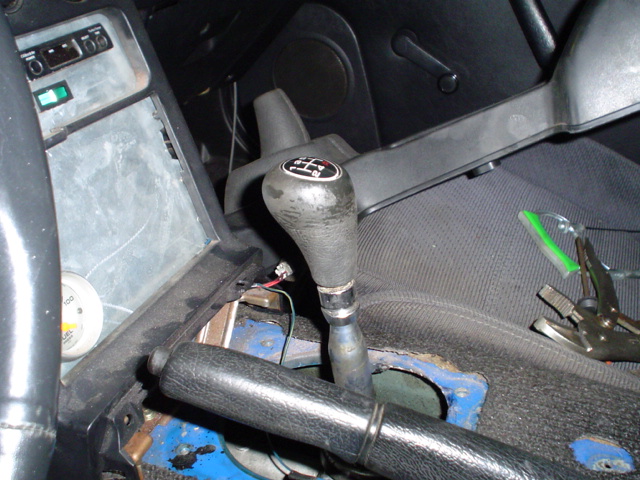
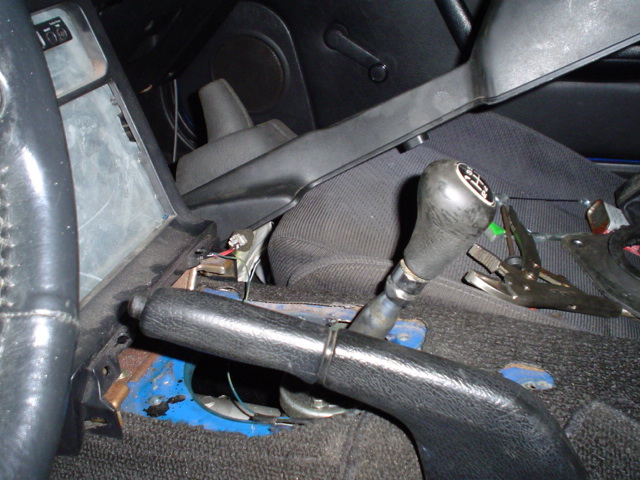
Notice also that your TII shifter sits in nuetral where your stock miata shifter sat in 4rd gear. The TII sits 3rd gear where your miata shifter sat in nuetral, and 4th, well...your going to have to modify your center console to accomodate 4th because it hits it in stock form
Wew...LOTS of work, huh? And you wondered why people just didnt drag race, or just replaced them as they broke? ;-) Now, you need to either modify a driveshaft, or get a custom one made. Marc K got myself, and himself a custom aluminum one made at driveshaftshop.com. It works with this tranny setup, and a TII rear end. Contact him if you are interested in one as I believe he still has the ability to get more of them made.
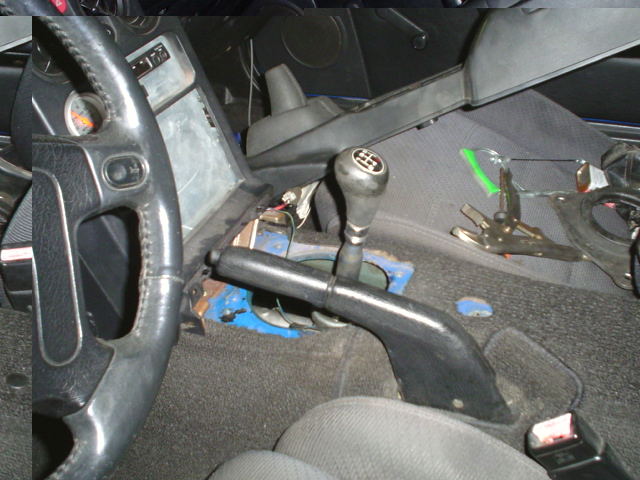
Here are a couple pics of my car....
|
 |
 |
 |
 |
 |
 |
 |
 |
|
 |