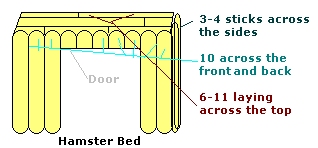
| The Layout When I start a larger, or more complicated project, I make a layout. A layout is just a quick sketch of what I plan to make. Then I make an estimate of how many sticks it will take for each part. I also see if there are any parts I can duplicate using the same technique. |
| Techniques I have aquired certain techniques of my own from making things, and I wanted to share them with you. They are in the order of necessity. |
| Click the name of the underlined technique to view a picture. |
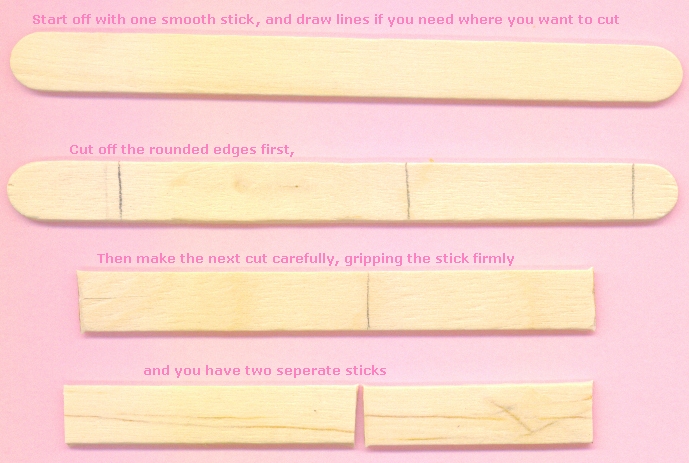
| Cutting Sticks Straight Cutting You may want to draw a pencil line exactly where you want it if you aren't the best at cutting, or if you are cutting many sticks (it will go faster). Hold the side that you aren't cutting firmly in your hand then cut with the inner part of the scissors (close to the handles). This will cut sticks faster and more efficiently. Making Shapes It may be easier to cut the stick into smaller pieces before you cut. Taking a rounded edge slowly turn the stick as you are cutting to make a shape close to a circle. |
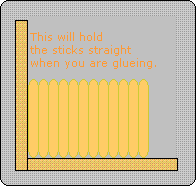
| Stick Straightener Why make one? If you build a lot of projects, you will find that this stick straightener will come in handy to help you make projects that are straight and strong. Ruler Straightener Take a reusable surface with a smooth cement-like surface, and attach two thick rulers together in the shape of an "L". This will hold the sticks in place before you support them and it will help keep them straight. |
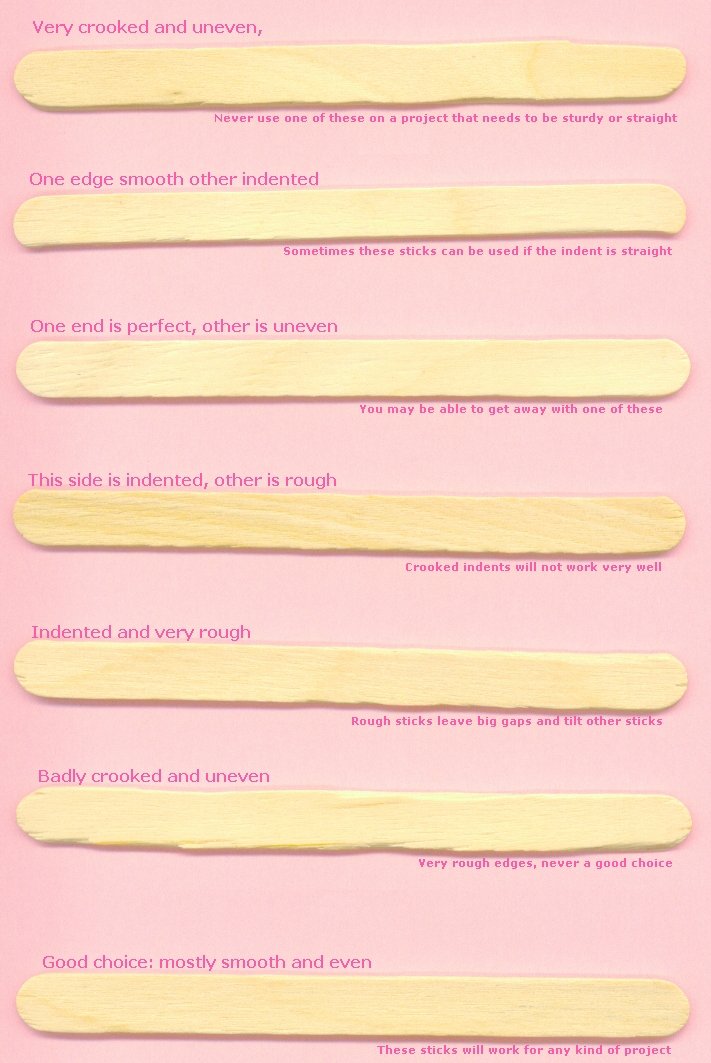
| Stick Selection When you are doing a more difficult project, you want it to be sturdy, so you need to use strong sticks. Go through your sticks and get rid of any thin, crooked, or broken stick. These sticks could be used around the house or also can be used to support a project. |
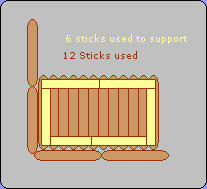
| Types of Support Rectangular Box: This is commonly used when making buildings or projects that are made of large stick sections. Put your sticks together up against the straightener, then make a box by cutting the rounded edges off of supporting sticks and making them into the shape of a rectangular box that is just the width of a stick from the edge. See picture. All-Over Support This is the most common way of supporting (I use it all the time). All you have to do is completely glue sticks (careful not to burn your hands) and place them all over the back of your stick section. By prying the section you can see where you need to add more. You can even overlap those sticks to make it very strong. |
| Common TERMS Sections - A group of sticks that have been grouped together and supported. Vertical - Going straight up Horizontal - Going across, (ex: like this ----------------) Rounded Edges - The 2 edges of a stick that are rounded. Supporting - To apply more sticks across the back so that stick sections and other groups of sticks, stay together properly and are sturdy. |
| Supporting This topic is all about making your projects sturdy. All you have to do is use sticks and glue them in certain ways. See Types of Support. This will make any size project last longer. |
| Painting This isn't a required talent for making projects like these, but it's definetly a fun one. You can paint your sticks before putting a project together, or paint them so they fit with the project after. The best paint to use is Acrylic paint. It applies well on the surface, drys well, and doesn't chip as easily. There are many different types of brushes you can buy to use, but I just use a fairly small white nylon round brush. You can do many different sizes with this. |