
For example if the patterns is 80 beads across and 100 rows high,I know I am going to need 800 beads for the pattern.
Repeat steps 4 to 6 untill the end of the row.
| Steps in Making a flat Brick pattern by Moonchild |
|
||||||||||||||||||||||||||
|
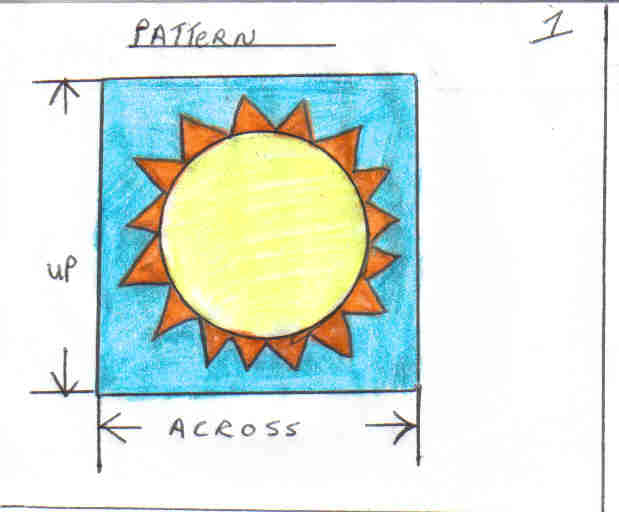
1.Whenever I set up to do a new pattern , I count my rows across and up the side of the pattern , so I will know exactly how many beads are used. For example if the patterns is 80 beads across and 100 rows high,I know I am going to need 800 beads for the pattern. |
||||||||||||||||||||||||||
|
|||||||||||||||||||||||||||
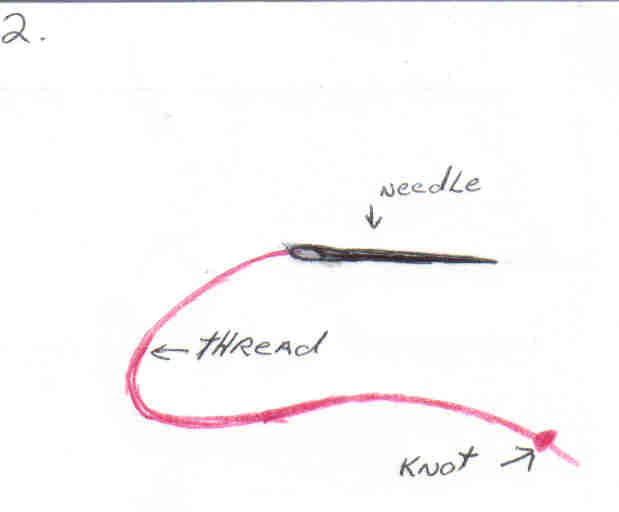
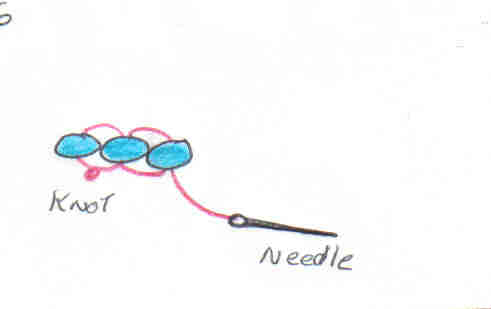
| 2.Thread the needle, making as small a knot as you can. | |||||||||||||||||||||||||||
|
|||||||||||||||||||||||||||
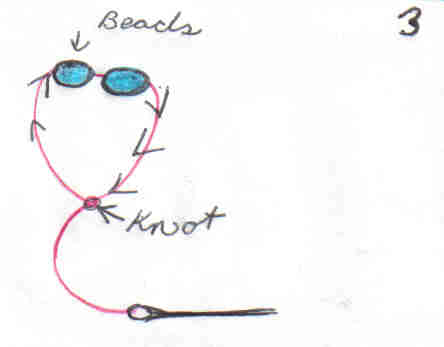
| 3.Pick up the first 2 beads of the pattern.Pull the beads down to the knot and bring your needle throught the knot to form a loop. | |||||||||||||||||||||||||||
|
|||||||||||||||||||||||||||
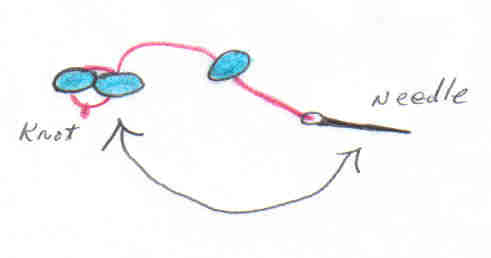
| 4.Bring the needle back up through the second bead and pull the thread tight so the beads are lying flat (side by side) | |||||||||||||||||||||||||||
|
|||||||||||||||||||||||||||
|
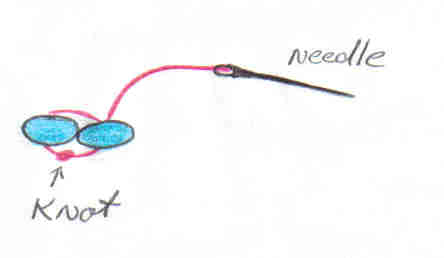
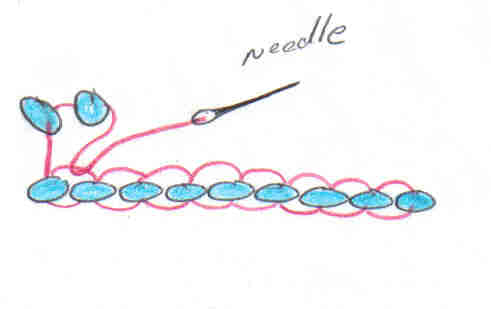
5 & 6 : Pick up your next (3rd) bead and bring your needle up through your last bead (second) * You need to go through your 3rd bead again ,it should look like # 6 when you pull your thread thight. Repeat steps 4 to 6 untill the end of the row. |
||||||||||||||||||||||||||
|
|||||||||||||||||||||||||||
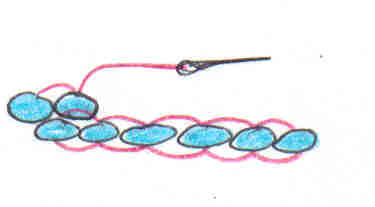
| 7. When you start your next row, pick up 2 beads and bring your needle through the loop between the first and second bead of your last row. | |||||||||||||||||||||||||||
|
|||||||||||||||||||||||||||
| 8.Bring the needle buck up through the second bead you just picked up and pull thread tight ( be carefull bot to break) when you finish your beads will lay flat and one will be over lapped. | |||||||||||||||||||||||||||
| 9. Repeat steps 4 to 8 untill the end of your pattern and finishe as desired. | |||||||||||||||||||||||||||