When we started this project, we knew that rendering caustics in real-time would be difficult. The main problem with caustics is that accurately rendering them requires backwards ray tracing, which involves too many calculations to be fast enough for an interactive program. So we needed to find a way to calculate the refraction of light rays in water quickly enough to keep up with a constantly changing water surface. What we weren't prepared for was the impact of outside factors on the caustics, and the variety of ways to implement them.
The first paper that we found on this topic was �Ray Tracing Refraction in Hardware� by Chris Trendall (Univ. of Toronto, 2000). Trendall�s claim was that most of the calculations could be done as part of a 6-step process, storing the results in various buffers and arrays. The basic idea was to represent the water surface as a height map and use the coordinates to calculate the amount of light that hit the corresponding point on the floor of the pool, thus finding illumination directly from light and normal positions. Unfortunately, implementing Trendall�s paper required an extensive amount of math, since we had to discretize various functions and perform three separate convolutions on each one. Aside from not understanding the discretizations, we barely grasped the concept of kernels and filtering, and decided to find a different paper.
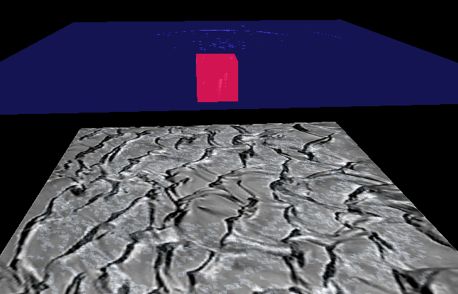
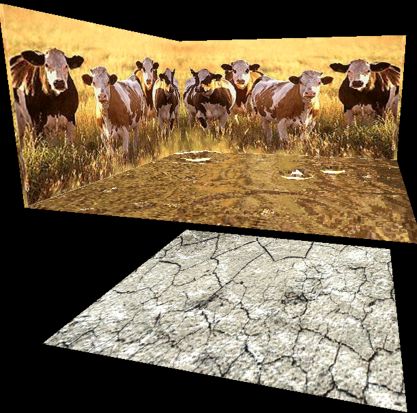
We took the look of Trendall�s program and added the crystal ball interface from as2 to create a scene that was viewable from all directions. We wanted to show how the caustics responded to movement on the water surface, so we display both surfaces, using glBlend and glDepthTest calls to make the water surface translucent so that the caustics were visible from any position. In addition, we played around with different texture maps to create 4 different scenes. A fish-eye view of the same scenes was environment mapped to the water surface, to simulate a reflective surface.
We spent quite a while working on the water surface. Although our focus was on the caustics underneath, their appearance greatly depends on the smoothness of the ripples. We tried out several ripple algorithms, from a basic sinusoidal to using 2 buffers, finally settling on a modified version of the 2buffer method.
As "eye candy", we decided to allow the user to drop a box into the water, creating a splash and watching the effects on the caustics below, as well as the color the box as it enters the water. This led to some research on particle systems and some attempts to model the behavior of flying water droplets. If you watch the box as it falls into the water, the color of the submerged box is darker than the rest of it. Also, the box casts a shadow on the pool floor, which shrinks as the box gets closer to the bottom.