| Limit Breaks |
 |
 |
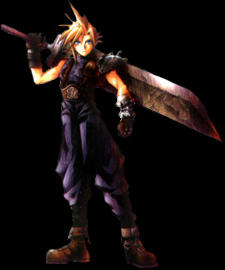
| Cloud Strife |
| Level 1: Braver-Cloud performs a leaping chop that splits a single enemy in two. Unless you're facing a really strong enemy that isn't a boss, this is usually your best Level 1 Limit Break. The attack is stronger than the Cross-Slash, so it usually kills weaker enemies. Cross-Slash-With several powerful slashes, Cloud causes massive damage to a single opponent. If the enemy survives the attack, there is a chance it may cause paralysis. It can't paralyze enemies who are naturally imune to paralysis, like most bosses. Level 2: Blade Beam-Waves of energy rush from Cloud's sword and collide with a single enemy. The remaining energy then splits into smaller, weaker waves, hitting any remaining enemies. This attack is great against a large group of weaker enemies. Always target the strongest enemy in the group, because the intial wave causes about three times as much damage as the smaller secondary waves. Climhazzard-Cloud skewers a single enemy and then leaps high into the sky to cause greater damage. This is best used against a single opponent or any really strong opponents you encounter. Eventually the Blade Beam attack will become ineffective, but the Climhazzard attack should be useful throughout most of the game. Level 3: Meteorain-While leaping into the air, Cloud unleashes a barrage of meteors upon a group of foes causing four seperate hits. This is actually best used against a single enemy, unless the targeted group is fairly weak. Used against one opponent, this can cause as much as 12,000 points of damage. Finishing Touch-Cloud creates a large whirlwind that sucks a group of opponents into obilvion, which causes them to either immediately perish or suffer extensive damage from falling back to the ground. Most opponents will simply perish, but larger creatures like bosses will always fall back to the ground. Save this Limit Break for groups-it's completely wasted on a single enemy. Level 4: Omnislash-Cloud assaults his opponent with a long series of powerful sword attacks. This can be used against a single opponent or a group; either way, this is an extremely powerful attack. With the correct sword in hand, this attack can actually cause just as much, if not more, damage than the fabled "Knights of the Round" Materia. |
 |
| Tifa Lockhart |
 |
| Level 1: Beat Rush-Tifa unleashes a quick combo against a single enemy for the first part of her limit break combo. Somersault-Tifa punishes a single opponent and shows off a liitle with this flipping kick. The Somersault tacks on another hit to her Limit Break combo. Level 2: Waterkick-The third part of Tifa's combo is a quick elemental wave of water that washes over an opponent. Meteodrive-Tifa shows off her brute force by picking up her opponent and delivering a quick backdrop. Level 3: Dolphin Blow-Tifa calls on her fishy friend for this watery uppercut and tacks on hit number five. Meteor Strike-After grabbing her opponent, Tifa jumps into the heavens before slamming down her opponent hard. Level 4: Final Heaven-Focusing her energies into her fist, Tifa hits the enemy with the force of a nuclear explosion. |
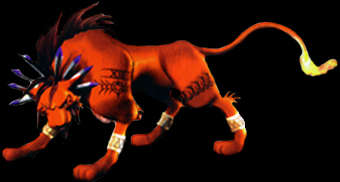 |
| Red XIII (Nanaki) |
 |
| Level 1: Sled Fang-Red XIII charges through an opponent causing a large amount of physical damage. For a while this may be the only long-range attack Red XIII has, so it's sure to come in handy. However, it'll become obsolete by the time you receive Blood Fang. Lunatic High-A glowing light covers the party and Haste is cast on everyone. Until you've purchased the "Time" Materia, the Lunatic High should come in handy during major battles. Level 2: Blood Fang-Red XIII charges through an opponent causing more physical damage than the Sled Fang attack. He also gains a small amount of HP and MP. This attack isn't much different from the Sled Fang attack, but it's nice for eliminating an opponent and boosting Red XIII's MP. Stardust Ray-Red XIII's howl summons a cluster of falling stars, which causes severe damage to groups of enemies. Unless you need the MP boost, stick with the Stardust Ray during fights. It inflicts considerably more damage to a group or a single enemy than the Blood Fang. Level 3: Howling Moon-The full moon drives Red XIII into a rage, casting Berserk and Haste on him for the remainder of the battle. This attack has some obivious advantages and disadvantages. Using this attack, Red XIII can attack quickly, but can no longer aid the party with magic or any kind of special attack. Earth Rave- Red XIII attacks a groupm of enemies with a series of five elemental attacks. In the end, the Earth Rave will prove to be more beneficial than the Howling Moon. It does a large amount of direct damage without commiting Red XIII to a single attack pattern. Level 4: Cosmo Memory-Red XIII summons a huge ball of fire which explodes, engulfing his opponents is huge ray of super-heated plasma. |
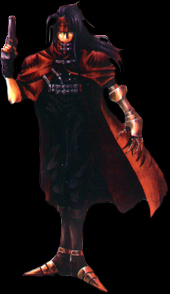 |
| Vincent Valentine |
 |
| Level 1: Galian Beast-Vincent transforms into a purple beast with horns that attacks with fire-based attacks. Beast Flare-Launches several orbs that explode and cause damage to a group of enemies. Berserk Dance-Performs a combo attack against a single enemy. Level 2: Death Gigas-Vincent transforms into a Frankenstein creature with powerful physical attacks and a lightning elemental attack. Gigadunk-Hits a single enemy with powerful punch. Livewire-Attacks a entire group with an electrical charge. Level 3: Hellmasker-Vincent transforms into a chainsaw-bearing maniac who may look very familiar. He can attack with his weapon or he can cause several negative status effects. Splattercombo-Hits a single enemy five times with his chainsaw. Nightmare-One enemy is hit with several status effects including Mini, Frog, Sleep, Mute, and Confusion. Level 4: Chaos-Vincent transform into a huge, winged demon. Unlike his other forms, Chaos uses attacks that aren't elemental based. Therefore, you won't find him suddenly healing your opponents. Chaos Saber-Acts like Slash-All, but doesn't rely on Vincent's weapon to determine damage. Stan Slam-A large skull is created under the opposition. Any enemies that aren't insantly killed are hit by flaming skulls. |
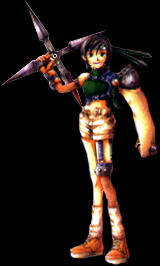 |
| Yuffie Kisaragi |
 |
| Level 1: Greased Lightning-Yuffie hits a single opponent with a quick attacks that causes massive physical damage. Greased Lightningdoes enough damage to eliminate weaker opponents, but it's well outdated by the time you receive the first of Yuffie's Level 2 Limit Breaks. Clear Tranquil-A blue orb surrounds each party member and restores a small portion of each character's HP. Early on, this Limit Break is helpful for curing your allies, but the amount of damage enemies cause plus the party's increased HP will soon be too much for Clear Tranquil to be effective. Level 2: Landscaper-Yuffie causes a tremor that forces the ground beneath a group of opponents to rise and explode, which causes massive damage to her enemies. Use this Limit Break solely against groups of enemies. The damage isn't cumulative, so its effect is drastically reduced against a lone enemy. Bloodfest-Yuffie attacks a group of enemies with a series of 10 deadly blows. Unlike the Landscaper, this is effective against a group or a single enemy. The individual attacks are weaker than the Landscaper's single attack, so it's wise to limit its use to small groups. Level 3: Gauntlet-Summoning a blue vortex beneath her opponents, Yuffie causes a large amount of damage to an entire group of enemies. Gauntlet causes a large amount of damage, but it's not cumulative. Keep it reserved for large groups of enemies or at least weak groups. Doom of the Living-Much like the Bloodfest attack, Yuffie moves about the screen and hits her opponents with a long series of deadly blows. The only real difference between the two is the amount of damage inflicted. The damage for this attack is cumulative makes it better against a single enemy than Gauntlet. Level 4: All Creation-Yuffie blasts her opponents with a huge beam of iridescent light. This attack causes a huge amount of damage to an enemy or enemies. |
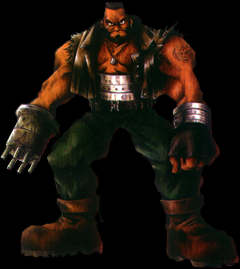 |
| Barret Wallace |
| Level 1: Big Shot-Barret fires a large ball of energy from his gun, which causes massive damage to his opponent. For the first portion of the game the Big Shot should come in really handy, but it quickly becomes obsolete when your enemies increase in strength. Mindblow-Barret fires a large ball of blue energy from his gun, which depleteshis opponent's magic points. Such attacks often go unappreciated, but the Mindblow can turn a fierce magic user into a helpless wimp. Level 2: Grenade Bomb-Targeting an entire group of enemies, Barret launches a deadly grenade into the enemy ranks. This is typically the Level 2 Limit Break of choice. It causes a decent amount of damage to entire groups of enemies. Hammerblow-Barret's powerful punch sends an enemy into orbit. Barret can completely remove an enemy from combat with the Hammerblow, but the attack is best used against individual non-Boss monsters. The Hammerblow doesn't cause any direct damage, so it's worthless against Boss creatures. Level 3: Satellite Beam-Proving he has friends in high places, Barret calls for the ultimate air strike against a group of enemies. The beams hit for about 3000-4000 points of damage on each creature. Although this attack is great against a group of enemies, it's considerably less effective against a lone attacker. Ungarmax-Lock and load! Barret dumps a large amount of ammunition into a group of enemies causing massive damage. The Ungarmax hits more times than the Satellite Beam, but the hits are weaker. Level 4: Catastrophe-Barret uses his gun arm to hover over a group of enemies, and then burns them to a crisp with a super-heated plasma blast. As you might expect, this is the best of Barret;s Limit Breaks. It works well against a group or a single enemy. It does have one downside: Because this attack isn't focused, a single enemy won't feel the full force of the blow. |
 |
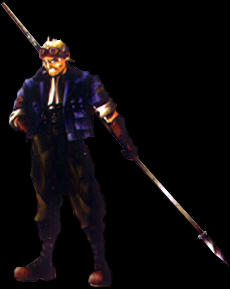 |
| Cid Highwind |
| Level 1: Boost Jump-Cid vaults into the air and crashes down on a single opponent's head. This is a straightforward attack that's your best bet for killing a a single enemy early on. Dynamite-Cid produces a large stick of dynamite that he hurls into a group of enemies. Once Cid learns the Dynamite Limit Break, it's unlikely you'll use the Boost Jump again. It causes a fair amount of damage to each monster in a group, but the effect isn't cumulative like Big Brawl or Dragon Dive. Level 2: Hyper Jump-Cid leaps into the air and drives his weapon deep into the ground, causing a huge blue explosion that damages an entire group of enemies. This is basically a more powerful version of the Dynamite Limit Break: it's great against a group, but loses something against individual opponents. Dragon-Cid summons a dragon to attack one of his enemies. The dragon injures the victim and transfers the HP and MP back into Cid. This is the best Level 2 attack against a single creature. It's also effective when Cid needs a small boost to his MP; the HP boost is insignificant. Level 3: Dragon Dive-Cis repeatedly pounces on a group of opponents. Each attack creates a large explosion that causes heavy damage to a single opponent. The Dragon Dive is the stronger of the two Level 3 Limit Breaks, but it connects against the enemy fewer times. Big Brawl-Cid shows off his fighting skills by leaping into a group of enemies and crushing them with a series of blazing-fast attacks. The Big Brawl hits for less each time, but it hits more times than the Dragon Dive. It's difficultto say which attack is better. Level 4: Highwind-Cid calls on the Highwind for assistance. The ship's crew answers by unleashing a huge salvo against the opposition. This is a great attack against a single enemy or a huge group. Each missile causes several thousand points of damage to most enemies, plus the total damage is cumulative. |
 |
 |
| Aeris Gainsborough |
| Level 1: Healing Wind-Aeris restores the party's lost HP with this heavenly breeze. Seal Evil-Aeris casts a mystic spell on a group of enemies, causing them all to stop and become silenced. Level 2: Breath of the Earth-Magical beams of light cure the party of any existing negative statuses. Fury Brand-Sacrificing her own Limit Attack, Aeris blasts the party with Holy power which instantly fills each pf her allies' Limit gauges. Level 3: Planet Protection-Aeris forms a protective barrier around the party that makes them temporarily invulnerable. Pulse of Life-With a quick word of prayer, Aeris completely cures the party of any ailments and restores any lost HP or MP. Level 4: Great Gospel-Aeris summons the heavenly host and the party is fully recovered and made temporarily invulnerable. |
 |
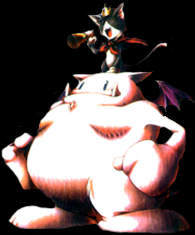 |
| Cait Sith |
| Level 1: Dice-Cait Sith throws several dice on the ground. The resulting score determines how much damage is inflicted to a single enemy. This Limit Break grows over time, making it possible to cause larger amounts of damage. Level 2: Slots-The gambling cat plays his luck against his own slot machine. There can be many different outcomes, and as you might guess, the more effective outcomes are tougher to get. Occasionally, you'ss actually have a particular outcome forced on you. For example, the slots often stop on the Mog Dance and Tou Soldier without the player actually having to time anything. The various effects are: 3 Stars=Mog Dance A tiny Mog appears and restores the party's HP, MP, and status. 3 Kings=Toy Soldier Six toy soldiers appear and attack any enemies that are present. 3 Bars=Summon Cait Sith uses a randomly determined summon spell. 3 Mog=Transform Cait Sith transforms into a giant version of himself. His teammates disappear for the moment, but return at the end of the battle. Only Cait Sith gains experience from the battle, and the entire party's HP is reduced to 3333 while their MP to 333. 3 Hearts=Lucky Girl Party's hit percentage is 100. Ensures perfect attack ratio against all enemies. 2 Cait Sith & 1 Bar=Death to All This is the unlucky roll. The entire party is instantly consumed by death... Game Over. Don't worry, this is extremely rare. 3 Cait Sith=Instant Victory All enemies present are instantly killed. This is difficult to get and never seems to be forced on the party. |
 |