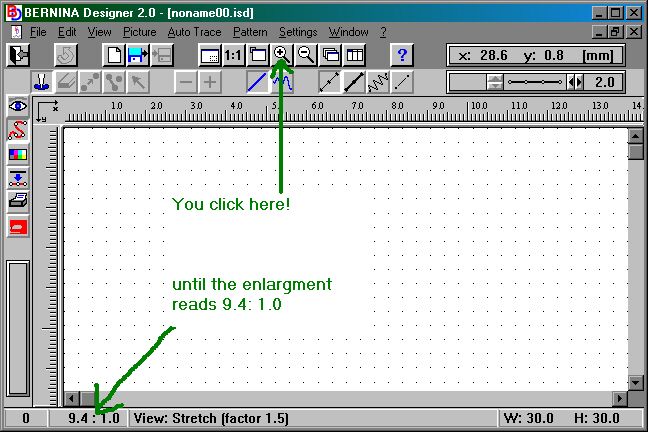
2. I've got the material, the 1630, the cable the PC, the Designer software... now where do I hit the button for the magic...hmmmm.... not so fast....get a pencil (not a pen!) and paper and start by getting something on it (OK! already - you may trace a simple design like a Fleur de Lis (mois parlez verrryy francais here!) Keep it simple... just thin lines at first!... no don't try for the satin stitch, you WILL be disappointed and frustrated. Also... don't try for a repeating border design (yeah-yeah... I know mine are stunning... BUT... you wanna first get comfortable with the software. - OK... you beat me down!... do a border design.. but don't bother about the repeating bit YET!) Decide on the size you want it to be... again... don't go over 30x30mm...hmmmm that's a little bit over an inch (") That's plenty to learn from.. don't go and be a size queen now! It is more important that you get to the point where your mouse (don't scream - it's not the furry variety!) becomes the needle of your 1630 and you can put it down where you want your machine to sew stitches! When you are busy putting down stitches, work with a zoom factor that shows up the grid (keep on clicking on the magnifying glass (+) untill you can see it [actually - click 2 x more after the dots have appeared the first time.. BUT REMEMBER that you have to fill the entire 30 x 30 screen with what you design because in the end (no matter how big you enlarged it) it will all sew out in a 1 x 1 " square! See the piccie below for detail. And remember also that by clicking on the 1:1 button you can see the design as big as it will really sew out!