


Making Text Stand Out
There are many ways to go about making your text stand out, ranging from neat blending effects to fairly simple ones. Here, I'll cover the simplest way to do so.
1. Open up a new documentby going to "File>>New." Let's make it 300px by 300 px with a white background.

2. Click on the Text tool (looks like a capital T), which should be in your Tools window. If that isn't open, go to "Window>>Tool" and make sure that there is a check mark next to that.


3. In your colors palette, select white. If this window isn't there, go to "Window>>Colors."

4. Zoom in to 100% in your Navigator palette. If that's not visible, go to "Window>>Navigator."

Next, click anywhere on your 300x300 image, which should still be white. Now, start typing. Have the text set at a good size--that is, make sure it isn't microscopic. Arial at 24pt is good. Remember--both the text and background are white, so don't be surprised if you can't see what you're typing. However, you can see the blinking cursor, so be sure to hit enter to go to the next line before you end up typing off the document. To move your text around, select the Move Tool from the toolbar,

and click on the appropriate layer you want to move in the Layer Palette

After doing that, you should be able to reposition your text.
5. Okay, done? Now, you want to see the text, right? Remember the Layers Palette I mentioned in the last step? Well, right-click on the text layer there, and select "Blending Options." There should be a list of stuff to the left side of the box that appears. Look for "Stroke," and click the box next to it to put a checkmark there.

Go ahead and play around with the settings. For now, you can leave the Blend Mode at Normal, but, of course, you don't have to. Anyways, position the box you're working in so that you can see your image. Make sure the "Preview" option is checked, and you should be able to see the effects on your text. Don't worry--the effects are saved when you click OK, and you can always undo most of your actions up until a certain point.
6. You should now be able to see your text. As each situation will vary, use common sense in deciding colors for both your text and your stroke outlining. Yeah, this one's REALLY basic and a bit harsh on the eyes, but you get the point. There are better, more subtle ways to make text stand out.

Here is another example of how Stroke can be used. This is actually a snippet from a wallpaper I made based off the game, Xenosaga.

Anyways, this just one of the several methods out there, including drop shadows, outer glow, and other effects.
TEXT GALLERY


Instead of clicking on "Stroke" under blending options, click on OUTER GLOW. Try fiddling around with the settings. When working with dark backgrounds, I tend to go for a very light shade of yellow (lighter than the default yellow) instead of white, although the bottom sample was done with a white glow. Duplicating a layer with glow effects and white text often brightens the effect-- especially when you play around with layer opacities.

This one's a bit more complicated, as it involves several blending filters, including glows, bevel/emboss, and a rather thick white stroke to separate it from the pinkish background, if you noticed.

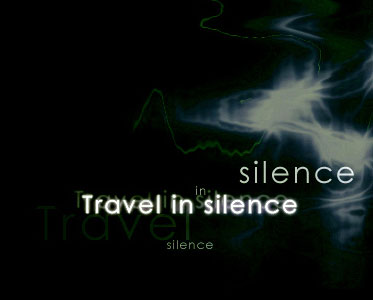
Not really a blending effect, but I put light gray words behind the main text to draw attention to it. Also, after rasterizing the layers, I lightly blended the outsides of the text to soften the edges a tiny bit.

Old site banner, but same concept as the new one. White stroke and blend brush.
Back to Photoshop Tutorials
Back to Tutorials Main
There are many ways to go about making your text stand out, ranging from neat blending effects to fairly simple ones. Here, I'll cover the simplest way to do so.
1. Open up a new documentby going to "File>>New." Let's make it 300px by 300 px with a white background.
2. Click on the Text tool (looks like a capital T), which should be in your Tools window. If that isn't open, go to "Window>>Tool" and make sure that there is a check mark next to that.
3. In your colors palette, select white. If this window isn't there, go to "Window>>Colors."
4. Zoom in to 100% in your Navigator palette. If that's not visible, go to "Window>>Navigator."
Next, click anywhere on your 300x300 image, which should still be white. Now, start typing. Have the text set at a good size--that is, make sure it isn't microscopic. Arial at 24pt is good. Remember--both the text and background are white, so don't be surprised if you can't see what you're typing. However, you can see the blinking cursor, so be sure to hit enter to go to the next line before you end up typing off the document. To move your text around, select the Move Tool from the toolbar,
and click on the appropriate layer you want to move in the Layer Palette
After doing that, you should be able to reposition your text.
5. Okay, done? Now, you want to see the text, right? Remember the Layers Palette I mentioned in the last step? Well, right-click on the text layer there, and select "Blending Options." There should be a list of stuff to the left side of the box that appears. Look for "Stroke," and click the box next to it to put a checkmark there.
Go ahead and play around with the settings. For now, you can leave the Blend Mode at Normal, but, of course, you don't have to. Anyways, position the box you're working in so that you can see your image. Make sure the "Preview" option is checked, and you should be able to see the effects on your text. Don't worry--the effects are saved when you click OK, and you can always undo most of your actions up until a certain point.
6. You should now be able to see your text. As each situation will vary, use common sense in deciding colors for both your text and your stroke outlining. Yeah, this one's REALLY basic and a bit harsh on the eyes, but you get the point. There are better, more subtle ways to make text stand out.
Here is another example of how Stroke can be used. This is actually a snippet from a wallpaper I made based off the game, Xenosaga.
Anyways, this just one of the several methods out there, including drop shadows, outer glow, and other effects.
TEXT GALLERY
Instead of clicking on "Stroke" under blending options, click on OUTER GLOW. Try fiddling around with the settings. When working with dark backgrounds, I tend to go for a very light shade of yellow (lighter than the default yellow) instead of white, although the bottom sample was done with a white glow. Duplicating a layer with glow effects and white text often brightens the effect-- especially when you play around with layer opacities.
This one's a bit more complicated, as it involves several blending filters, including glows, bevel/emboss, and a rather thick white stroke to separate it from the pinkish background, if you noticed.
Not really a blending effect, but I put light gray words behind the main text to draw attention to it. Also, after rasterizing the layers, I lightly blended the outsides of the text to soften the edges a tiny bit.
Old site banner, but same concept as the new one. White stroke and blend brush.
Back to Photoshop Tutorials
Back to Tutorials Main