| Home
VCR MiniDV
VHS-C adaptor
Video Formats
VCR operation & connections
Hookup diagrams
|
Consumer Video:
Video Cassette Recorder:
VCR Basics and User Guide
The invention of the VCR, or video cassette recorder, in the 1970s gave us the first consumer device which allowed people to record TV shows for viewing at a later time. This capability released us from the bondage of the TV networks scheduling, thanks to the VCRs "time-shifting" capabilities, we could record a program when the networks deemed it would run, but watch at a time convenient for us.
The Sony Betamax (Beta) VCR format ruled in the beginning (1975-1976), until the VHS format eventually succeeded in taking over the market. Beta VCRs, Sony's proprietary format, existed for years and many models were produced, but VHS (Video Home System) won out in the long run and became the standard consumer format for video cassettes, both pre-recorded Hollywood movies and blank tapes for recording at home, and the VCR itself. Even Sony eventually made VHS VCRs.
Over the years, VCR's have grown in features, and shrunk in price. Where the basic VCR, which was also the top-of-the-line VCR, once cost about $1,500, a basic VCR now is affordable by all, with some as low as $49 and used models going for far less. Top of the line VCRs with more features go for about $100 or so but what you get now rivals or exceeds what you'd only have seen in video studios back in TV's infancy. Although many people are progressing to the DVD recorder and hard disk recorders, the VCR still occupies a place in the home of millions of TV viewers and Hollywood movie enthusiasts. The second hand market for old movies on VHS tape is a bargain, typically only costing a dollar or two per VHS movie.
Many people discovered that time-shifting wasn't their number one priority: renting videocassette movies was. Still others want a VCR so they can copy from their camcorders.
VCR Introduction
The modern VCR reached it's zenith by the year 2000. That is a very good lifespan, about 25 years. Still, by the year 2006, many VCRs are still in use in the home, but many models now contain a DVD player and a VCR together.
The VCR is an electronic device which weighs about 8 lbs. and is about 15 in. wide, 11 in. deep, 4 in. high and contains a television tuner (Channel Coverage: VHF: 2-13; UHF: 14-69; CATV: 1-125 Total Channels: 181), circuit board, video heads/drum and tape transport along with gears, a small electric motor, front panel controls and multi-function display.
Top manufacturers include Sony, Panasonic, JVC, Toshiba, RCA, Sharp, Samsung and many others. Most modern full-feature VCRs have stereo sound and 4 heads with a variety of nice to have features such as freeze frame, auto clock set, auto channel setup, VCR Plus+, slow motion, search and 60 sec. skip for commercials.
The reason people own a VCR is to:
1) Record and view TV programs live or time delayed
2) View pre-recorded movies on VHS tapes
3) Copy camcorder recordings to VHS tape
4) Record music or any audio source
VCR SETUP
What you should have in your VCR setup:
VCR, TV, Hookup Cables, Remote control, videocassettes and TV signal source.
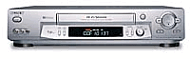
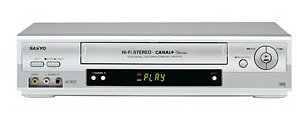
VCR |
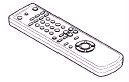
Remote Control |

TV |
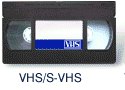
VHS Video-cassettes |
Connecting Cable |
TV signal source can be
antenna, cable TV or satellite TV |
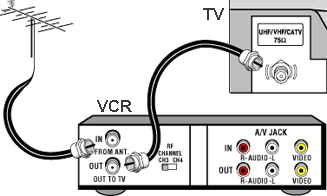
Basic VCR cable hookup
Both the VCR and the TV need to be plugged into AC outlets for power. The VCR is powered on using the power button on the VCR or by using the power button on the VCR remote control.
The VCR needs to be connected to the TV using audio/video cables. Exactly which cable you use and how you connect your components depends on your specific situation. Not everyone has the same components. You may receive your TV programming by Cable TV while someone else gets their TV programming over the air using a rooftop or indoor TV antenna.
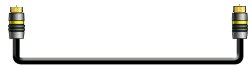
A VCR can be connected to a TV using a single coaxial cable which carries audio and video combined, or several A/V cables which split the audio and video so they are carried to the TV separately. If you use a single coax cable, as seen in the drawing above, connect the VCR OUT jack in the back of the VCR to the TV VHF/UHF IN jack on the back of the TV. Be sure to set the TV on channel 3 or 4 when using the VCR as your signal source. Select which channel to use (3 or 4) on the VCR by setting a switch manually, usually in the back of the VCR, or by electronically selecting channel 3 or 4 on your VCR. As there are many different brands of VCR and even many more models, the procedure varies. Consult your owner's manual.
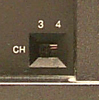
VCR selector switch on back panel. Switches to channel 3 or 4.
Also, connect your TV signal source, such as Cable TV or Antenna to the back of the VCR using a single coax cable connected to the VCR's ANT IN jack. This jack is typically just above the ANT OUT jack going to the TV. Both are silver in color with threads on the jack. The cable is screwed on or sometimes just pushed on.
Most VCR's come with "onscreen programming," which is a series of menus that (at least theoretically) walks you through the various settings and functions of the VCR.
Continue >> Next Page
|