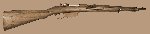
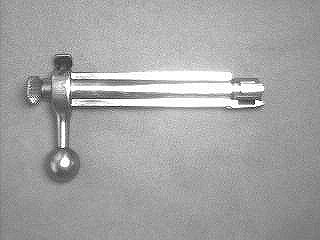
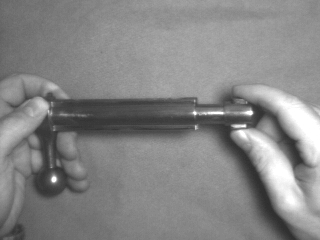
The Steyr Mannlicher
M95 Rifle Bolt
Short legal disclaimer
... This information is provided for entertainment purposes only.
It is not intended as a how-to guide. The author assumes no responsibility
or liability of any kind should somebody try to duplicate these procedures.
In other words, if you tear your gun apart and put it back together wrong,
(or fail to get it back together) you're on your own!
This page is graphics
intensive! Please allow several minutes @ a 28.8 connection for all
pictures to download to your computer.
Last updated 08-22-2001
Disassembly
For Assembly
Info Click Here
 Step
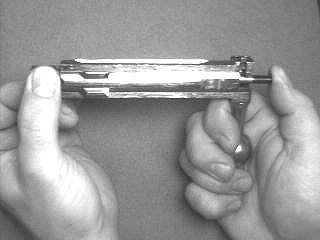
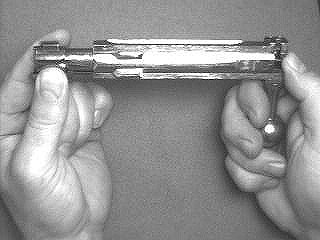
1 - Remove the bolt.
Step
1 - Remove the bolt.
Put the safety lever in the "fire" position and pull the bolt as far
back as it will go. Perform standard safety checks here, making sure
the rifle is unloaded, etc.. Now push the trigger forward, hold it
there, and quickly pull the bolt backwards out of the receiver. If
it doesn't come completely out, the bolt head is trying to rotate and is
slightly binding under spring pressure. Wiggle the bolt around while
pulling it back and keep the trigger pressed forward. It should eventually
slide out.
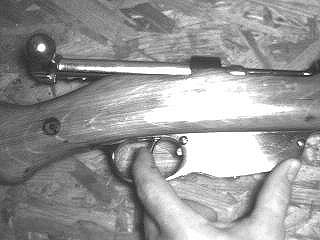
Push the trigger forward to remove the bolt.
Step
2 - Rotate the bolt head.
The bolt head may, or may not retract inward from spring pressure when
the bolt is removed from the receiver. If it does not, you will need
to tap on it with a soft-faced hammer. I use the rubber coated handle
of my $10 Kmart driver. Try to avoid hitting the extractor.
You want the bolt head to be retracted inward for disassembly.
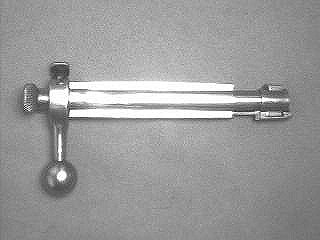
Bolt head in outward position.
Bolt head being tapped.
Bolt head retracted inward.
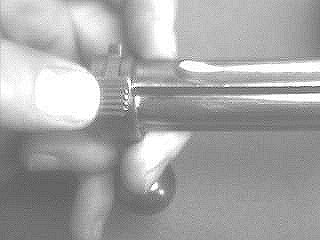
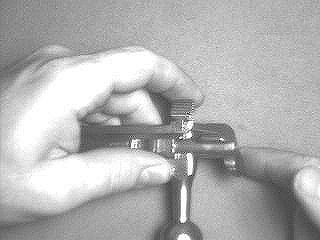
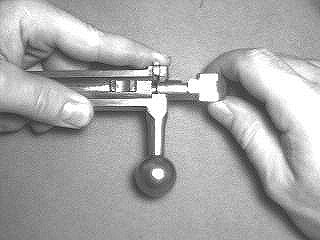
Step
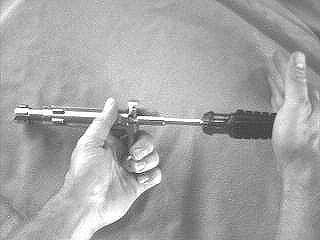
3 - Unscrew the cocking piece.
Hold the bolt so you can manipulate the safety lever with your index
finger. Hold the safety lever halfway between "safe" and "fire" positions.
With your other hand, grab the cocking piece and pull it back. Now
move the safety lever into the "safe" position and hold it there while
unscrewing the cocking piece. After about 8 revolutions, you can
lift the safety lever slightly and let the cocking piece retract back into
the bolt body. This makes the last few turns easier.
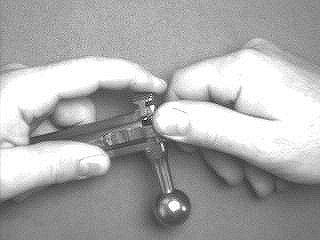
Hold the safety lever at halfway position.
Pull cocking piece back (heavy spring pressure).

Hold safety lever in the "safe" position
Cocking piece removed.
while unscrewing cocking piece
(counter-clockwise).
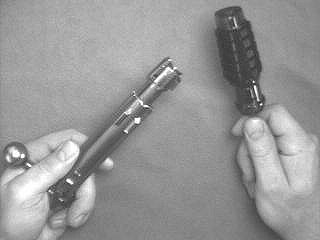
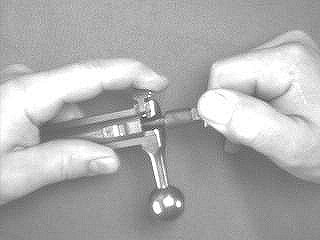
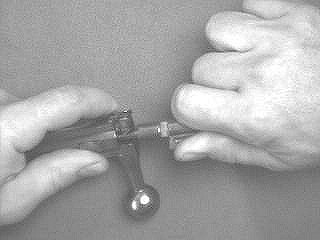
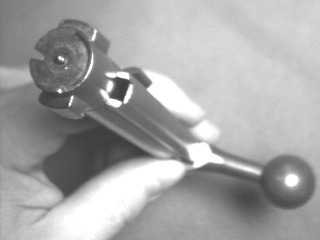
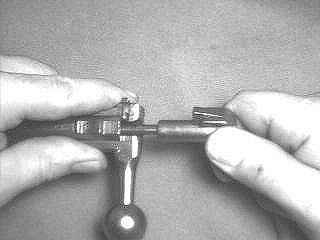
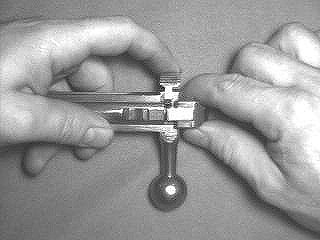
Step
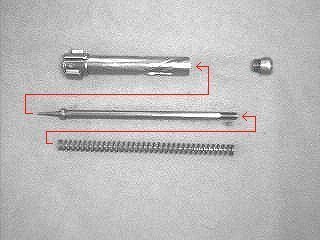
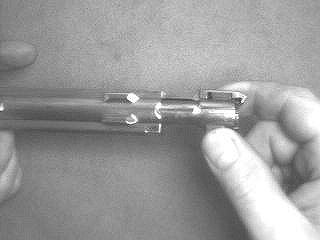
4 - Remove the bolt head assembly and extractor.
Grasp the bolt as shown below. Rotate the head 90 degrees clock-wise
and push the assembly out with your thumb at the same time, until it "clicks".
At this point you can pull the head assembly out with brute force, or very
carefully tap it out from the back, being conscientious of the
threads..
Hold the bolt like this.
Turn the bolt head clockwise while pushing
the assembly out with your thumb.
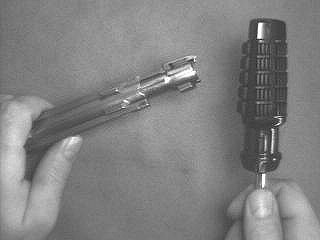
Kmart wonder driver to the rescue. The hollow
Bolt head assembly and extractor separated
tip fits perfectly over the rear of the firing pin
from bolt body.
shaft. A rap on the drive handle pushes the
entire assembly out.
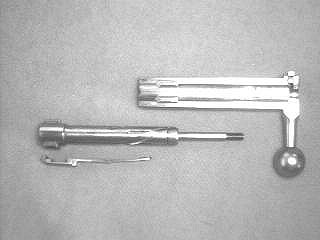
Step
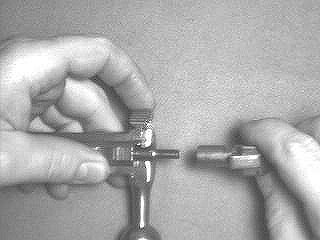
5 - Take down the bolt head assembly.
WARNING - FLYING PARTS HAZARD!
The spring inside this assembly in under a
lot of tension. Hang on tight!
Unscrew the retainer as shown below.
Unscrewing the retainer.
Components of the bolt head assembly.
Miscellaneous
Info
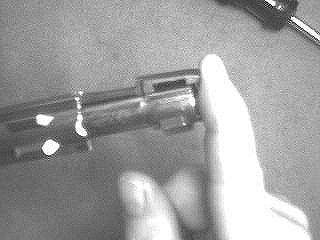
At this point the bolt is almost completely taken down.
There are two part that I don't mess with. If you look inside the
bolt body (breech side), you can see a bushing that the firing pin shaft
passes through. I can't see a reason for removing it unless it's
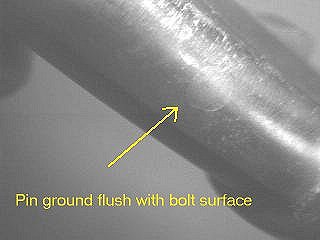
damaged. Besides, it's appears to have a pin passing through it that's
been ground flush with the outer bolt surface. Also, the screw holding
the safety lever in place has been punched. It's not coming out without
being drilled.
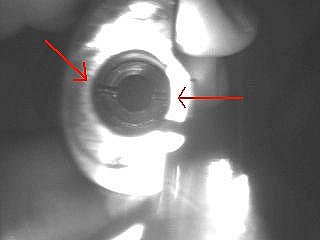
Slots in the bushing.
Pin holding bushing in place.
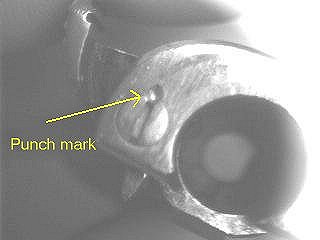
Screw holding
safety lever in place.
Assembly
Step
1 - Put the bolt head assembly back together.
Undo everything you did in step 5 above. When the retainer is
fully screwed into place, it's grooves will probably NOT align with those
on the bolt head's shaft. This is ok. Just unscrew it until
the grooves line up.
Retainer tightened completely down.
Unscrew retainer until it's grooves line up with
Grooves are not aligned.
those on the bolt.
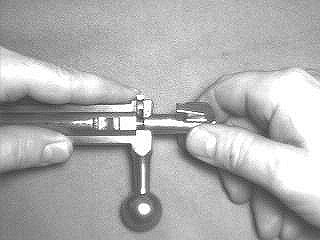
Step
2 - Orient the firing pin.
Notice that the firing pin shaft has a flat slide. Orient the
flat side of the firing pin so it is facing the same direction as the notch
in the bolt head.
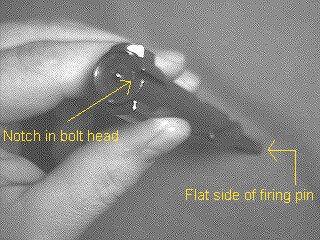
Flat side of firing pin shaft.
Firing pin oriented for assembly.
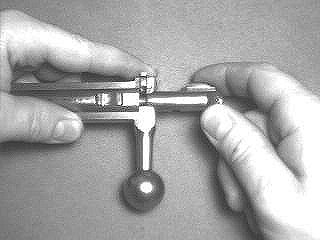
Step
3 - Install bolt head into bolt body.
Note: Hold the safety lever in the "safe" position during this procedure.
With the flat side of the firing pin shaft aligned towards the bolt
handle, insert the head assembly into the bolt body. If everything
is aligned just right, the bolt head will smoothly slide into the
body, rotating counter-clockwise as it goes in. If it doesn't completely
slide into the bolt body, follow the directions below.
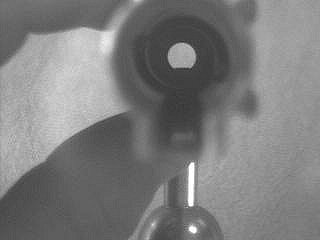

Hole that firing pin shaft passes through.
Insert the bolt head into the bolt body as shown.
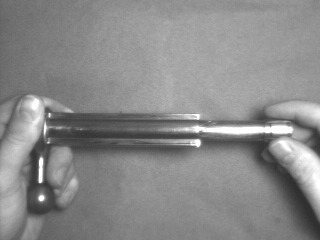
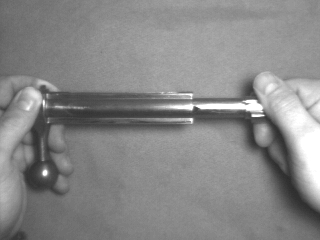
If it goes in about this far and then stops...
...push in and turn clockwise. In about 1/3
revolution it should slide in a bit like this.
Now, keep pushing in and turn it counter-
When the bolt head is fully seated and properly
clockwise. In about 1/2 revolution it should
aligned, it will look like this. Notice that the notch in
slide into the bolt body.
the head faces away from the bolt handle.
Step
4 - Install the extractor.
With the bolt head extended to the position shown below, put the extractor
into it's slot and push it into place. Rotate the bolt head counter-clockwise
while simultaneously pushing it into the bolt body, until it "clicks" into
place. Keep the safety lever in the "safe" position during this procedure.
Putting the extractor into it's slot.
Pushing the extractor into place.
Bolt head is extended about 1 inch. Notice that
slot in bolt head is almost lined up with the
extractor slot.
Rotating the bolt head counter-clockwise until it
Thumb holding safety lever in "safe" position.
"clicks".
Step
5 - Seat the bolt head.
Now give the bolt head a rap with a soft faced hammer and rotate it
into the retracted position.

Rap on the bolt head ...
... until it turns counter-clockwise and seats.
Step
6 - Install the cocking piece.
Hold the safety lever at the halfway position and screw the cocking
piece onto the firing pin shaft until it touches the bolt body. Now
pull the cocking piece back and move the safety lever into the "safe" position.
Let the cocking piece move inward under spring pressure. Holding
the safety lever in the "safe" position, screw the cocking piece onto the
rear of the firing pin shaft. If it's tab doesn't line up the the
notch in the bolt body when fully tightened, just unscrew it a 1/3 turn
or so until it does. Pull the cocking piece back and move the safety
lever to it's halfway position. Let the cocking piece move inward.
Hold the safety lever at the halfway position...
...and screw the cocking piece onto the firing pin
until it touches the bolt body.
Now pull the cocking piece back and move the
Let the cocking piece retract inward while
safety lever to the "safe" position.
holding the safety lever at the "safe" position.
Screw the cocking piece fully on. If it doesn't
...unscrew it about 1/3 turn until the cocking piece
line up properly...
tab line up with the notch in the bolt body.
Now put the safety lever at the halfway position
and let the cocking piece move inward.
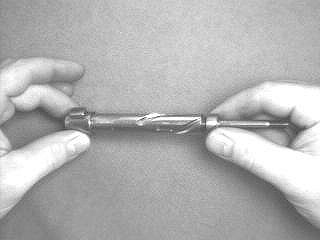
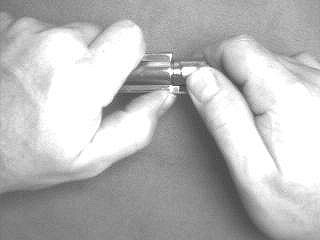
Step 7 - Extend the bolt head.
NOTE: Wipe any oil off the bolt so you can get a good grip on it.
The bolt head must be in the extended position for installation in the
rifle. I find it easiest to accomplish this by holding the bolt in
my left hand and pressing against the extractor with my thumb. Then
I grab the bolt head with my right hand and pull it outward while turning
it clockwise simultaneously until it "clicks" into place and locks.
The trick is to push with your left thumb and
pull with your right hand at the same time.
The bolt may now be installed in the rifle.
Holding bolt in left hand with thumb on
Pull & rotate bolt head clockwise until it
extractor
"clicks" into place.
For more info on the M95 follow this link to Randy
Rick's website http://www.alltel.net/~randyric/rm1895.htm
He has a lot of good stuff on this rifle and other Steyr firearms.
Questions/Comments? Send email to [email protected]