My Training Philosophy: Here, you're about to listen to me ramble on for a long time about the training of a horse. All right, you've been warned! Stage 1 This is the pre-saddling stage, when your horse is learning to trust and respect you. Many people never consider this stage, making the saddle-breaking stages that much more difficult. I personally believe in the use of a rope halter, as a horse is less likely to sit on your hands and will be more readily respectful of the thinner contact. In hand, I use many Pat Parelli concepts to command respect from the horse, as well as using transitions between whoa, walk, trot, and back up to command attention. In the end, I want an attentive horse that will lean forward when I lean forward, lean back when I lean back, and make immediate transitions in step with me. It becomes a kind of dance, with both handler and horse in tune with each other. A horse should never crowd me, pull me, or make random attempts to eat scenery. I want any horse I handle to be able to enter a showmanship at halter class at any given time. Equipment: Rope Halter, Lead Rope. Stage 2 This is the stage where the horse is introduced to basic riding concepts, including saddling and steering. The horse should recognize the saddle and all fittings as a "safe zone", which can be accomplished by several roundpen exercizes. The horse should eventually accept the saddle without fear, which eliminates future saddling dances. At the same time, using driving techniques, a horse can be learning to accept the bit and to turn in the direction of a pull. My bit of choice is a full cheek snaffle, as it's simple and encourages the horse to follow a pull. By attatching a pair of longe lines to the bit and standing behind the horse (out of kicking range, of course) one can teach the horse to stop, go, and steer before the horse is riding, which is a tremendous plus, as one has more power on the ground than on the horse's back. This is also the time to begin softening exercizes, teaching a horse to give to the bit instead of just sitting on or pulling against the pressure. This can be done at almost any age, from about the mid-yearling year on. Equipment: Fitted Saddle, Pad, Girth, Browband Headstall, Full Cheek Bit, Longe Lines. Stage 3 This is the first stage where someone is actually in the saddle. Once a person is accepted on the horses's back, it is time to reinforce what was learned during driving. Using the same verbal and rein signals used while on the ground, and introducing gentle leg pressure, reintroduce and reinforce stop, back up, turn, and to begin with, an occasional trot, ideally while in a round pen. At this stage, it's all about repetition and reinforcing until a horse answers these basic cues almost without thinking, much as a child learning to read spends much time at a basic reading level just reinforcing what he knows. To advance prematurely is to compromise the unquestioning obedience to these basic cues. As time goes on, and the horse is becoming more and more understanding, spend more time at the trot, working on steering and transitioning from there. Only occasionally, in a controlled enviornment such as a roundpen, and in the later parts of Stage 3, should one attempt a canter, as the horse will not be balanced or controlled enough to be able to respond to direction or transition cues. Here, as in any part of a horse's training, it is important to consider bit choice. Some people believe that it is important to start out in a shanked bit and transition down to a snaffle, but a shank is too complicated for a beginning riding horse. A horse that learns to steer and respond to cues in a shank will always be heavier and require more force to respond. Also, some people believe in a rougher mouthpiece, such as twisted wire, thinking that it would make a horse lighter. Here as well, I say NO. So, again, my choice here is a full cheek snaffle, eventually moving into an o-ring snaffle to encourage a horse to give without the encouragement of cheek bars. A piece of optional equipment here, safe to introduce later in Stage 3 is a martingale, adjusted so that the rein rings can touch the horse's throatlatch. This will remain neutral until the horse throws his head up to evaid the bit, giving you a new angle to touch his mouth in, thus teaching him that that's not the place to put his head. Other optional pieces of equipment are draw reins, which are excellant for dealing with a horse that springs off your leg or is stiff in the neck and poll. The sliding action of the reins helps compact and flex your horse's front end, which is helpful in many different exercizes. Equipment: Fitted Saddle, Pad, Girth, Browband or English Headstall, Snaffle Bit, Closed Training Reins (braided cotton is nice) or English reins, Crop or Dressage Whip. Optional: Martingale, Draw Reins.. Stage 4 In this stage, the horse has had at least a month of consistant riding and responds lightly and confidently to cues to turn, stop, walk, trot, and back up. It is at this stage that the training for a horse can split into either Western or English. Either way, this time should be spent on making the basics more fluid: beginning to balance the horse, correcting popped shoulders, encouraging a soft poll, and bending to the inside are all things to be worked on. Once the horse responds to these new cues, it is time to begin working on the canter. The reason the canter was not safe to work on earlier was described in Stage 3, but now your horse should be responsive enough to begin working on it. I'll describe this in detail, as it's an important and sometimes frustrating aspect of training. Going back to the trusty roundpen, begin balancing a steady trot using transitions up and down, trot-walk-trot-walk. When your horse is responsive and not rushing along, cue him up to a canter (The cue: inside leg anchored as usual, outside leg moves back to hold the outside. Squeeze.). If he simply begins rushing along at a speedy trot, pop him with a crop behind your leg until finally breaks into a canter. This will probably be very speedy and off-balanced, so encourage balance by sitting straight, not forward as you'll impulsively want to do. It will feel as though you're actually sitting a bit back due to the momentum. Carry a light, following contact: light, so that you aren't carrying him (you want him to be able to carry himself), and following, so that your transition cue will make sense.. Make one full circuit around the ring, then cue him to trot by resisting his movement, roughly if absolutely necessary. When he finally transitions down, rub his neck enthusiastically and coo to him to let him know without a doubt that he did a good thing. Make one circuit balancing the trot, then transition back up, canter one circuit, then cue to trot. Repeat until he's balancing himself enough to transition nicely, then do the same thing on half-circuits, and eventually quarter-circuits. The reason a horse initially canters with such speed is not because he just wants to go fast, it's because he's strung out, and can't do any transitions quickly because he'll essentially trip over himself. The difference between a balanced and a strung out canter is the difference between me standing in a slouch and standing properly. If I'm slouched, with my shoulders slumped, hips disengaged, leg cocked, chin down, back loose, then to do something quickly, say, do a high kick, I would have to engage all these things to be able to do it first. Otherwise, I'd fall down. Whereas, if I'm standing with my back straight, shoulders back, chin up, hips level, legs straight, then I can do that same kick with relative ease and speed. Once he's transitioning consistantly, begin working on his leads. If you're going on a circle that bends to the left, you'll want him on the left lead. Cue him to canter, and if he's not on the correct lead, immediately transition back down to the trot, and ask him to canter again, having a slight bit more weight on the inside rein than the outside, to encourage him to take that bend and pick up the lead. Don't ask for lead changes yet, as your horse is not ready for them. Equipment: Same as Stage 3. |
 |
 |
 |
| There should be enough room to fit 2-3 fingers between your horse's withers and the pommel of the saddle. If it's any higher, then it most likely means that your saddle is too narrow and is pinching his back and spine. If you can't fit at least two fingers in there easily, then your saddle is too wide, meaning that it will be riding on your horse's withers. All these problems can create tremendous pain in the horse's back, and could possibly lead to problems that can only be corrected with professional help, which takes time and money and tremendous pain on your horse's part. So take the time to properly fit your horse. A good saddle fit will eventually pay itself off. |
There should be a straight line from ear to shoulder to hip to heel. My line is a bit curved here, as it's a less-recent picture. My position (as well as MM's) has improved since then. |
| Some good online Resources: Horse Illustrated I use the messageboards. 2003 Dressage Tests (Adobe) These patterns are really good to ride. |
| Products I use: English Wintec Saddles AP 2000 and CC (you can't beat a universal saddle) SLT's Essex English strap goods (cheap, but soft and durable) Bits: Copper Roller Dee Hunter Dee Full Cheek French Link O-Ring Western Circle Y Saddles, Strap Goods, and Show Equipment Showman Headstalls Single Ear w/Bit Clips Bits: Full Cheek Correction S-Sh (adv) Grazing (adv) Combination (M-Sp.) Items I want: Bosal Felt Cutback Pad |
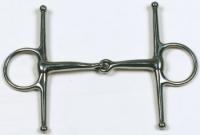
A full-cheek snaffle is an irreplaceable piece of equipment when it comes to starting horses or retraining older horses. For the horse that never learned to be an automatic steerer, this is excellant to use with the softening exercizes, as it won't pull through the mouth and encourages the horse to follow the pull of the bit. In case one cannot be used, a dee ring snaffle will do. |
Questions? Comments? Think I'm Wrong? Just want to Argue? Contact Me! [email protected] or Instant Message: CocoBirdi |
Telling Leads Not sure what lead you're on? It's actually simple, once you know what you're looking for. Once I discovered it, I didn't know how I'd missed it. Left and Right Lead: If you look down at the horse's shoulder, if you're on the left lead, the left shoulder will be the more forward-reaching shoulder. Your left hip should also be angled more forward than the right. Vice-versa for the right. Counter-Canter/Crossfiring: Instead of a gentle rocking motion, it will feel as though your horse is bending one direction in front, another direction in back, creating a wierd-feeling canter. Why? Because he's on one lead in front, the other lead in back. Usually this is not desirable, and is never desirable in the early stages of training, so correct it the moment you feel it. |
| Western Stage 5: At this stage, you can either transition to a bosal or remain in an o-ring snaffle. This is also when you begin to introduce neck reining to the horse. Begin transitioning over to neck reining slowly, introducing it by many many little circles, eventually widening the area to the entire arena or riding area. By now, the horse is responding to commands fluidly and confidently, and should be a pleasure to watch as well as ride. Now, you should be working on lightening your cues, such as a simple lift of the reins for a stop, and a simple point of your hands for a turn. To best train in this, use heavier reins, such as braided cotton, so that the horse will feel the shifts. Strap nylon split reins are not recommended, as they tend to be pretty light. For even better results, shorten your horse's mane by either french braiding down the neck or cutting it, so that the horse will be able to feel the reins equally well on both sides, and not be hampered by the mane. In this stage, you will begin introducing a rudimentary lead change, and honing it until the horse will switch leads on cue in the middle of a canter without falling apart or speeding up. By the end of this stage, the horse should be responding to light neck rein cues for all gaits and directions, and not requiring a constant contact to carry a steady pace. This is one of the longer stages, as it requires lots of time to hone these skills. Equipment: Same as Stage 3, except a possible addition of a bosal. Western Stage 6: Traditional cowboys did not touch this stage until their horse was five, having been started around 2 1/2 and ridden consistently. By this time, the horse is responding lightly to the rein being lifted to whoa, and laid against the neck to turn. He should not require any contact. Now, and only now, you can transition your horse into a shanked bit. To begin, use a shank bit with a single-jointed mouthpiece and swept-back shanks to introduce your horse to the new feel. Continue honing responses, ensuring that your horse will respond as lightly in the shank as he would in the previous bit. When he becomes accustomed to the new balance, and responds lightly, then you can move into a correction mouth shank, which will introduce the final port while still having the flex of a broken mouth. Continue honing. Equipment: Fitted Saddle, Pad, Girth, Optional Breastcollar, Shanked Bit, Curb Strap or Chain, Reins, Headstall (While a Browband is required for a Snaffle Bit, a Leverage Bit is not so prone to causing the Headstall to fall off, so if You would like to switch to the ever-fashionable Slip Ear Bridle, Now would be the Time.) Western Stage 7: By this time, your horse should be responding to feather-light shifts in the reins. He should respond immediately to all cues, and be balanced and enthusiastic. Introduce your horse to a grazing or spade bit, work to ensure that he'll accept it, and call your horse broke. Helpful Resources: Cross-Train Your Horse by Jane Savoie ---an excellant book for riders in any discipline looking to improve their riding. Uses dressage to improve any style. Barrel Racing the Wright Way by Sam and Martha Wright ---a must-have for any speed event rider. Horsemanship by Xenophon ---a well-known resource that is still very valid today. (note: this was written by an ancient Greek cavalry officer, so it was never copyrighted. Because of this, you can read it online for free. Horse and Rider (magazine) ---if you subscribe to only one magazine, let it be this. Always has useful articles on training, showing, and other stuff. Except, English riders: never take the English articles seriously. They show only the Western-English way, which I do not support. Note: I haven't had the opportunity to work through all the levels myself, so the last stages are a bit sketchy and could possibly be wrong. I'm still learning! |

|
  |
| Have an opinion on what I've written? I appreciate any comments! Sign my Guestbook! |
Selecting Tack Don't be hasty in buying tack. Especially with investment items, always do your research on the average style prices and dependable brands. By doing your research, you'll know what is the usual price for a particular quality, and you'll recognize a bargain. Know what you're getting. For example: I'm looking into buying a set of show romal reins. I've researched the use, so I know I'll be able to use them. I know what good and bad rawhide braiding looks like from firsthand experience. Using the internet, I've looked at many many many different romals at many many many different sites, and discovered that the price ranges can range from $50 for ultra-cheap quality, to $700 for ultra-high quality silver loaded romals. The price range I'm now looking at is $250 for a medium quality romal in 12 plaits, with either little or no silver, since I like the look of a minimum-silver romal. What I Came Up With: I really like the look of Champion Turf romals for $205. I like the price of the C/E Leather's romals for $159 with dependable, though simple, looking braiding. Dale Chavez is a top-line show tack company, and I found a bargain in a 12-plait for $265. I haven't picked one yet, but I'll probably go with the Dale Chavez, since the reins will definately be attractive and appropriate in the show ring. Bad Example: When I was first getting into buying show tack, I was looking for a silver browband headstall for a bargain price. I did not take into consideration brand, quality, or do any research. While searching on ebay, I found what appeared to be an attractive ferruled headstall/reins/breastcollar set for an unbelievable $100! The pictures were slightly blurry, and there were NO closeups of the tack at all, but I bought it. What I got was ultra-cheap leather, horrible fake silver with scratched engraving, and split reins that were too short and too heavy to lay over the horse's neck. I still have the set, and it has the place of shame at the bottom of a tack trunk. Know your brands, Know your Equipment. |
 |
| The Canter-Walk Transition Many times when people ride and train, when they ask for canter from the walk, they allow their horse to sneak in a few or even many steps of trot before transitioning to canter. While this does make it easier for the horse, a walk-canter transition encourages the horse to rely on tempo and strength rather than momentum to switch gaits. Also, relying on momentum gives the horse a much more rushy canter when he finally reaches the gait, which is not desirable. Collecting, carrying, and lifting your horse when asking for the canter or walk, as well as initially tapping his haunches with a crop, assists him in transitioning. At first your horse will find it difficult, and will continue to trot. Transition up and down a number of times over several rides, and your horse will begin to gain the strength and collection needed for this awesome maneuver. When you finally get a good transition, the feeling is amazing. |
| This is NOT a definitive source. I am still learning myself and have not even managed to try out all of these levels, as my horses are not there yet. Consider this food for thought, and do your own, more in-depth research to find the little details to each idea before trying something out. |