This page will detail the replacement of the full length floorpans in a 1967 Mustang Coupe. This undertaking is not for the weak of heart, it takes alot of nerve to cut up a major protion of your car with a SAWZ-ALL, chisles, cut off wheels and a Spot Weld-Cutter.
Tools used:
Tape Measure--Used to take measurements before removal so you can put it all back together correctly.
Sawz-all(recirocating saw)----for major panel removal.
Cut-off Wheel---for minor trimming and tight area metal removal.
Offset Right Angle Die Grinder--A must have for fine triming and removal of spotweld high spots.
Right and Left Cut Aircraft Shears-Used to trim Sheetmetal
Snap On RotoBroach Kit----used to cleanly remove spot welds and cut new holes in new panels for new welds.
Eastwood Co. Interpanel Clap Set--Used to closely hold and align panels to be welded.
Mig Welder
STEP 1---Measurement and Diagram.
After removing the interior, measure and take note of all spacial relationships. This includes measureing and marking locations for Seat Belt mounts, seat track mounting holes, location of seat risers, etc....Make sure to get this right otherwise you will have alot of work to do on re-assembly to fit everything correctly (don't want that seat in the wrong place now do we???)
STEP 2---Floor Pan and Seat Riser Removal.
Using your best judgement, remove all the areas you intend to replace using the tools listed above, this meant the whole enchilada for me since my entire floor was wasted on the drivers side....make sure not to trim too far, you can always take more off....it is alot harder to put metal back on....this is especially true in the area of the tranny tunnel.
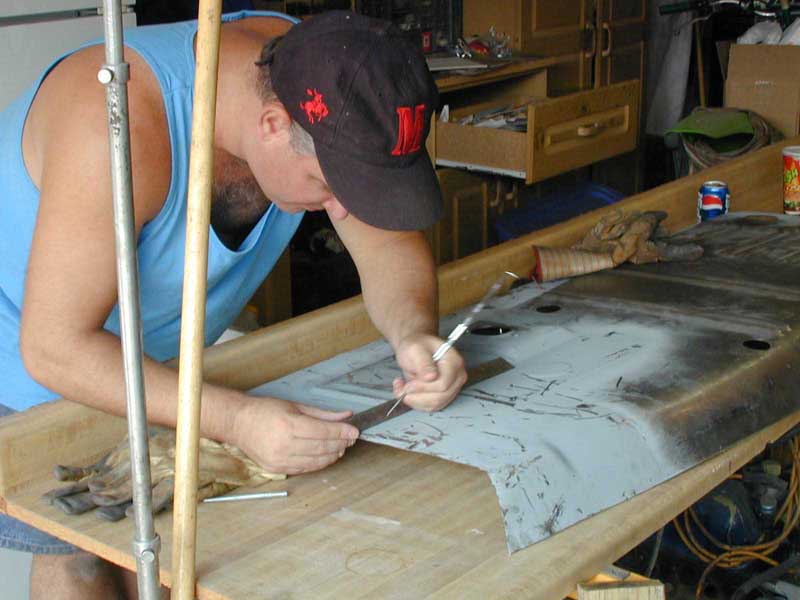
After Removing the seat riser and the major portions of the panel you can lay your new panel in and get an idea of just how much metal you need to remove. As your panel comes closer and closer to fitting, you can start to scribe or trace the overlapping sections as a guide to what needs to be removed.
Take your time!!!This step took me most of a week, but I was very conservative and careful....baby steps!!
I removed large amounts of sheetmetal witht he SAWZ-ALL And Cut-Off Wheel, smaller amounts with the offset shears and fine trimming with the offset die grinder using 3M rolec discs.

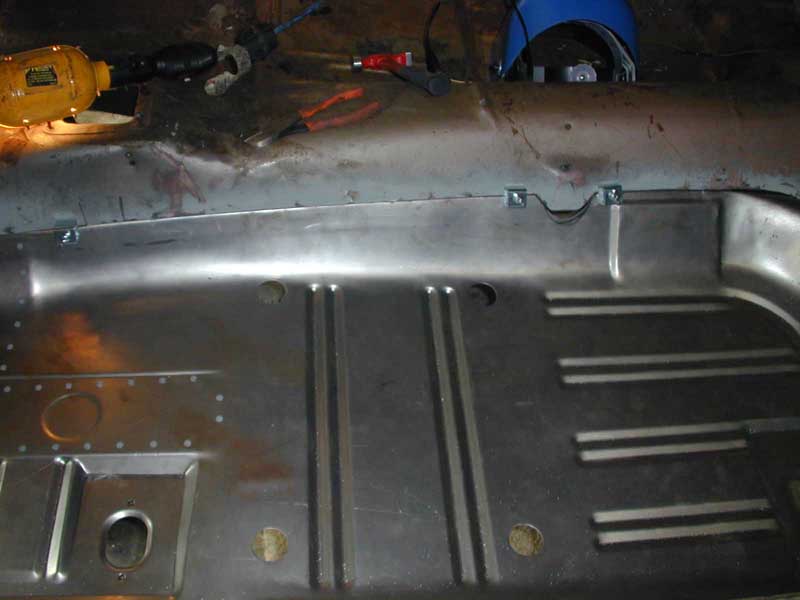
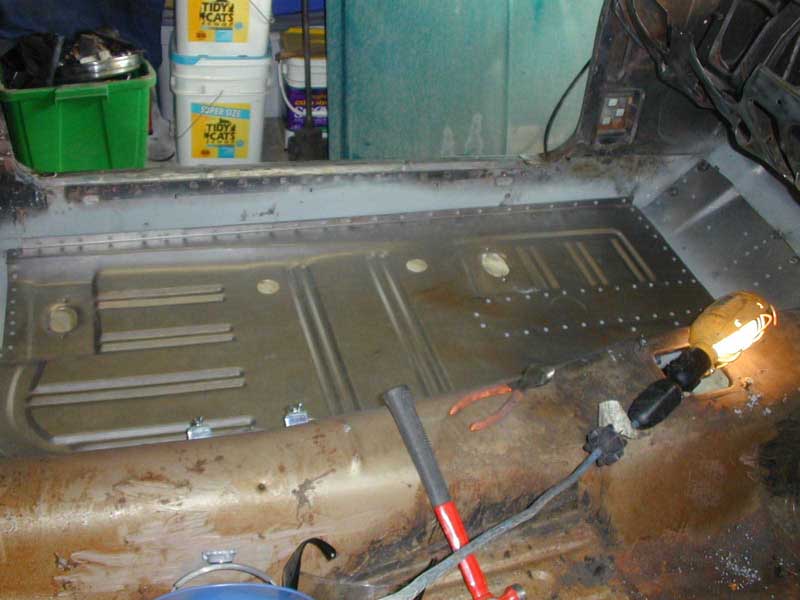
This picture (above)shows the rear area of the floor (just infront of the back seat) having been cut out.The outer half of this area is Overlapped from the factory and will be in this case as well. From where the panel rises to underneath the back seat and all the way around, up the tranny tunnel to the front will be butt-welded.
This picture shows the front area of the floor removed and the toeboard replacement pannel partially fitted. (Note the gaping hole in the passenger side toeboard!)
The area above the torque box and where the floorpan replacement pan have to be trimmed so that they fit together like pieces to a puzzle, this takes a tremendous amount of time, Of course you can overlap the panels, but I saw this as an area of future concern and I do not want to do this again, any area where two panels overlap can trap moisture and when that happens, rust happens....the goal here is to repair the floor to last another 35 years.
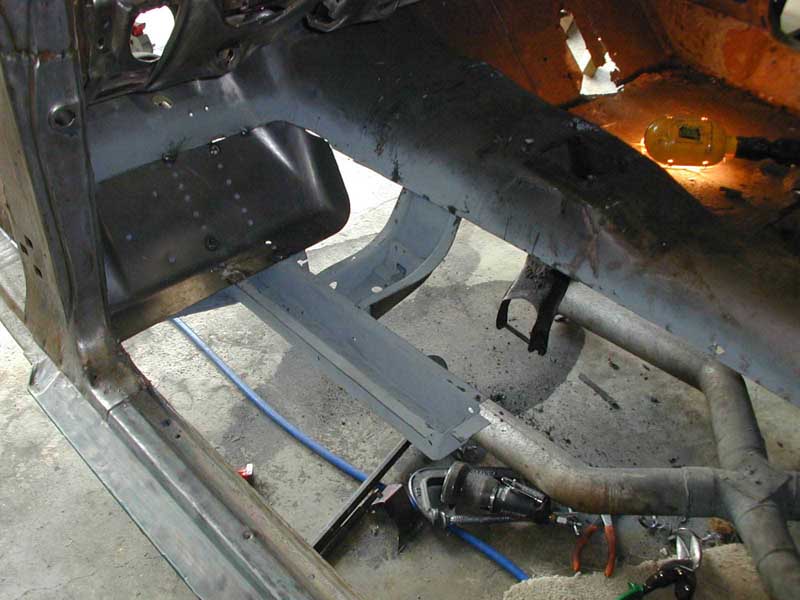
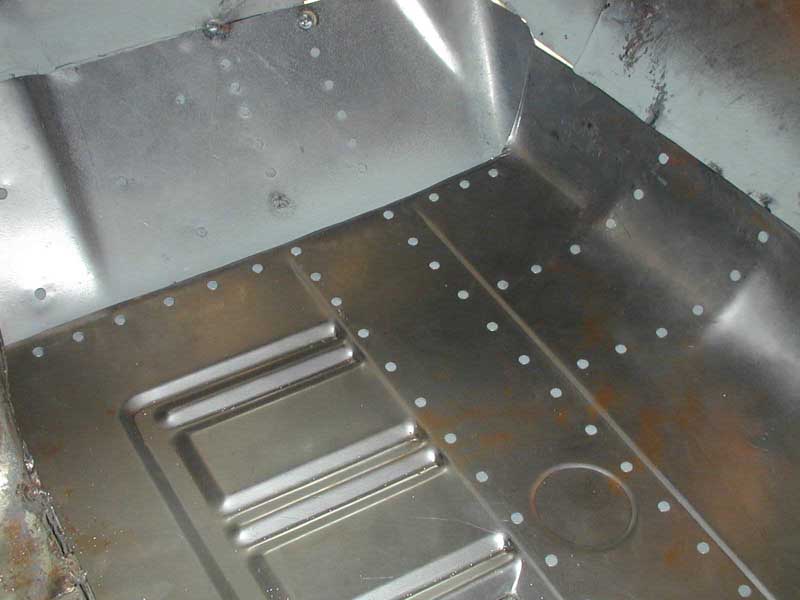
By now you think I am crazy, but this can be done. This picture details the area where the replacment floor pan meets the tranny tunnel (which is not being replaced), notice the Inter-Panel clamps I bought from Eastwood Co., these are a must for this type of welding. These clamps allow two pieces of sheetmetal to be aligned, clamped and seperated by only .090 inches...perfect gap for the mig weld to be applied to join the panels.
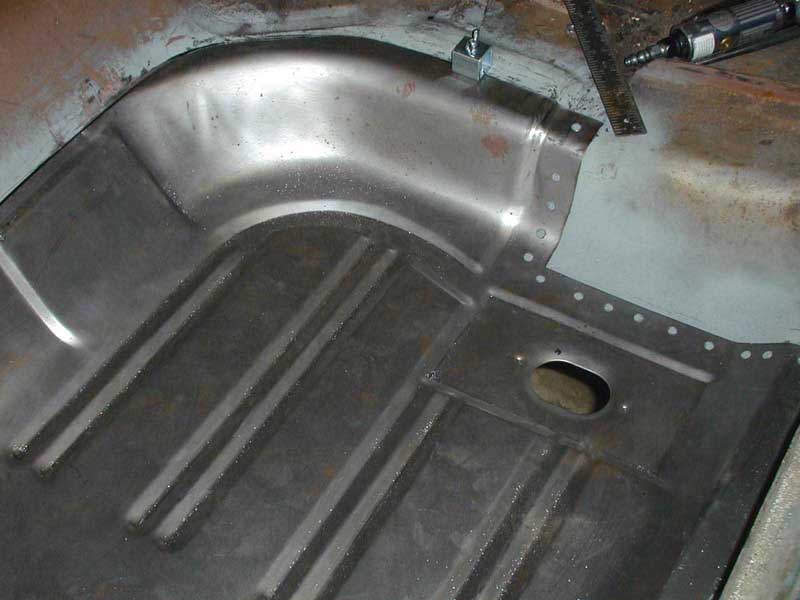
This picture details the frontal area along the tranny tunnel and the toeboard, notice the holes drilled in the new sheetmetal for the spotwelds along the framerail and transmission cross-member (and also along the inner rocker panel in later pictures.) You can also see where I took off too much metal along the junction of the toeboard, trans tunnel and floorpan---the big gap near the top of the picture...this was not fun to fill in!!! You should also notice the few spotweld holding the toeboard in place, only do a few until you are sure everything is going to fit correctly, then you can go back once both pannels have been trimmed and fitted and finish the toeboard and move on the the floorpan. 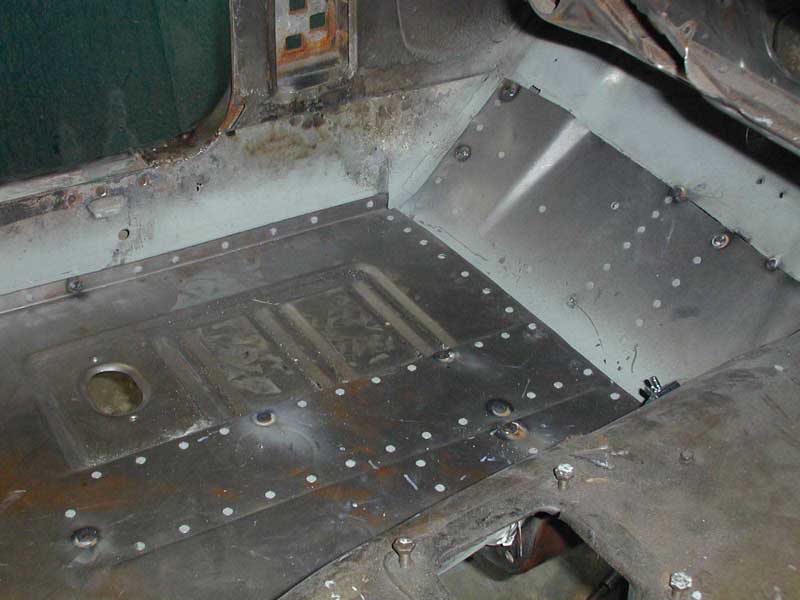
Note: the Grey Primer is cold galvinzing compound, which can be welded through, which I applied to all surfaces that were to be un-accessable after welding that could not be coated with rust preventative paint due to the welding...go lightly on this because if it is too thick, it makes for messy welding, hopefully this will provide some protection for the future.
In retrospect, I would only use the Cold Galvinizing compound in areas that will be un-accessable after welding, I made the mistake of spraying this in a number of areas which I later had to clean with a wire wheel just so I could get a good weld.
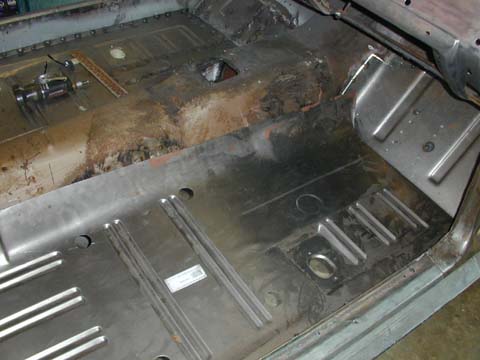
AS you can see, the passenger side is the same story, just get the fit right, shooting for the .090 gap between the floorpan and what is left of the tranny tunnel and the clamp it up and butt-weld it. Some people chose to overlap and weld, but this can leave and area which, if not sealed correctly, will trap moisture ane rust out again...no thanks, I don't want to do this again!
This site and the information found herein are intended solely for entertainment. I am a self-trained "shade-tree" mechanic with no technical automotive schooling, rather just some good old fashioned commnon sense and an instinctive mechanical ability. NO warrenties or guarentees are made for the correctness of any information or technique used in or seen on this site.