|
This guide provides a pictorial description on
replacing the timing chain tensioner on the classic SAAB 900 16V. The
tensioner featured here is the later type used on the B202 engines. Read on and
enjoy !
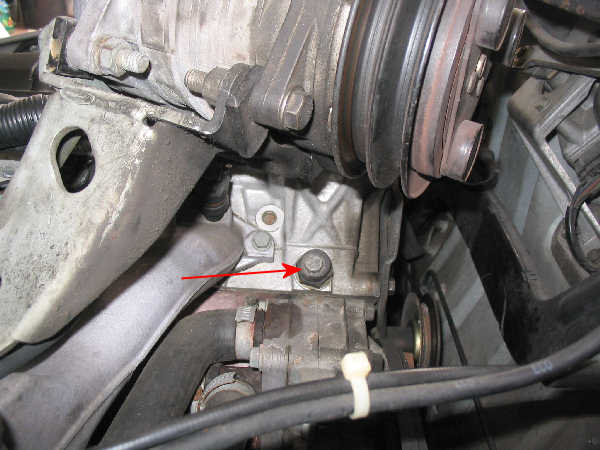
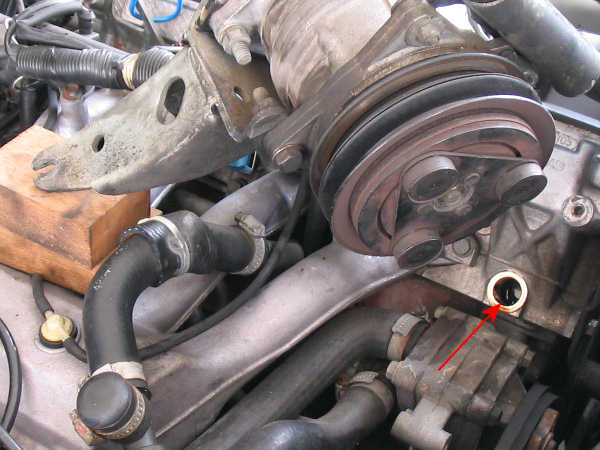
Tools used : 6 mm Allen Key, 10, 12 & 13 mm ring spanners, 12 mm & 27 mm socket and drives, "S-hooks", torque wrench, screwdriver Noise from the timing chain can be due to a worn timing chain, worn chain guides, sprockets or the tensioner itself. Removing the tensioner provides a pretty good picture if the chain is worn. The Tensioner is located on the cylinder head below the AC compressor bracket. Without dismantling anything, the tensioner can be seen via a hole on the bracket. Removing the tensioner requires removal of the AC compressor bracket. The AC compressor need not be removed from the bracket. The bracket is secured to the head by two 6 mm Allen screws and one 12 mm screw at the bottom. Start by removing the AC belt then the two Allen screws securing the AC compressor bracket as shown below.
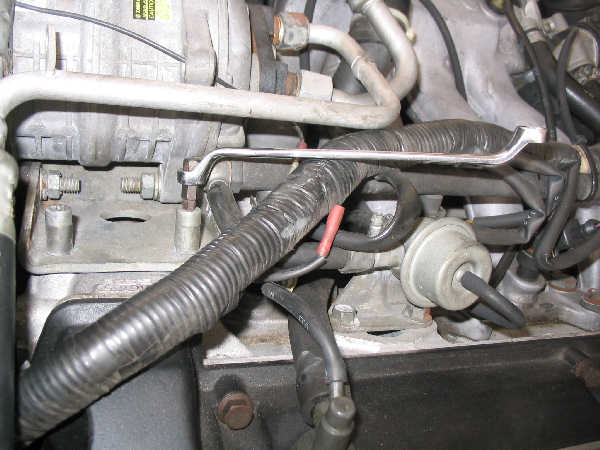
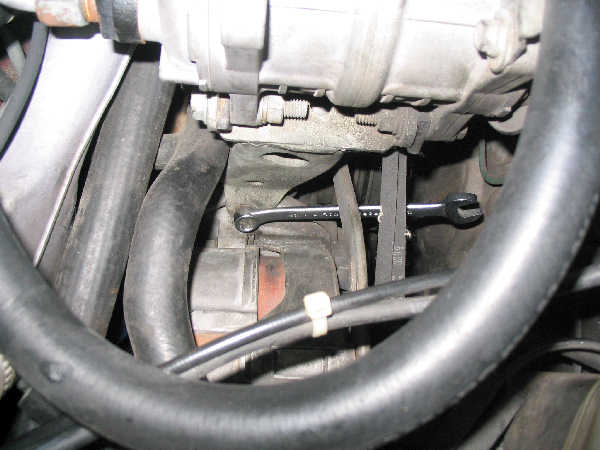
Remove the two belts driving the alternator and water pump. Reinstalling the belt can be challenging, therefore I remove the water pump pully (secured by four 10 mm screws) to free the belts. Then remove the top screw on the alternator sliding bracket and push the alternator towards to left wheel housing until the screw at the bottom of the AC compressor bracket is visible. I highly recommend to disconnect the battery terminals (negative side will do) before proceeding with this. The 12 mm screw at the bottom of the AC compressor bracket (picture below) need not be removed completely as the bracket has a cutout to allows the bracket to slide out upwards. Loosen it sufficiently to allow the bracket to slide out.
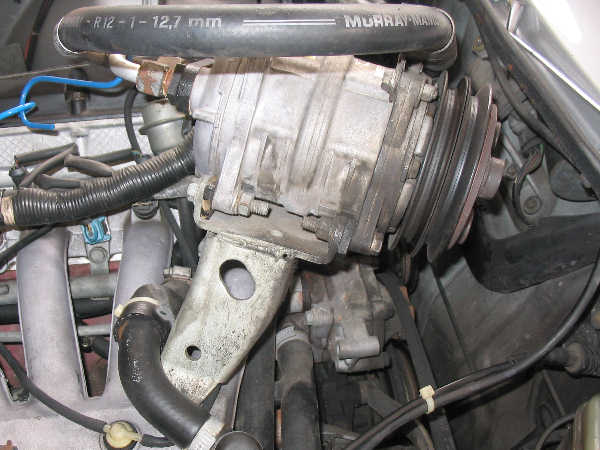
Lift the AC compressor together with the bracket and let it rest on the inlet manifold as shown below.
I used 2 pieces of "S-hooks" to secure the compressor to the engine lifting bracket and prevent it from tipping over (picture below).
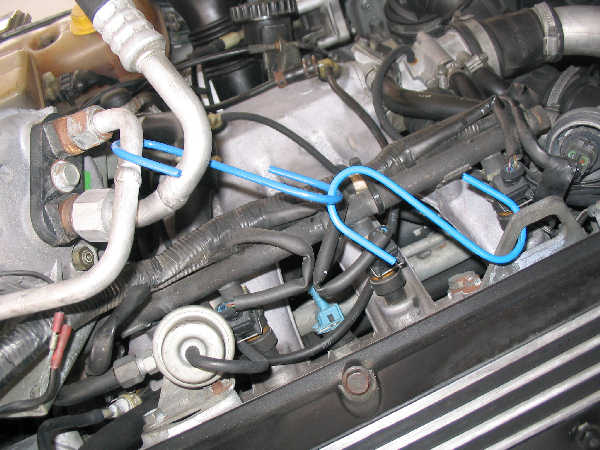
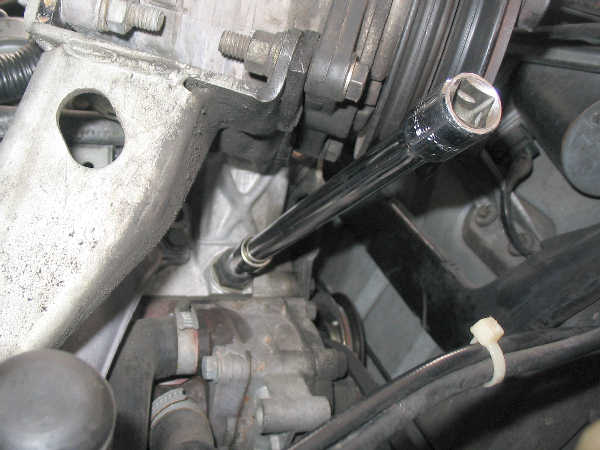
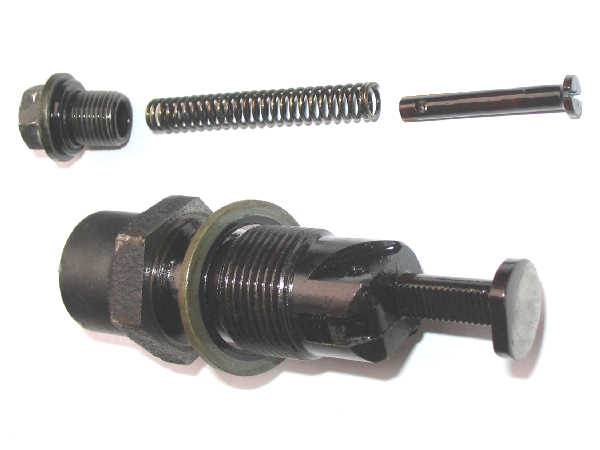
The chain Tensioner unit is now clearly visible (picture below). Remove the 12 mm screw using a socket and extension bar. Remove the spring and plastic plunger, taking care not to drop it into the engine bay.
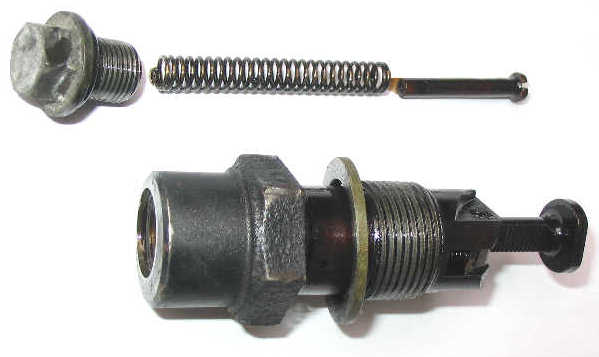
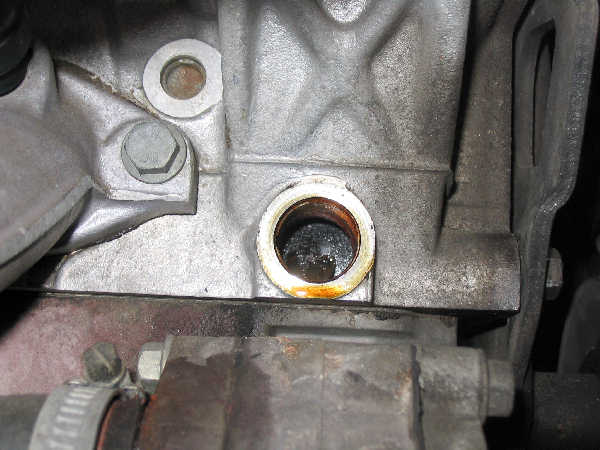
Remove the Tensioner completely using a 27 mm socket spanner. Below is a view of the side of the cylinder head with the tensioner removed.
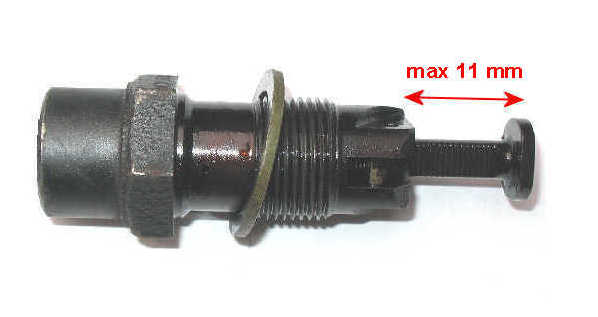
Examine the length of the protruded section of the tensioner as shown below. If the length exceeds 11 mm, the timing chain or chain guide is worn.
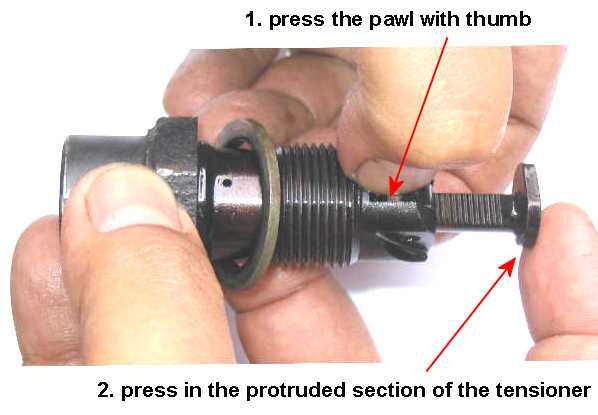
To reinstall, press the protruded end completely back into the tensioner housing while pressing the pawl using your thumb or a screwdriver. This is done with the spring, plunger and screw uninstalled.
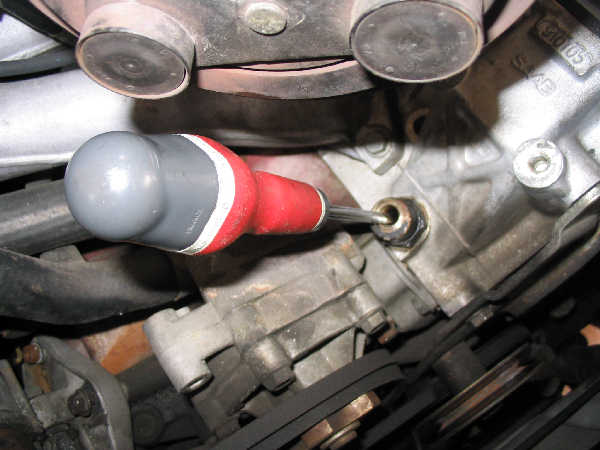
Refit the tensioner unit to the cylinder head and tighten to 63 Nm (47 ft-lb). Using a screwdriver, press the tensioner out as shown below until it is taut against the chain guide.
Then reinstall the plunger together with the spring and the 12 mm screw.
Reinstall the AC compressor bracket, drive belts for the alternator & water pump, AC belt and finally the battery terminals and you're done !
|