| XMODS EVOLUTION DEANS 5 - DEANS 6 - DEANS 7 CELL TUTORIAL |
| PART 3b: INSTALLING THE 6 CELL |
| If you have any questions, please email me. [email protected] |
 |
 |
 |
 |
 |
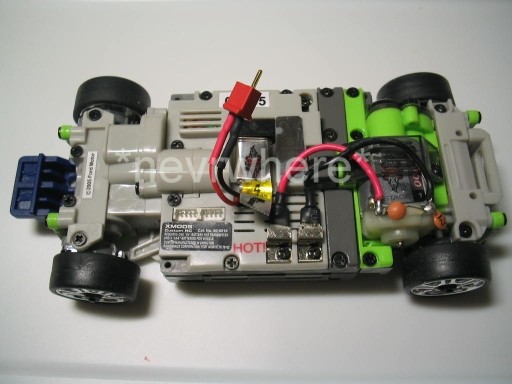
| Once you have the chassis plug installed you are ready to plug in the 6th cell battery holder. Simply install the batteries in the car and 6th cell battery holder, then plug it into the chassis plug you had just installed. |
 |
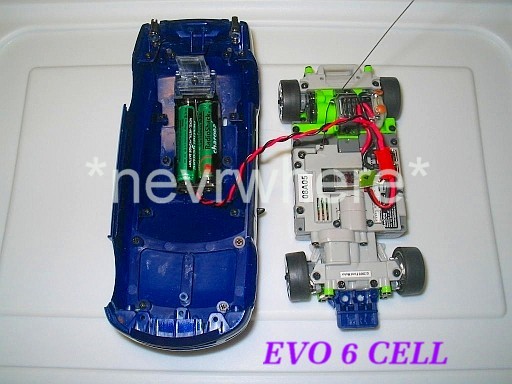
| MOUNTING THE 6TH CELL |
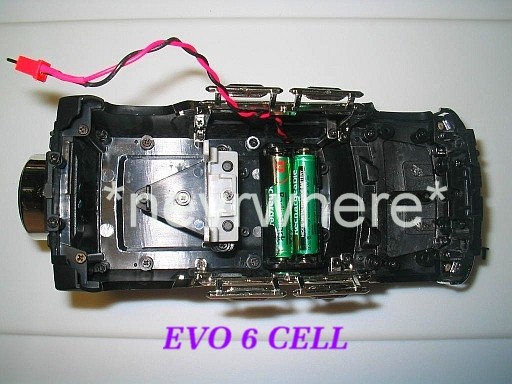
| The picture to the left is that of the EVO Mustang. It shows the location of the placement of the 6th cell battery holder. In order to place it here, I had to remove the L-supports near the rear body mounting clip. (see next pic) |
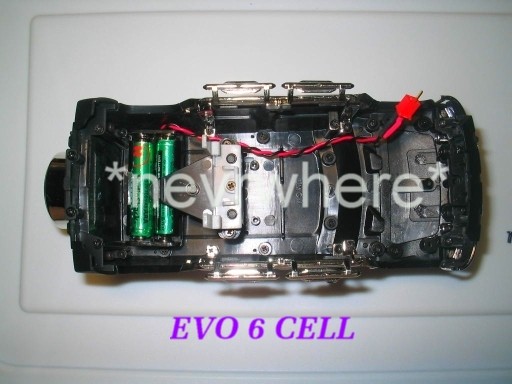
| For the Mustang, I had to remove the L-supports to allow the 6th cell battery pack to mount further towards the rear. In some cases you may need to remove the lights mounting posts. It was not necessary to remove the light posts on the Mustang. I suggest with all the evo body styles to first try to mount the 6th cell holder without cutting anything away. If you cannot fit it underneath the body, then I would first remove the L-supports. I used a flush cutter to cut them away but you could also use wire cutters, dremel, exacto, or anything else that will allow you to remove the L-supports. After the L-supports have been removed, do another fitting. If it still does not fit then I would suggest removing only 1 light mounting posts and do another fitting. Once you are able to fit it underneath the body you are done. Use the same method with the G35 and Evo8. |
| The Pontiac Firebird did not require any body modification at all to fit the 6 cell battery hop-up. It will even fit the 7 cell hop-up without any modifications in the wide rear wheel set up. |
| The Hummer also did not need any body modifications to install and allowed alot of room for installing the 6 cell battery mod. Here are a couple of pics showing a couple of locations for mounting the 6 cell battery mod in the H2 Hummer. |
| F150 pics coming soon, but it will accept the 6 cell hop-ups and the 6th cell holder can be simply mounted in the bed of the truck. |
| Dyno testing using the Tamiya Speed checker had the following results using a stock evo car, 12:23 gearing, 6 cell battyery hop-up, and evo stage 2 motor 30,000rpms = TOP SPEED 30 mph / 48kph. WOW!!! Nearly 3 times the original speed of a stock xmod car!!! |
| Though all modifications necesary for fitting the cell mods under the body are the responsibility of the buyer, I will show you the techniques I use when installing them in my own cars. |
| The same techniques should work with most of the original xmods as well. These techniques will not work with the Corvette and NSX cars due to lack of space between the chassis and the body. |
| NOTE - 7 CELL: When installing the 7 cell the same techniques apply as you used to install the 6 cell. This does not mean it will fit under all body types. I've tried it with the Mustang and it does not fit. It does fit in the Truck bed and in the Hummer. It does fit very well in the Pontiac with the wide wheel set up without any modifications at all. Other body styles have not been tested for fit. All body modifications necessary to fit the cell pack under the body is the responsibility of the owner. NOTE - COOL DOWNS: As with any type of increased power supply you should give adaquate cool down time after each run. Xmods recommends a 20 minute cool down for every 15 minutes of play time with a stage 2 motor. When up grading to even higher power levels you should decrease run times to allow for longer cool downs. |