 |
|
|
|
|
|
|
|
|
|
|
|
|
|
|
|
|
|
|
|
|
|
|
|
|
|
|
|
|
|
|
|
|
|
|
|
|
|
|
|
|
|
|
|
|
|
|
|
|
|
|
|
|
|
|
|
|
|
|
|
|
|
|
|
|
|
|
|
|
|
|
|
|
|
|
|
|
|
|
|
|
|
|
|
|
|
|
|
|
|
|
|
|
|
|
|
|
|
|
|
|
|
|
|
|
|
|
|
|
|
|
|
|
|
|
|
 |
|
Pictures taken using a sony MVC-CD350. Don't spend a dime on this camera. Get a Canon or something else besides a Sony. |
|
|
|
|
 |
|
|
|
 |
|
|
|
|
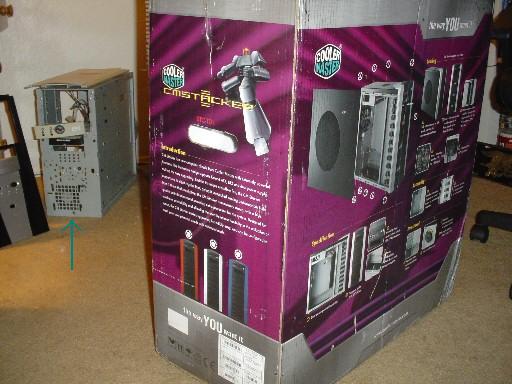
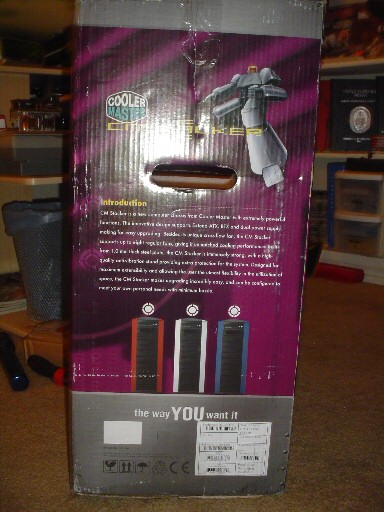
Ok, to start, here's the box. I don't know why, but other sites seem to like posting pictures of the boxes new toys come in...so I'll try it as well.
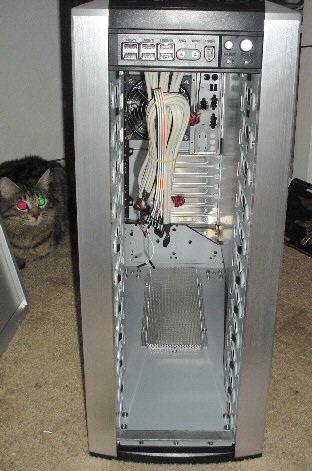
The green arrow is pointing at something you should not pay too much attention to. It's my very first PC I built back in 1999. I'm fixing it back up to give to my dad for father's day.
On the right, there are pictures of the CM stacker in Red and Blue variants, so expect them? The regular aluminum looks better IMO. |
|
|
|
|
|
|
Which brings us to the point of this page being made. I can't find any in english! That, and some things need to be pointed out to bring to light what a kick ass case this is!
Venturing over to Coolermaster's forums, some questions have been brought up and I'd also like to bring to light some things that aren't too clear when you decide to purchase. It's also been brought up over at my favorite hang-out, the MaximumPC forums.
The first being: this case IS brushed alloy. The CM site shows a black case for some reason. I had intended to paint the case with a Petronas FP1 theme (my favorite SBK team this year, that and it's a cool green), but when I opened the box and drug it out to witness a full alloy case...well, I changed my mind! |
|
|
|
 |
|
|
 |
|
|
|
|
|
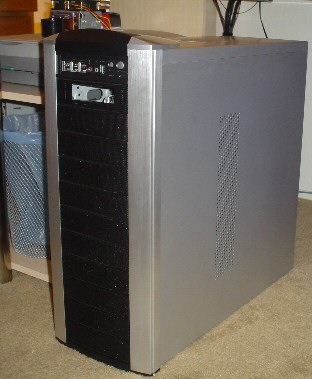
Here is the CMstacker standing tall. And it IS tall (more on that later). The holes you see here on the side is the inlet to the Crossflow fan. Not one imperfection was found in the finish in or out. The case has alloy panels on all around and the black area is perferated steel.
The hump on the top is the only plastic on the outside. The hump has "Coolermaster" on the top, and "CMstacker" on the front angle. Underneath it is a map to Jimmy Hoffa's body. |
|
|
|
|
|
|
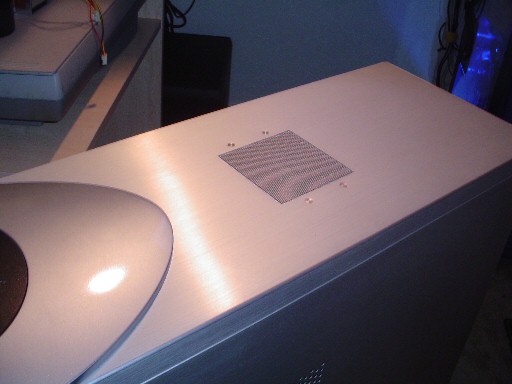
Here I'm trying to show the finish of the case. In the Coolermaster forums, an individual had stated that a pre-production unit had a circular dent on one of the corners. Again, I vouch that not one knick was anywhere on this case. Great craftsmanship abounds throughout this unit.
The blow hole is also of good quality. The screen is not just flat and bolted up to the panel. It bends down around the fan and is removed as a unit. The fan included is a quiet 80mm coolermaster unit. No real need for an extreme blowhole fan here folks. |
|
|
|
|
|
 |
|
|
|
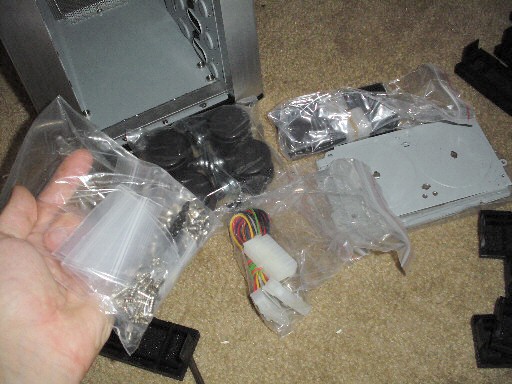
Before we dig further into this case, looky here! This is the most hardware I've ever recieved with a case I've purchased. There's enough stuff here to build 3 average towers. Given the amount of bays in this thing, I suppose you could use all this filling it up if one was so inclined. Not me though. Also shown are the wheels that can be optionally mounted instead of the cases feet/pads.
There's some black screws in the bag that I don't know what they go to yet. But I'll keep playing around until I figure it out;) |
|
|
|
Let's get right to the front bay covers... |
|
|
|
 |
|
|
|
Here's a close up of the bay panel for the floppy drive. For you guys/gals that think you're elite and don't need a floppy, don't throw this away. Someday you may decide to use a RAID array or an HDD controller card and WILL USE A FLOPPY. Sad, but true (don't sue me again Metallica...please!). The rest of the panels look like this, minus the big square hole. Natch!
Also visible farely well is the front I/O panel. Lots of stuff to plug into here. If I had made this thing, I'd have a perferated door covering it up, but that's just me. I have a Soundblaster Audigy2 Live! Drive that has these goodies and this only adds USB for me. |
|
|
|
 |
|
|
|
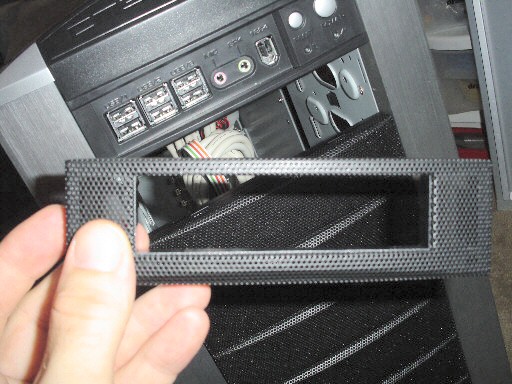
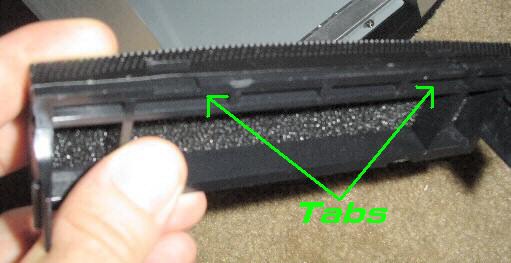
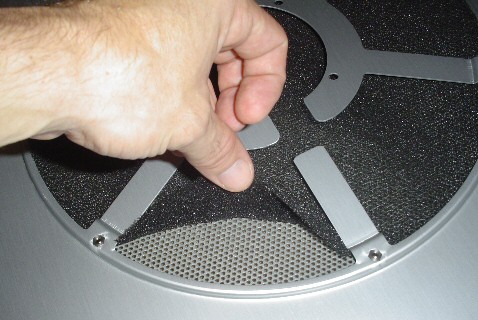
Here's a blurry, out of focus close-up of the other bays showing the filter media that is housed in each one. The screen is formed around the plastic frame and held on with 4 tabs. You don't need to take it off! If you want to clean the filter by itself, you can work the media out of the frame and slip it back in easier than you can pull the metal mesh off. I'd rather just wash the entire thing in the sink or use some air and blow it out. But...
If you want to pull it off, You'll need 2 flat tools at a time to pull the screen off. Don't try any less as it's almost a moot point. Along with these tabs, there's a little square tab on the sides that also hold on the screen. It's almost like these were designed to not really come off, but give you kind of the option anyway. Weird. No biggy. Again, just hose 'em off with the media in place...frame and all. Set them out to dry and re-install. |
|
|
|
 |
|
 |
|
|
|
A couple ways to remove the front bay covers. |
|
|
|
|
|
|
|
|
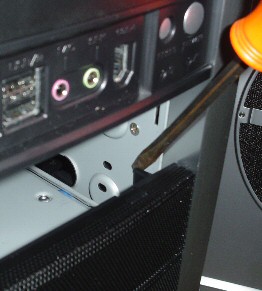
From the outside. This is only possible once you get one cover off. I pulled the Floppy drive bay off first, but it came to my mind as I write this that in real life and in use, there'll be a drive in there. So... |
|
|
|
|
|
|
...go at it from the inside. Again, in real life, drives will be in here. You may end up pulling the one directy over or under the bay you intend to pull, then get the one with the drive (which then is covering the tabs), you'll go back to the front. It's not brain surgery.
Plan your cleanings far apart. This isn't fun, but unless you have this thing in a sawmill, I don't see having to clean all that often. |
|
|
|
|
|
Speaking of this, have you ever pulled the face plate off your current case and seen the filth back there!? It's a mess. I just did my cleaning on my SOHO tower and I flushed a couple giant bunnies out from their hiding place. I think a tumbleweed was even in there:p Which brings to light this design's strength. The entire front is pretty much open to airflow into the case. There's no bulkhead between the cover and your PC's guts like a typical case has to trap dirt. The filter media should do a better job than no media at all (like most cases). While some would think of this as bad because dirt doesn't stop and gather behind the face, but rather enters the case. But in my idea, a regular puff of air on the hardware and a wipe of the case's bottom is easier than doing the same PLUS yanking the front panel off and getting the junk out. And, again...done on a regular basis, big mounds of fluff should never accumulate anywhere on this thing. |
|
|
|
 |
|
|
|
 |
|
|
|
|
|
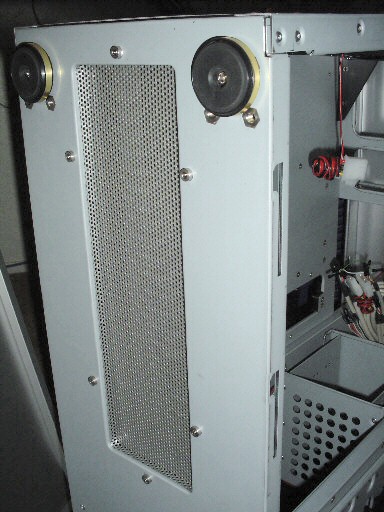
This shows my grubby mitts pulling up on the side panel's filter. It's the same media used in the front bays. I didn't take many pictures of this panel as I'm not using it (I also purchased the custom side window).
This panel has a huge port with the same perferated hole pattern as the front, except it's grey instead of black. It has a mount for another fan if you really feel the need to install yet another fan still.
The way they designed the panel, both of the sides can be installed on either side for the BTX switch-over. For some reason, this thing looks like the Millenium Falcon to me.
I dunno... |
|
|
|
|
Here you can see my kitty Desmo in full duplex mode. That shit is weird. Oh ya...
This is the front with all the bay covers removed. See what I mean by being an open and full flowing case!? Nothing is stopping fresh air from comming into this thing through the few thousand little holes in the covers. The first thing the cool air hits is your precious drives.. |
|
|
|
|
|
|
 |
|
|
|
 |
|
|
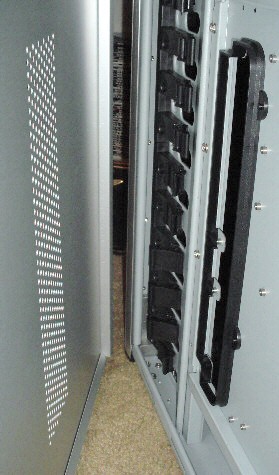
Backside of the motherboard tray's crossflow inlet and the panel's inlet holes. Assembled, there is no gap between the tray's black plastic shroud to the side panel, but sandwiching your own filter media in there isn't a bad idea at all. It'd be odd to have filters all over except here. Especially if you intend to use the big honk'n crossflow fan! It'll suck up a cow if you're not careful... |
|
|
This is the case's bottom showing yet another inlet. Haven't seen this either on another case. Take note that this may not help a whole lot if you sit your case on the carpet, but it does add more air none-the-less. Most nice desks have a spot for your case, and if this one fits there, use it. I yanked the little feet pads off and put on the included lockable wheels to raise it up a bit for some clearance.
I like putting a mirror on my case's inside base and a layer of dynomat under it, so this just adds more cutting to the chore. |
|
|
|
|
|
|
 |
|
|
|
Below, we start looking at the drive bays inside. All the bays hold the standard 5-1/4" drive devices by default. To mount a 3-1/2" device, you have to use the drive cage (one included).
Each shock-mounted cage can hold 3 standard sized drives and each unit has one 120mm fan mounted to the front (with a very long power lead with a molex'ed end). |
|
|
|
|
|
 |
|
|
|
|
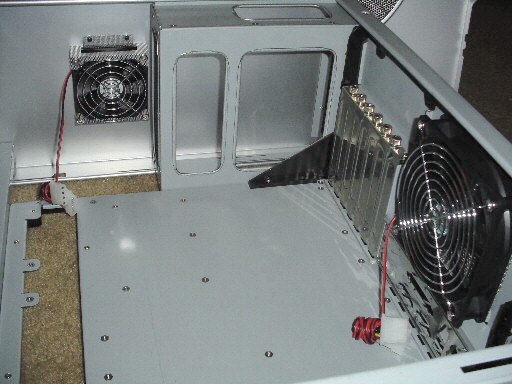
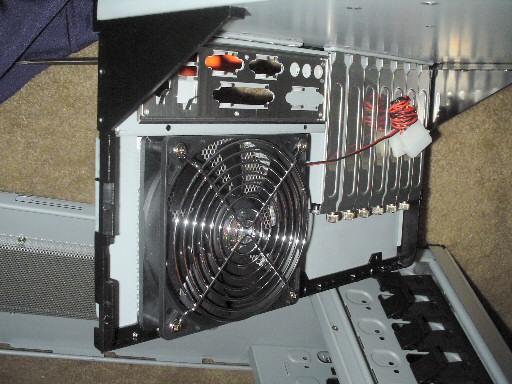
This is the inside looking up from the bottom. From here you can see the big 120mm rear fan, the nice 80mm blowhole fan and the mesh design I wrote of earlier, and the thumbscrews on the PCI blanks. Nice touch BTW.
All edges inside are rounded off. And with all the playing I've done inside it, I've yet to find a sharp edge.
Just measured up the area around this fan and looks like it'll hold a Black Ice Xtreme radiator just fine! |
|
|
|
|
|
|
 |
|
|
|
 |
|
|
|
|
|
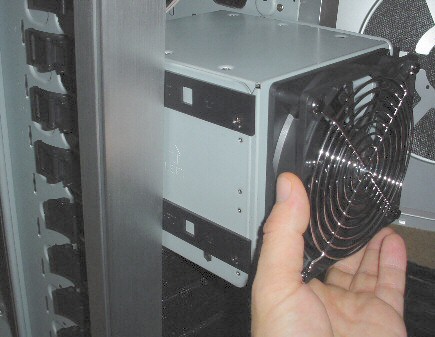
The bay being pulled out. Exciting, huh? I like these drive rails! The Cheiftec/Antec style I'm used to was fine, and liked them until I met these fellas. On the Cheiftec's, you had little metal springs on the ends of the rails that you could access from the front of the case. You push those inward toward the center and it released the drive. But, you still had to contend to the wires and cables inside, so unless you just pulled out the drive and pushed the junk back in (i.e. sloppy, and ruins your nice wiring job) you still had to go into the case.
On the CMstacker, you pop off the side of the case, flip the drive's latch, and push it out. They're even numbered:) Here are the drive rails they use. Just little black plastic strips that have detents for the clamps to get a grip on. The row of clamps can be seen in on the left and in other photos. They're snug, which I've seen a complaint about, but I don't know why you'd want them loose. Drives, IMO, should be firmly planted. Unless you're in a race to swap drives or something, snug is better. |
|
|
|
|
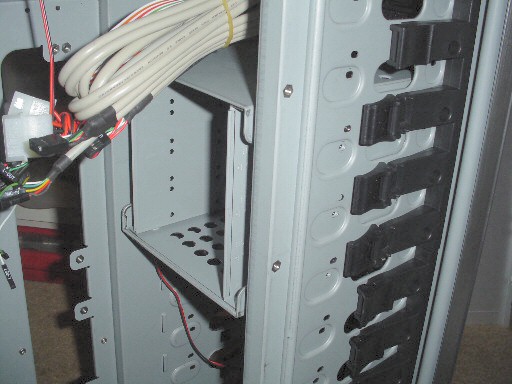
The included drive bay. I didn't think it'd be included as, prior to it's release, the CM site was offering them as options. Never assume, it makes an ASS of U and ME. Anyway, they are options, but only if you need to purchase more of them. I will, but not yet. I only need 2 drives for some good Matrix RAID love'n.
This may also be the only pic I have of the front panels cables. Nice and long. I still wish they'd make a standard for front panel connectors on MOBO's so case manufactures could just use a plug instead of all these little individual ones, but you can do much about it for now.
(what I do is, once you figure out how they go onto the board, I JB weld the entire thing into one bid slug. I'm an artist with JB weld and can make it look just like a normal plug. The trick is working it with something flat, when it's a bit more firm, and using water to keep it from sticking to the flat something or your fingers). |
|
|
|
|
|
|
 |
|
|
 |
|
|
|
|
|
|
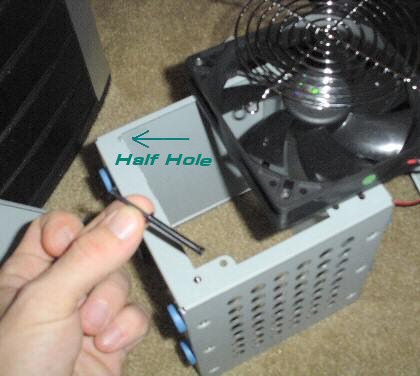
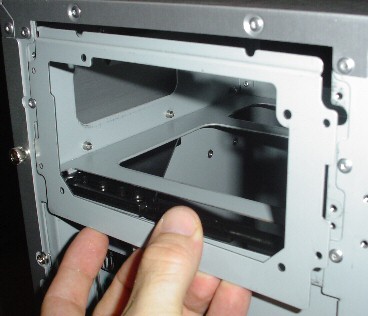
This is something I'm trying to forget, as it's the only thing I've found that still bothers me about this case. The good part is that the fan mounts into 4 holes using those black plastic push-pins. Having used these on my Jeep quite a bit (all over the thing!), I felt comfortable seeing them in use here. You pull the center pin out and it releases the entire outfit. Better than screws as it's tool less.
The bad side? That bay came with 3 knock out strips that had holes in them like the base does. I, in my infinite wisdom, knocked them out to get less restriction of airflow from the big 120mm fan. Having done that, I knocked out half of 2 of the mounting holes! It's not really half; more like 30% of the hole. But now the pin has less of a grip and if you remount the entire thing, one good yank will pull the fan out of the bay. There is a cure though. I've stuffed some 3/16" filter media between the fan and the bay and it snugged it up. It also keeps the unit from ever causing a vibration or noise down the road somewhere. |
|
|
|
|
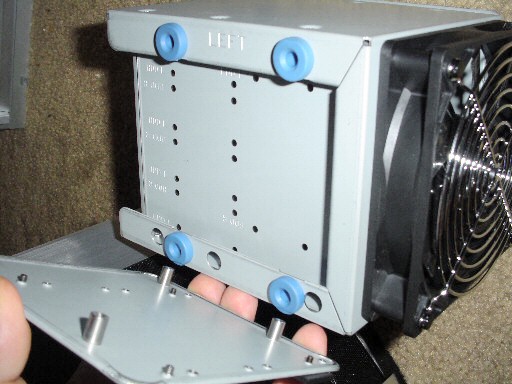
This is the sideplate of the drivebay pulled out of the mounts. It just slides back in. Those blue things are really squishy feeling. Not like stiff rubber or nothing I've seen normally in a case. Not that I'll throw this case around, or that my drives jump around, but it's nice to know they're in there keeping the shock down on those Raptors...California residents take note;) |
|
|
|
|
|
 |
|
|
|
|
|
|
 |
|
|
|
|
|
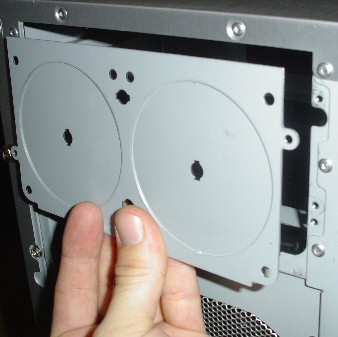
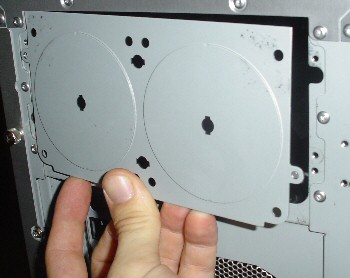
This threw me for a curve. I took these pictures to complain, but then I pulled my head out of my ass and figured it out. The first pic shows the plate as it was mounted when you knock it out. Then I thought, "hmmm...what if you use the bottom mount for the PS? This won't go back on!"
I flipped it over, and there it is. It bolts back on fine. Again viewing a complaint over at Coolermaster's Forum about not having enough mounting spots (only 2) and that it will vibrate if you put the fans in the holes, I decided to test the theory.
No pics, but I knocked out the holes and mounted the fasted fans I could find (some Tornados) and it didn't make any noise you could hear over the fans themselves. So, I tried some lower speed Antec fans. Still nothing. Look, if your fans are vibrating enough to shake sheetmetal, your fans suck. Get some that aren't missing blades! |
|
|
|
 |
|
|
|
 |
|
|
|
|
|
Just your standard power supply mounting plate. I like the extra step they took to notch the top to miss the rivets on the underside.
This is where you mount the flux capacitor. |
|
|
|
|
|
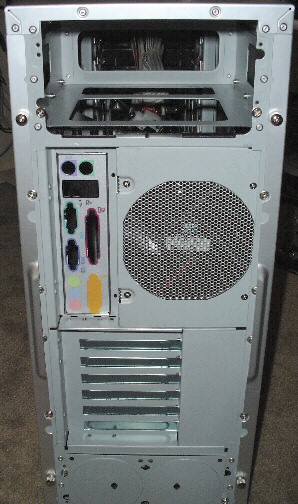
The back of the case. See all those extra screws? You remove those in the BTX transition. Also note taht the I/O and fan area can be removed in this transition. I bring this up because it'll be easy to work with if you want to put a radiator there. |
|
|
|
Let's transform this ATX case over to BTX... |
|
|
 |
|
 |
|
|
|
|
|
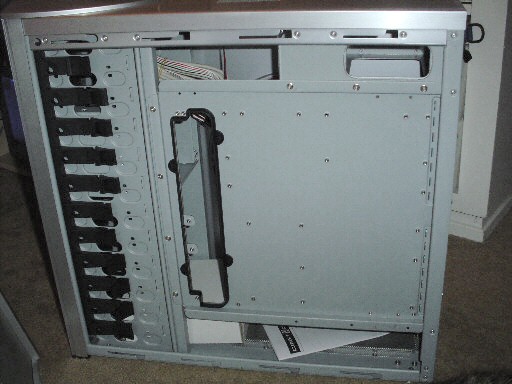
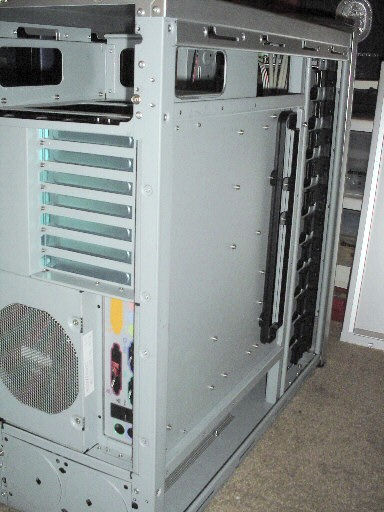
Full view backside of the tray and case. Start yanking every screw around the tray. Move to the back side and do the same, using common since (or RTFM).
There's a lot of screws. Don't eat them. |
|
|
|
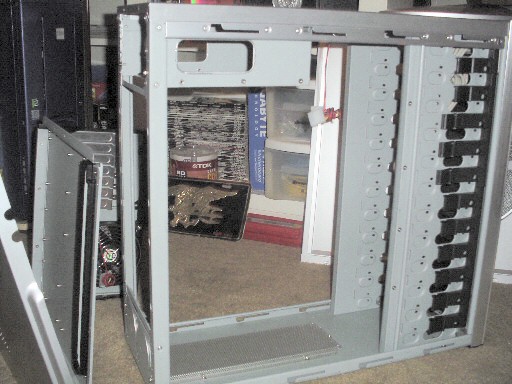
Here's the bare chassis with the tray module removed. I stood on this just to see what it did. Felt very firm and sturdy. Immulate at your own risk. I only weigh 168lbs. |
|
|
|
|
|
 |
|
|
|
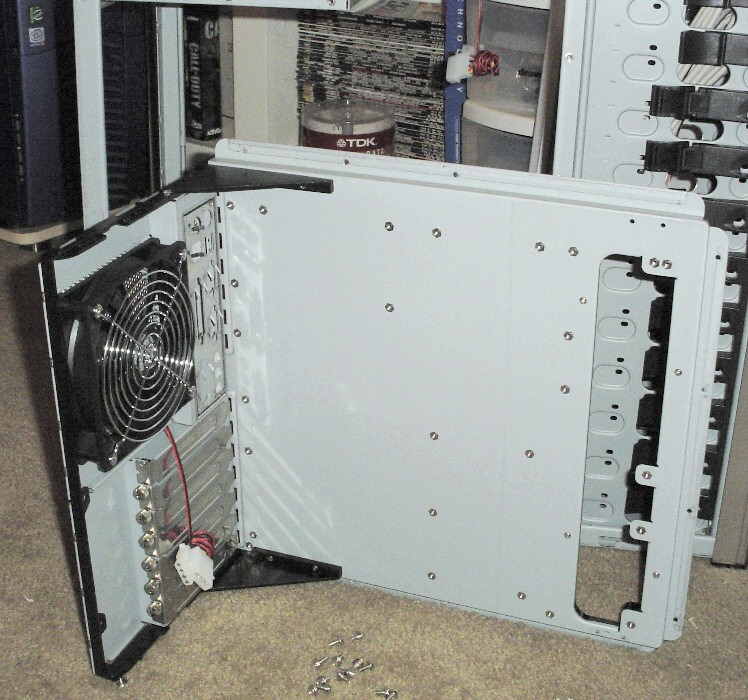
The tray module and the enedieble screws. Kept this pic farely large as it got pretty grainy as I shrunk it. Again, very sturdy build. The braces are made of strong plastic. And again we see the thumbscrews on the slot covers. Look, one's missing. I figured out why once, but forgot since then. |
|
|
|
 |
|
|
|
Another view of the tray module. I took the time to take this, so I might as well put it up. Now that you're done looking at it, flip it over and begin putting it back in the other side of the chassis. If you've eaten any of the screws, either cough them up or dig some more out of the bag. |
|
|
|
 |
|
|
|
And here it is in BTX mode. Well, pretty close. I skipped the steps you do to the rear panel because...I just didn't feel like doing those at this time. It's pretty basic though as you just do a few more steps with the fan/IO panel. |
|
|
|
 |
|
|
|
 |
|
|
|
|
|
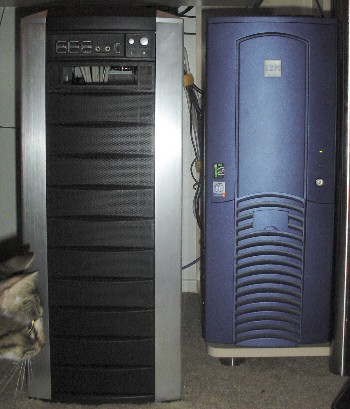
And here you can finally see it's size, relative to my kitty's head...er...I mean the standard Cheiftec type full-tower. (Fact of the day: in engineering or architecture, this is known as an ELEVATION)
This is a dead-on shot and not distorted to the best of my ability. It's HUGE! The blue tower is sitting up on the desk's base and the tops are level; about a 3" difference in height. Adding the included wheels adds another 2 or 2-1/2" of elevation (there it is again!). Juuuust fits in the desks alloted space. |
|
|
|
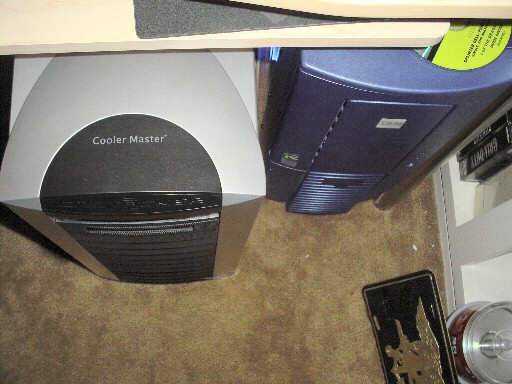
And here is a shot from the top, again showing it massive size. Until now, I've felt the Cheiftec cases were monsters. They're a crying bitch sitting next to this monolith!
There back panels are even, and the difference in this dimension is about 4". Have you noticed I've changed to a 12pt font??? Inconsistancy abounds:p |
|
|
|
|
|
More images and my creative genious writing are sure to come! Drop back by soon...I'm posting pics as folks request them. |
|