| Begin
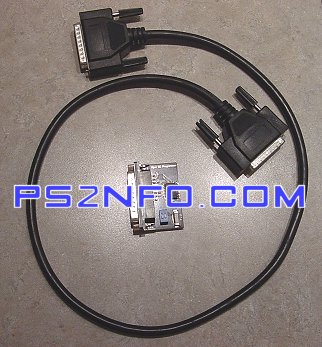
by taking any standard PC Parallel Cable and inserting it into your Viper GC Programmer as shown. |
 |
| . | |
|
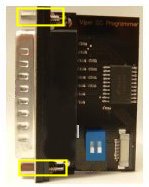
If you don't have a Parallel cable it is still possible to program
your Viper GC module, however, you will have to plug it directly
into your PC's Parallel port. If connecting the programmer directly to your PC you will have to unscrew the shield that covers the pins. Merely undo the two protruding screws (highlighted in yellow) either side of the shield and remove the shielding to connect the programmer to your LPT port. |
 |
| . | |
| Next, plug the other end into your PC securely, and ensure the flex wire is plugged in securely to your Viper GC Programmer. | 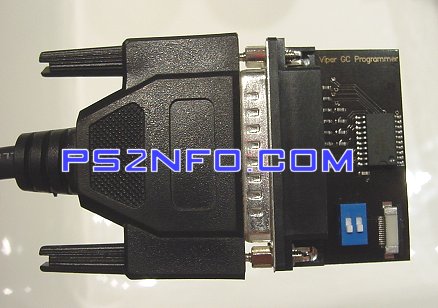 |
| . | |
| It is important that BOTH white switches on the Viper GC Programmer are in the down or off position as detailed in the diagram on the right before you switch on your Gamecube console to program it. |  |
| . | |
| Switch
on the Gamecube and open Viper Flasher 1.0 utility (available in the Downloads
Section) on your PC. Click on File and then Load BIOS... and at the pop-up prompt navigate in Windows (XP preferred) to the latest third-party Cobra BIOS and select it. Note: This guide was compiled with Cobra 0.4 BIOS but the flashing utility will work for all BIOS's. |
 |
| . | |
| You
should receive a loaded successfully prompt. Now is a good time to ensure your PC Parallel Port Parameters are correct and USE SAFE MODE (writes slower) is enabled also. If you are unsure which address your PC is currently set to, you can find this out by right clicking on the "My Computer" desktop icon, selecting Properties from the menu and clicking the Hardware/Device Manager tab. Expand "Ports" and right-click on the LPT Properties and select the Resources tab to view the current I/O Range. If errors are encountered then it may be worth checking that your LPT
port is correctly defined. |
 |
| . | |
| Now,
click the Write button on the Viper Flasher and you should briefly see
an "Erasing The Chip" prompt, followed by another displaying
Writing Data... and finally a Finished prompt. This is all you have to do to program the Viper GC, however, it is also a good idea to now click on the Compare button to ensure the data you just flashed was not corrupted during the transfer. |
 |