 |
|
|
|
|
|
|
|
|
|
|
|
|
|
|
|
|
|
|
|
|
|
|
|
|
|
|
|
|
|
|
|
|
|
|
|
|
|
|
|
|
|
|
|
|
|
|
|
|
|
|
|
|
|
|
|
|
|
|
|
|
|
|
|
|
|
|
|
|
|
|
|
|
|
|
HOW TO DRAW CHEMICAL STRUCTURES AND MECHANISMS
OF REACTIONS |
|
|
|
By:
Chemistry Heroz
Champlain Regional College - Lennoxville |
|
|
|
 |
|
|
|
|
|
|
|
|
|
|
|
|
|
Table of Content: |
|
|
|
Introduction |
|
|
|
Free Download |
|
|
|
Menu |
|
|
|
Shortcuts
|
|
|
|
Example of Mechanism of Reaction
|
|
|
|
Example of 3D Configuration
|
|
|
|
When chemistry students have to make a completely computerized lab-report, including drawing of structures or mechanisms, it can be very long and frustrating to draw the chemical structures with a drawing program like Paint. Furthermore, the result is often unclear. Hopefully, chemists have tools to help them in their work. One of them is Cetramax ChemicPen 2.6, an intuitive program that allows drawing easily formulas and reactions on the computer. Then, you can save your work and export it in other programs such as Microsoft Word. Therefore, to help you to be able to use ChemicPen efficiently in the future, we will present this program, explain its main functions, and make a systematic example of mechanism and 3D configuration of a molecule made by ChemicPen.
You can download for free and safely the trial version of the program on the following link:
GET A FREE VERSION OF
CETRAMAX CHEMICPEN 2.6
Even if it is a trial version, all the options are available. You will therefore be able to save your work, export it, and so on� |
|
|
|
 |
|
|
|
THE MENU |
|
|
|
First, we will present the different icons of the toolbar and explain their function. The icons are the following: |
|
|
|
 |
|
|
|
In fact, this chemistry program is quite intuitive and easy to work with. |
|
|
|
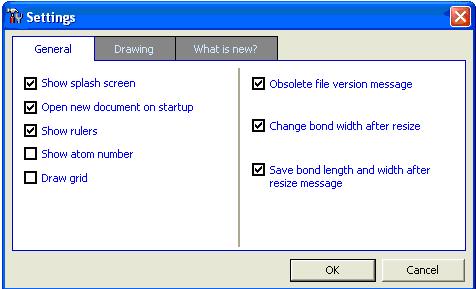
As usual, the menu contains File, which is used to save, print, and so on as in most programs. In the Edit section, there are the traditional commands such as copy, paste, cut, and select all. In the View part, you can hide the toolbar, or part of it. Finally, in the Options, you can change the settings as shown under:
|
|
|
|
 |
|
|
|
In addition, in the previous Settings menu, it is possible to use a grid in the background, which is very helpful to align the different molecules. This can be done by checking the Draw Grid option. |
|
|
|
 |
|
|
|
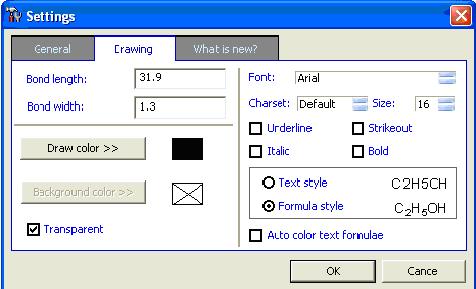
Then, the Settings also allow changing the Drawing options. However, most of those settings can be changed directly from the toolbar. For example, the font, and everything related to the text, can be modified in the text menu on the toolbar. The only exception is the text style, which can only be changed in the Settings. In the menu Color, you can change the color of the drawing. Finally in the Help menu, there is a link to the website and the about/help. |
|
|
|
|
|
|
|
THE SHORTCUTS |
|
|
|
In the toolbar, there are icons that are shortcuts for different tasks. The first seven icons are the following: new, open, save, print, cut, copy and paste. They are the usual icons that can be found in most programs. Then, the next fourteen icons are more interesting since they are particular. We will therefore describe each of them and explain their particular utility. |
|
|
|
 |
|
|
|
The first one is the cursor icon. The cursor is used to select objects and move them around without changing their orientation. It can be used to select object(s) for further operation by clicking on it or clicking and dragging the cursor. In addition, when a structure is selected, the size can be modified by putting the cursor on a corner, clicking, holding, and dragging to change the size. |
|
|
|
 |
|
|
|
The second icon is the cursor with two bonds. This cursor is used to change the orientation of bonds by holding the left button of the mouse and drag it to give it the orientation wanted. |
|
|
|
 |
|
|
|
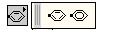
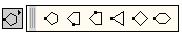
The third icon is the benzene. The arrows at the bottom of the icon show that there are other possibilities for it. For this one, it is benzene, but shown differently as shown in the following picture (picture rotated by 90 degrees to save space). Benzenes are often used in reactions in organic chemistry. Therefore, this icon is very important for this purpose. The way to use it is to select the type of benzene wanted, then to click anywhere on the screen where you want it to appear, and hold the click to rotate it. |
|
|
|
 |
|
|
|
 |
|
|
|
The fourth icon is the chemical bond. However, there are many possibilities of bonds that may be used, such as double or triple bonds. To make a bond, you choose the wanted one, than you click on the screen to create it. Then you can move them and change their orientation with the two pointer icons previously presented. Bonds are very useful, because they are part of all molecules. |
|
|
|
 |
|
|
|
 |
|
|
|
The fifth icon is the question mark with bonds. With this option on, when you click on something, it will change it to other possibilities. For example, when you click on a single bond, it becomes a double bond, and if you click again, it will become a triple bond. This icon is useful when you made a mistake and you want to change it quickly without erasing. |
|
|
|
 |
|
|
|
The sixth icon is the eraser. This icon is used to erase what is not needed. When this icon is on, clicking on something will simply erase it. |
|
|
|
 |
|
|
|
The seventh icon is the cyclic structure. This icon works like the benzene one. However, instead of benzenes, it is different cyclic structures such as cyclopentane, cyclohexane, and so on... These structures are commonly used in organic chemistry. |
|
|
|
 |
|
|
|
 |
|
|
|
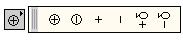
The eighth icon is the charge. The different charges that may be useful are all present. When this icon is on, the selected charge appears on the screen where you click with the mouse. Those different charges are used in chemistry to show if an ion is positive or negative in reactions or mechanisms. |
|
|
|
 |
|
|
|
 |
|
|
|
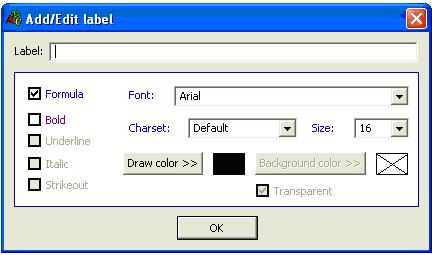
The ninth icon is the text. This icon is used to type the name of reaction or mechanism, the name of the molecules or to write atoms. It is a very useful icon with many options and the following menu appears when you if the screen with the text icon selected. This option allows writing formulas, names as well as changing the color, font, and size of the text. |
|
|
|
 |
|
|
|
 |
|
|
|
The tenth icon is the arrow. With this icon, you can make straight arrows for the result of a reaction, double arrows for reversible reactions and resonance structures or the curved arrows used in mechanisms. Arrows are therefore very important to demonstrate precisely mechanisms or reactions. |
|
|
|
 |
|
|
|
 |
|
|
|
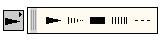
The 11th icon is the 3D bond. It works like the conventional bonds icon. These bonds are used to draw 3D pictures of molecules that are not planar. The two main possibilities are thick black bond to show the bond in front of the plane and doted one to represent the back. Triangle shapes are for single bonds while rectangular shapes are for double bonds. |
|
|
|
 |
|
|
|
 |
|
|
|
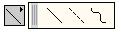
The 12th icon is the line. It works like the bonds icon. Those are used more to show the different movements of particles . |
|
|
|
 |
|
|
|
 |
|
|
|
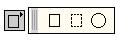
The 13th icon is the shape. It works exactly like the charge icon. It is used to draw a box or a circle around the reaction or structure drawn. |
|
|
|
 |
|
|
|
 |
|
|
|
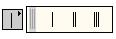
The 14th and last icon is the brackets. When this icon is on, clicking on the screen will create them. Then, by holding the click, the size of the brackets can be changed. Those brackets are very useful in chemistry to show resonance structures and reaction intermediates. |
|
|
|
|
|
|
|
EXAMPLE OF CHEMICAL MECHANISMS |
|
|
|
Step-by-step approach |
|
|
|
Two examples will follow to show the major icons utilities, a reaction mechanism and a 3D picture.
Reaction Mechanism, Part 1: |
|
|
|
 |
|
|
|
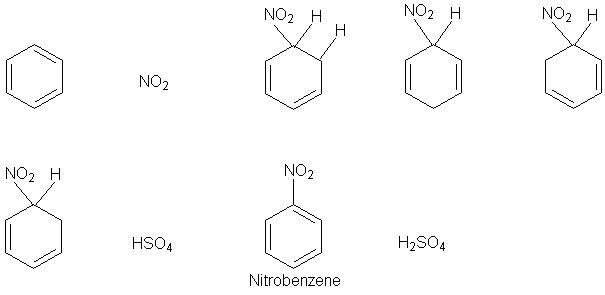
In the previous picture, the three following steps are shown:
1. The first step is to put the number of benzene needed. Then, we changed the unwanted double bonds of benzene to single bonds by clicking with the question mark icon on the bonds that need to be changed.
2. The second step is to choose the correct bonds, and create as much as needed with the bond icon. After, with the cursor with bonds, we can move the bonds to the benzenes, and change their orientations (when necessary) by selecting the tip of the bond.
3. The third step is to use the text icon to type the atoms or molecules needed in the reaction. Then, we moved them around with the cursor.
Reaction Mechanism, Part 2: |
|
|
|
 |
|
|
|
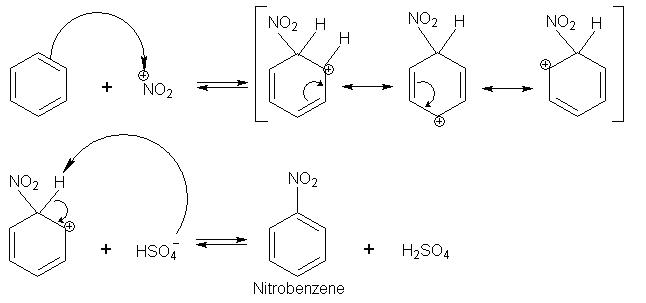
This picture shows the final mechanism, obtained with the five remaining steps following:
4. The fourth step is to put the + signs and arrows. The + signs were made using the text icon, to be able to put it the size needed. The arrows were made with the arrow icon, and placed with the cursor.
5. The fifth step is to create the charges needed with the charge icon and to place them correctly using the cursor.
6. The sixth step is to put the arrows of the mechanism to show the movement of molecules and charges. It was done with the arrow icon, by choosing the curved arrow type. Then, you click where you want the arrow to start and hold the click to move the end of the arrow to where you want it to finish.
7. The seventh step is to put the brackets around the resonance structures using the brackets icon. Then, you hold the click to enlarge the brackets as much as needed.
8. Finally, the background grid (click Options, then General) can be used to align everything by dragging the structures with the cursor. If a complex structure need to be moved, select all of it before dragging it. |
|
|
|
|
|
|
|
EXAMPLE OF 3D CONFIGURATION |
|
|
|
Step-by-step approach |
|
|
|
 |
|
|
|
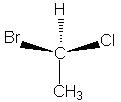
1. As explained earlier, write the needed atoms with the text icon.
2. As usually, create the normal bond with the bond icon, move it with the cursor, and change its orientation with the bond cursor icon.
3. Create the 3D bonds by selecting the needed one in the list using the 3D bond icon.
4. Drag the bond with the normal cursor and orientate with the bond cursor icon.
|
|
|
|
Finally, ChemicPen 2.6 is a very useful demo that allows drawing quickly chemical structures and mechanisms of reactions as we showed. We also wish that you have learned how to use this great tool to save time when having to submit a computerized chemistry project or lab-report. So, stop drawing chemical structures with paint! |
|
|
|
Back to Top |
|
|
|
|
|
|
|

|
|
|
|
|
|