| Coronado 35 Projects (Always a work in progress) |
| Date: June 2008 |
| Click here to go back to Don's Coronado 35 Homepage |
| Project: NEW SHORE POWER |
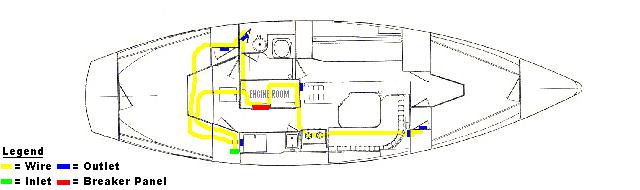 |
| As with other old boats I've owned, I just didn't trust the 30+ year old wiring. So, my first major project was to replace it. That way I can sleep in confidence that my boat won't burn down. The iput wire ran from the inlet (starboard side on the coaming), down through the hanging locker, under the battery compartment, to a curcuit breaker on the side of the galley. From the breaker panel, two wires exited. One went aft, the other forward. Going aft, the only hard part was fishing the wire through the space under the head (by the door). I had to use a hack saw to cut out part of the old wire. From the head, the wire ran to an outlet on the port side of the captain's cabin. Then, under the berth, back up the hanging locker, where it ended at an outlet for the galley. Going forward, the wire runs under the stove and up the starboard side. Again, I had to use a hacksaw to cut the old wiring in order to remove it. The wire also gets tricky around the fuel tank. Be careful there! Once the old wire is removed, It's as simple as white to white, black to black, and green to green! If the diagram confuses you, just contact me. |
| Materials - 75 feet of 30x12 water resistant wire - 6 new (plastic) outlet boxes - 6 receptacles - New connectors for the wire ends |
| Tools - Knife - Wire cutter/crimper - Hack saw - Flat blade screwdriver |
| Cost = only $100.00 |
| Date: June 2008 |
| Project: NEW COAMING BOXES |
| Materials - 2 Coaming Boxes from Defender - Fiberglass Reapir kit AND Epoxy kit - One tube 4200 - 16 SS screws |
| Tools - Orbital sander - Screwdriver - Hack saw |
| Cost = only $175.00 |
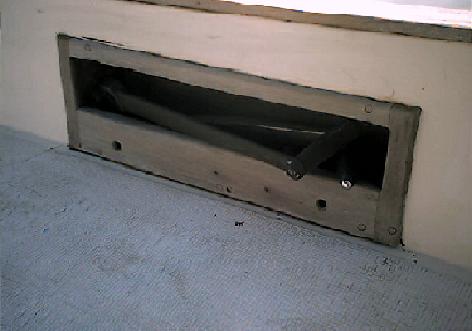
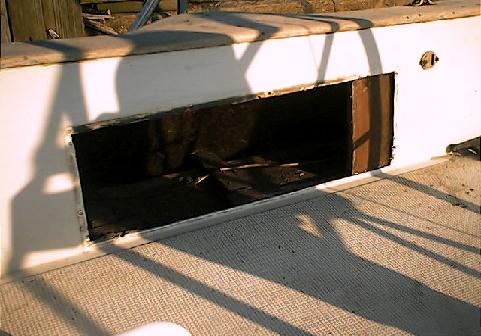
| Think this was a lot of work for nothing? Think again! Does your Coronado 35 have soft spots on the deck outside of the cockpit? That's because water is intruding underneath the coaming boxes. It was a poor design!! Look how the original box sits almost on the cockpit seat. Water runs straight into it!! Removing the old coaming boxes was fairly easy! Simply pry out the teak plugs and unscrew the ss screws holding the box. |
 |
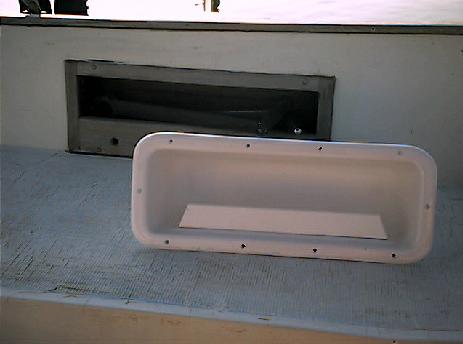 |
| Problem, the new box was 3 1/2 inches shorter than the old. So, I cut a piece of wood, fitted it into the gap and fiberglassed it in. See the right side of the hole. Once the glass cured, I had to test fit the box several times. Each time, I used the epoxy kit to fill low spots, etc until the surfaces were smooth. Using an ample amount of 4200, I then screwed the new box into place! Now, when it rains, water isn't running into my deck and down into the galley through light fixtures, etc. Eventually, I need to replace the core material in the deck outside of the cockpit. |
 |
| Links to more projects: |
| Future Use |
| Future Use |
| Future Use |
| Future Use |