Haley Turbine Projects


|
Haley Turbine Projects
|
|
Started every time throughout the entire project, regardless of modifications.
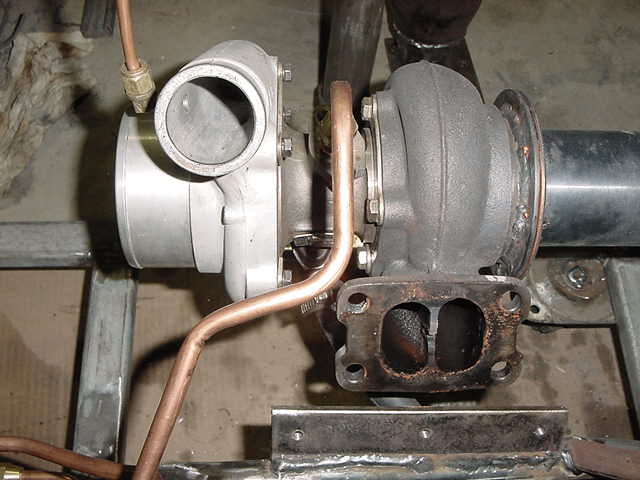
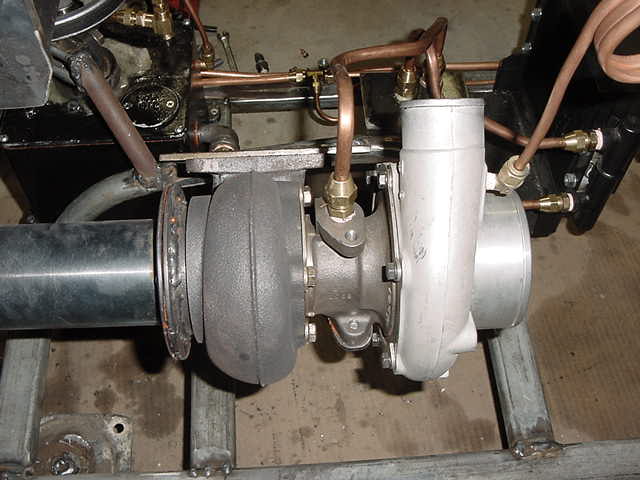
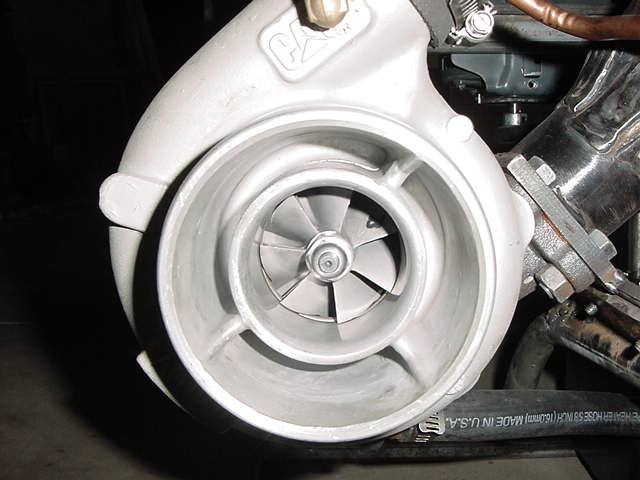
I dug out the turbocharger that I acquired about 8 years ago. It is brand new and still in the original box. It had a broken ear where the oil pipe attached to the center section. for this reason they scrapped the product. It is off a small commercial diesel truck. I consider myself lucky that I do not have to buy or scrounge for one to start my project.
I thought about what to do next.
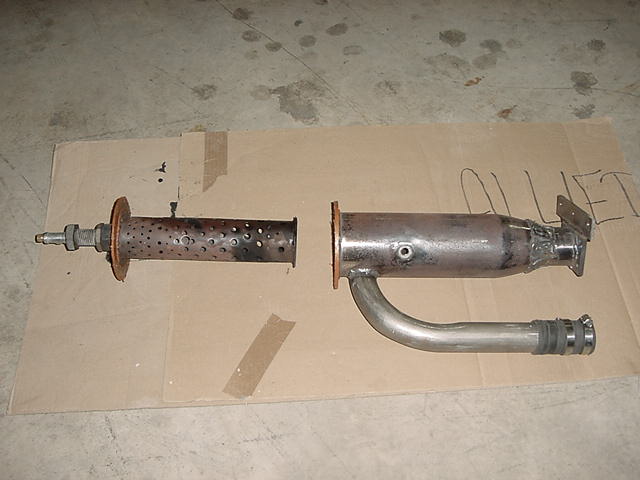
I started construction of the combustor. I took an old drive shaft from a Ford Van or truck. It was 5" in diameter and had a taper in it that worked almost perfectly for the reduction to the approach to the turbine inlet.
I met Ryan Boyles today. Can you believe I met someone in my city who had already built a turbine and had started on his second? Small world. He showed me the turbine below and ran it. My first live home built turbine show and he brought it in the trunk of his car. He left it with me so I could get some ideas for mine. The turbine is complete as shown. The only thing needed is fuel. It runs on propane or kerosene. It is even wired to run an external electric fuel pump for the kerosene. ( Pigtail left of gauges )
Ryan Boyles first Turbine
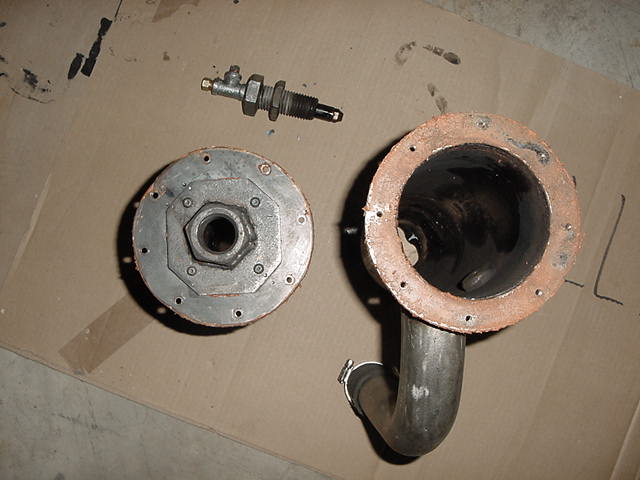
I worked on my combustor today after work. I found a smooth pipe with a nice 90 degree bend for the compressor delivery tube to the combustor. I cut the flanges for the top of the combustor and made my flame tube. I gave some serious thought to my injector design.
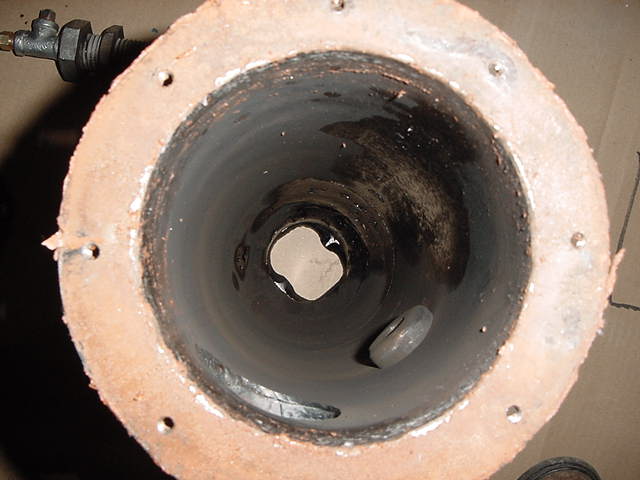
Combustor Top View Inside of combustor. Note spark plug boss.
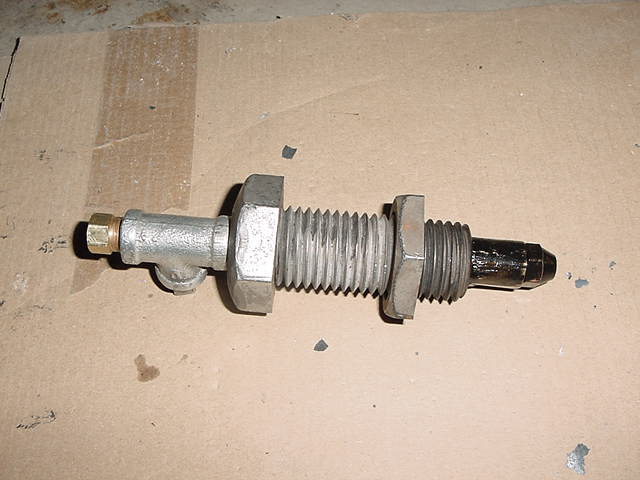
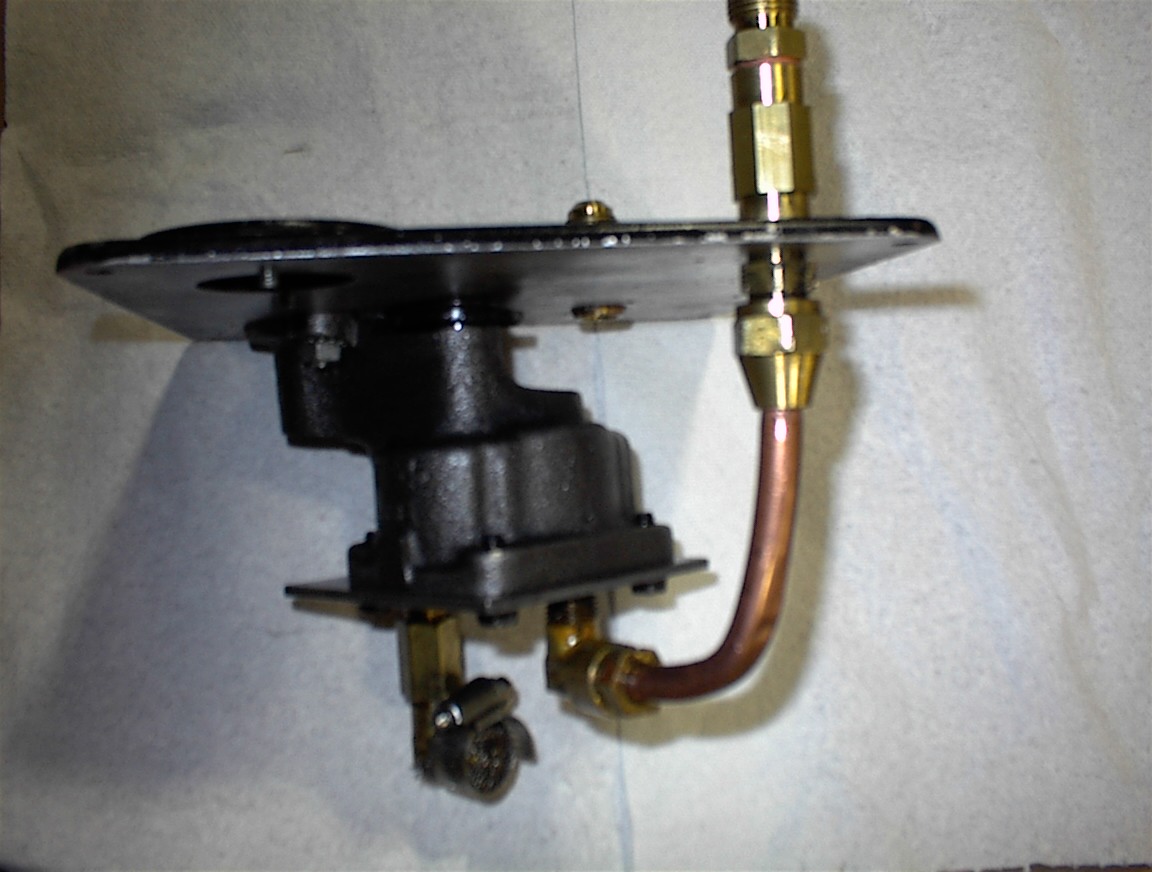
Built and Installed the injector holder, flame tube, spark plug seat, air delivery tube and combustor top. Here is a view of the injector and complete combustor.
Fuel Injector and Holder Injector, Flame Tube and Air Casing My injector holder will accommodate Propane or kerosene by changing the nozzle type. ( Kerosene shown ) The position of the injector is completely adjustable.
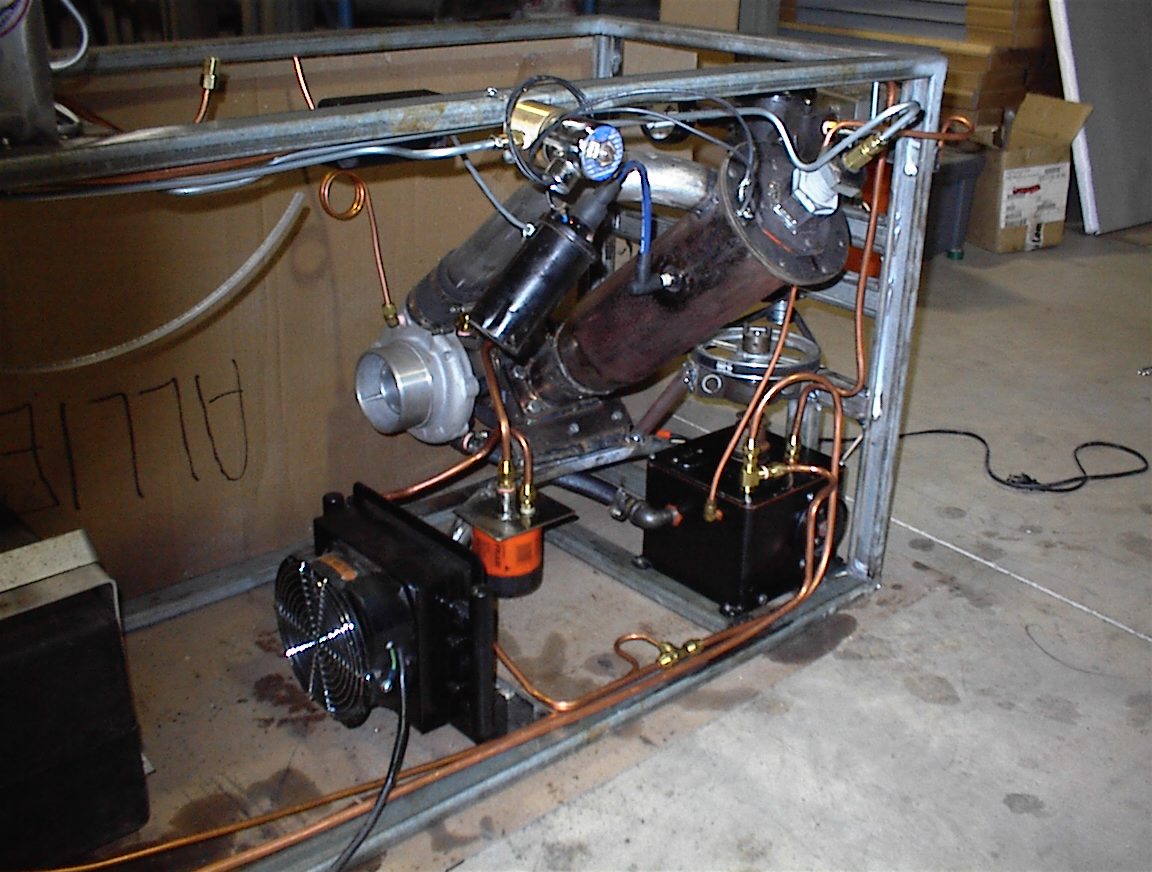
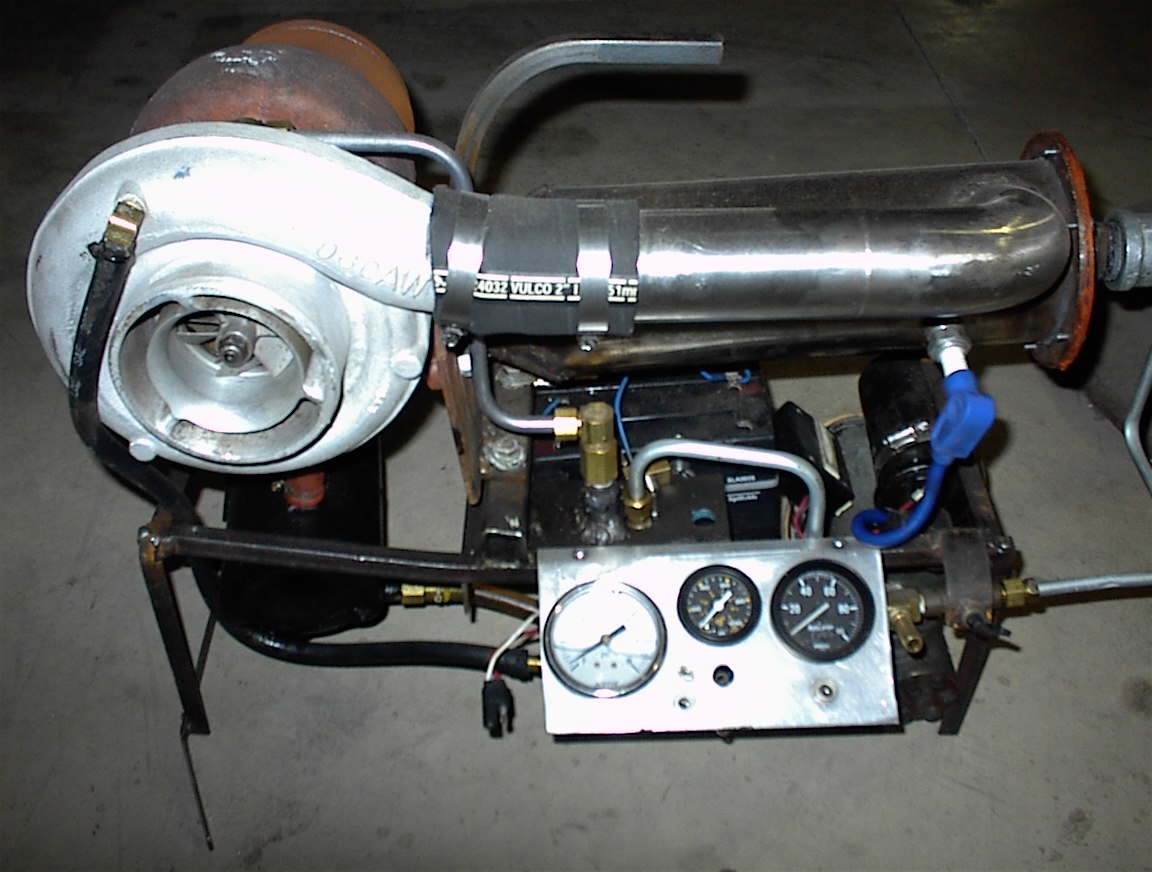
I built my test frame today and mounted the turbine and combustor in the frame.
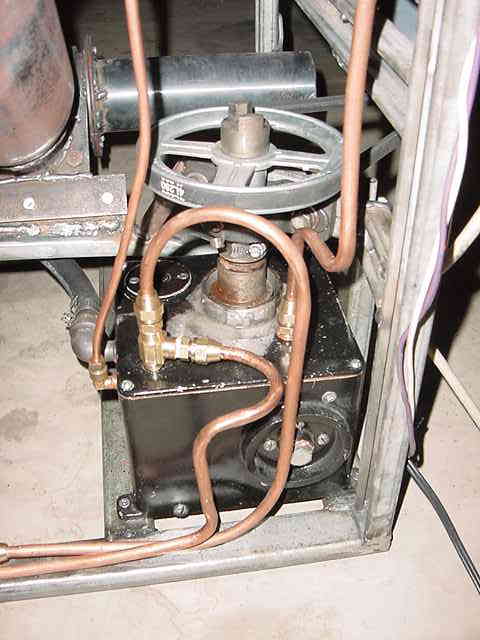
I found a cast aluminum tank. I took the contents out, plugged all unused holes. The I took a small block Chevy oil pump and milled the mounting boss perpendicular to the drive shaft of the pump. I removed the backing plate with the pressure regulator and install a plate steel back with fittings that would work for our application. The pump is driven by an AC electric motor with belt and pulleys. The pressure is regulated manually. Small Block Chevy Oil Pump mounted to the lid of oil tank. Oil pump/tank assembly
First run on Kerosene (K-1). Started with 9 parts K-1 1 part gasoline. Started as easy as propane with more flames out the exhaust. Started with 80 degree 2.5 GPH nozzle. Achieved 10 PSI boost at 65 PSI fuel pressure. Installed 60 degree 4 GPH nozzle. Achieved 19 PSI boost at 65 PSI fuel pressure. Not happy with fuel pressure. Fuel pump would only provide 65 PSI cold. Going to remove the fuel pump and tear down.
Took fuel pump apart and found that it needed serious cleaning. Old oil deposits in the pump were breaking off and getting caught in the tight clearance' of the pump' G rotor. The pump has 2 separate outputs. One of the output was deadheaded causing low fuel pressure on the side we were using. Relieved the pressure and now have 210 PSI cold. Pressure hot never drops below 180PSI hot at full throttle.
Test run with 70 degree 5GPH nozzle from 4GPH 60 degree Air temp was 60 degrees Fahrenheit. Oil pressure 40lbs full bypass 0w-30 mobil1 K1 fuel/ 205 PSI pump pressure 12x3" jet pipe No inducer on compressor Test results: 10PSI Fuel pressure, 19# boost, 730 Degrees Fahrenheit Ex Temp. Throttle up to 48# boost@ 190# fuel pressure. Please note that we only throttle up to full boost and return to safe boost immediately! This is not recommended as turbine damage could result! If you do not have a tach, limit boost to 30psia. 7:50PM 15# fuel pressure, 11# boost, oil temp 180 degrees, 31# oil pressure. Throttle up to 45PSI boost, Fuel pressure 180# Must get tachometer, tet, tit, we want to home build everything possible. The test lasted 41 minutes. Had 4 flame outs. Simply re-ignited by pressing ignition button momentarily. Flame out occurred @ steady RPM and de-accelerating. Just some fine tuning on flame tube needed. Max'ed out fuel nozzle, need more fuel for more RPM. Start up was slow and long. Large flame from introduction of initial fuel supply. Kept starting air on till engine pulled its' own.....absolutely awesome! Pure power and energy. This is a beautiful engine, responding well to modifications. We are very pleased.
Today I decided to put the test stand on wheels. It took 2 men to move the rig outside to run the turbine. One of the guys had to use a two wheel cart! Enough of that. I install swiveling castors on the front with pneumatic tires on the rear. Now 1 man can easily move the rig around the shop. :-)
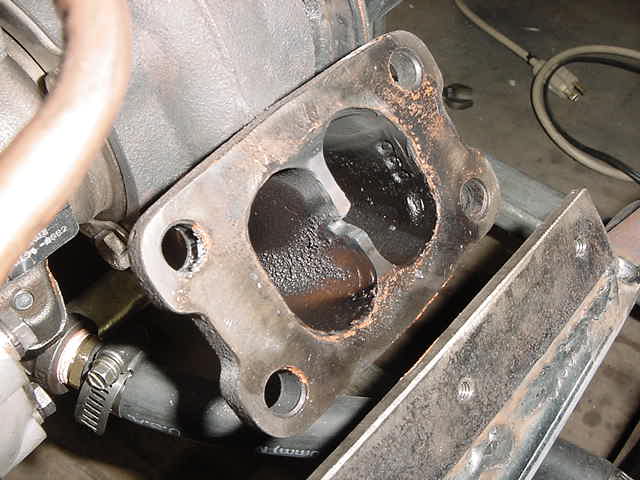
Today I started to place all wiring in conduit and clean up wiring on the test stand. Rob tore the turbine down for inspection. The flame tube has seen better days. It will have to be replaced. We are going to use stainless for the new tube. The turbine inlet was fire slotted also. We are going to radius the bridge in the turbine inlet so it will be deeper in the inlet and thicker to reduce overheating of the bridge. This is why frequent teardowns are so important! Fire slot in the inlet bridge.
Flame tube after about 8 hours of testing
You can email me @ [email protected]
|
 :-(
:-(