![]()
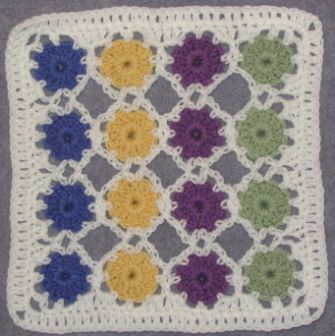
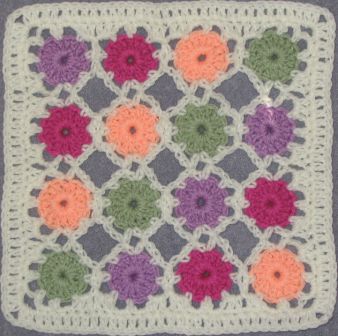
Simple Yoyo Square
12 inch square
Copyright 2005 Chris Simon
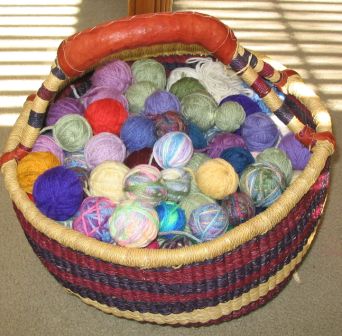
What do you do when your scrap basket is out of control? Make yoyos! Each yoyo takes less than 10 feet of yarn, so even a very small scrap ball will make at least one.
Here's a cool way to join them which minimizes extra ends to weave. Be sure to scroll down to the bottom of the page for a photo of a huge afghan made using this technique. I based this joining on Priscilla Hewitt's Flat Braid Joining method. I love the look of her yoyo joining, but wasn't crazy about the idea of using a separate strand to join each individual yoyo. I came up with this method as a way to join as many yoyos as you want in one row with a single strand of yarn. In the case of my giant afghan pictured below, this means that I had only 50 ends to weave for the joining instead of 1500!
Vote for me in Top 100 Crochet and Hook Sites ListH hook or size needed for gauge.
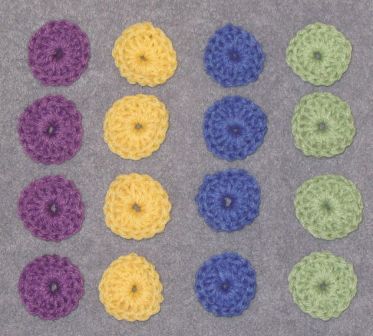
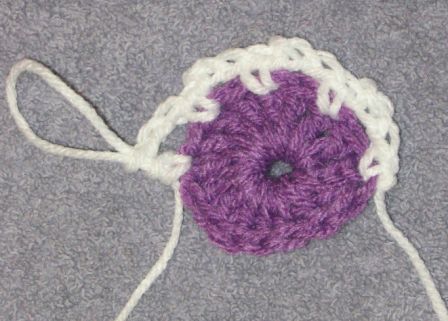
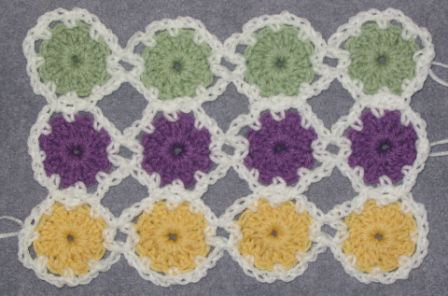
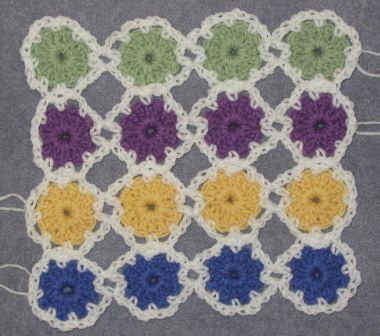
First, you'll need sixteen yoyos.YOYO
Chain 4, join with sl st to form ring. Ch 3, 15 dc in ring. Finish off. Be sure to weave ends securely. Decide how you would like to arrange your yoyos in four rows.
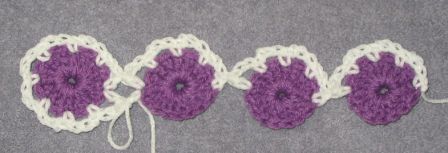
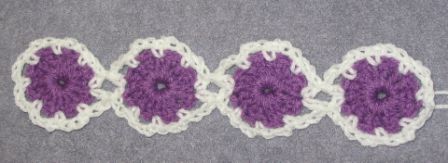
ROW 1 JOINING
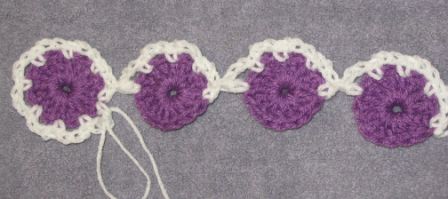
Now to join the first row of four yoyos.
With joining color, join with sc in any st on first yoyo. (Ch 3, sk next st, sc in next st) three times. Ch 2, sk next st, hdc in next st.
Pick up second yoyo. Hdc in any stitch. Ch 2, sk next st, sc in next st. (Ch 3, sk next st, sc in next st) twice. Ch 2, sk next st, hdc in next st.
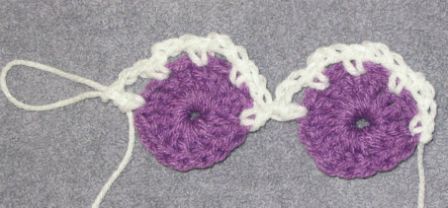
Pick up third yoyo. Hdc in any stitch. Ch 2, sk next st, sc in next st. (Ch 3, sk next st, sc in next st) twice. Ch 2, sk next st, hdc in next st.
Pick up fourth yoyo. Hdc in any stitch. Ch 2, sk next st, sc in next st. (Ch 3, sk next st, sc in next st) six times (we are wrapping around to the second side of the row). Ch 2, sk next st, hdc in next st (same st as previous hdc from other side of the row).
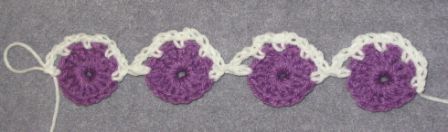
Hdc in third yoyo (same st as previous hdc from other side of the row). Ch 2, sk next st, sc in next st. (Ch 3, sk next st, sc in next st) twice. Ch 2, sk next st, hdc in next st (same st as previous hdc from other side of the row).
Hdc in second yoyo (same st as previous hdc from other side of the row). Ch 2, sk next st, sc in next st. (Ch 3, sk next st, sc in next st) twice. Ch 2, sk next st, hdc in next st (same st as previous hdc from other side of the row).
Hdc in first yoyo (same st as previous hdc from other side of the row). Ch 2, sk next st, sc in next st. (Ch 3, sk next st, sc in next st) twice. Ch 3, join with sl st in beginning sc. Finish off (or wait to weave ends if desired. See note below).
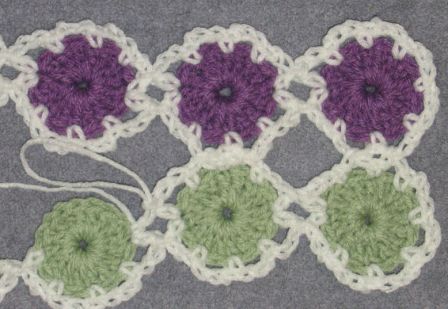
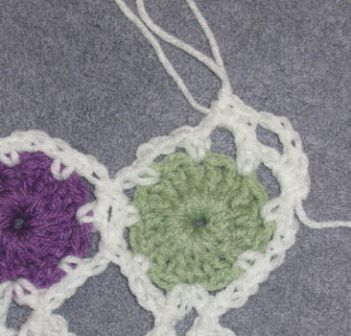
ROW 2 JOINING
Okay, now we're ready to add the next row of yoyos. This is only a tiny bit more complicated than the first row. If you've done the Flat Braid Joining method for joining afghan squares, this will be very simple for you.
With joining color, join with sc in any st on first yoyo. (Ch 3, sk next st, sc in next st) three times. Ch 2, sk next st, hdc in next st.
Pick up second yoyo. Hdc in any stitch. Ch 2, sk next st, sc in next st. (Ch 3, sk next st, sc in next st) twice. Ch 2, sk next st, hdc in next st.
Pick up third yoyo. Hdc in any stitch. Ch 2, sk next st, sc in next st. (Ch 3, sk next st, sc in next st) twice. Ch 2, sk next st, hdc in next st.
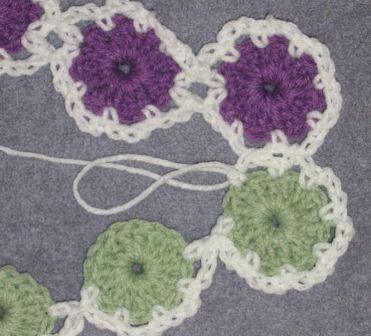
Pick up fourth yoyo. Hdc in any stitch. Ch 2, sk next st, sc in next st. (Ch 3, sk next st, sc in next st) four times (we are wrapping around to the second side of the row). *** Here's where things start to be different from the first row ***
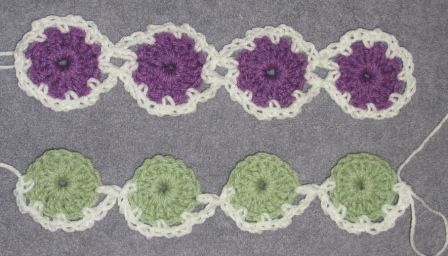
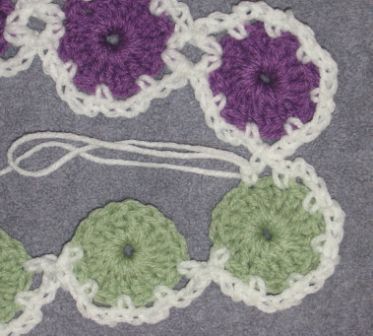
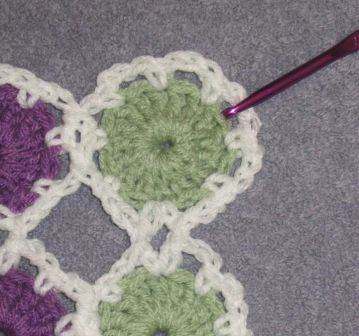
# Ch 1, drop loop from hook, insert hook through loop of fourth yoyo of previous row (see photo for placement). Put loop back on hook, ch 1, sk next st on current yoyo, sc in next st. Repeat from # once. You should now have two ch spaces of the current yoyo joined to two ch spaces of the fourth yoyo in the previous row.
Ch 2, sk next st, hdc in next st (same st as previous hdc from other side of the row). Hdc in third yoyo (same st as previous hdc from other side of the row).

Ch 2, sk next st, sc in next st. # Ch 1, drop loop from hook, insert hook through loop of third yoyo of previous row (see photo for placement). Put loop back on hook, ch 1, sk next st on current yoyo, sc in next st. Repeat from # once. You should now have two ch spaces of the current yoyo joined to two ch spaces of the third yoyo in the previous row.
Ch 2, sk next st, hdc in next st (same st as previous hdc from other side of the row). Hdc in second yoyo (same st as previous hdc from other side of the row).
Ch 2, sk next st, sc in next st. # Ch 1, drop loop from hook, insert hook through loop of second yoyo of previous row (see photo for placement). Put loop back on hook, ch 1, sk next st on current yoyo, sc in next st. Repeat from # once. You should now have two ch spaces of the current yoyo joined to two ch spaces of the second yoyo in the previous row.
Ch 2, sk next st, hdc in next st (same st as previous hdc from other side of the row). Hdc in first yoyo (same st as previous hdc from other side of the row).
Ch 2, sk next st, sc in next st. # Ch 1, drop loop from hook, insert hook through loop of first yoyo of previous row (see photo for placement). Put loop back on hook, ch 1, sk next st on current yoyo, sc in next st. Repeat from # once. You should now have two ch spaces of the current yoyo joined to two ch spaces of the first yoyo in the previous row.
Ch 3, sk next st, join with sl st in beginning sc. Finish off (or wait to weave ends if desired. See note below).
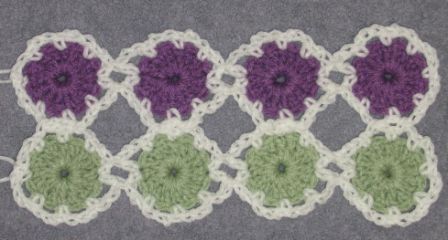
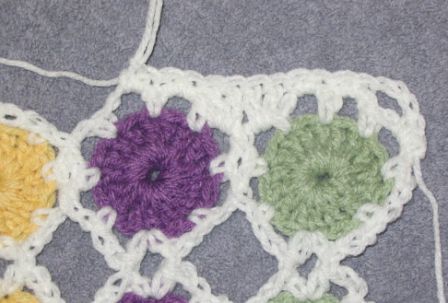
ROW 3 AND 4 JOINING
Repeat Row 2 joining for rows 3 and 4. You may notice that my loose ends are on the left for two of the rows and on the right for two of the rows. I chose to join two rows and then flip them around and join the other two rows on the opposite side. I did this to "spread out" the end weaving later on. This way, there are four ends to weave on each side, reducing the chance of making the edges bulky and ugly.
I am purposely waiting to weave the ends from the four rows of yoyos until I'm finished with the square. I dislike weaving ends into chain stitches. After we add the border rows, there will be some nice juicy dc stitches to weave into!
BORDER ROUNDS
Time to square this thing up and finish it off!
Round 1
In this round, you will be putting two sc stitches in each of the loops on the "hill" of each yoyo, and two dc stitches in each of the loops in the "valley" between the yoyos.
Pick a corner and locate the loop just to the right of the "cornermost" sc. My hook is pointing at it in the photo below. Join with sc in this loop. Sc in same loop (total of two sc in loop). Ch 3, 2 sc in each of next two loops.
*(2 dc in each of next two loops, 2 sc in each of next two loops) three times. Ch 3, 2 sc in each of next two loops. Repeat from * twice.
(2 dc in each of next two loops, 2 sc in each of next two loops) twice. 2 dc in each of next two loops, 2 sc in final loop. Join with sl st in beginning sc. (28 sts per side)

Round 2 Ch 3, dc in next st, *(2 dc, ch 2, 2 dc) in corner ch 3 sp. Dc in 28 sts across to next corner sp. Repeat from * twice. (2 dc, ch 2, 2 dc) in corner ch 3 sp. Dc in next 26 sts. Join with sl st in 3rd ch of beginning ch 3. Finish off and weave all ends. (32 sts per side)
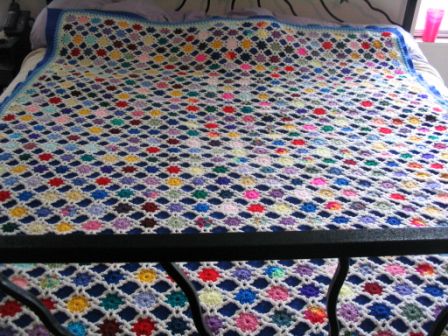
And now, if your scraps are REALLY out of control, here's the next step! This afghan was made from 25 rows of 30 yoyos each - 750 yoyos in all. I made it over the course of about a year. Each time I had accumulated 150 yoyos, I got out the afghan and added five more rows to it. Yes, that is a king size bed! This thing is enormous! My only plan when making it was this - I did not include any white, brown, black or gray yoyos. All other colors, including variegateds, were fair game. Joining was done using soft white. I'm thrilled with the way it turned out.

Corrections:
1/4/06 - minor correction to Row 2 joining.
1/5/06 - minor correction to Row 1 joining. Thanks, Phyllis!
� 1998-2007 Chris Simon - chrissimon (at) verizon (dot) net
You are welcome to print this pattern for personal use. You may link to this page, but please do not copy the pattern source to another web page. Please email me and let me know if you're linking to this page. Thanks!
