|
|
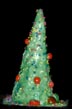
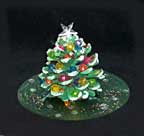
Ice Cream Cone Christmas Tree Craft
These are great activities to make at Christmas parties. What you will need: Sugar cones, green frosting, small candy like red hots, tiny M&M’s, cake decorating toppings or sprinkles, and paper plates.What to do: Turn the cone upside down on a paper plate and cover the entire cone with green frosting. Decorate the tree with candy and toppings |
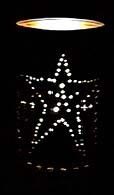 |
Halloween Lantern You Will Need: Paper Pencil Nail Hammer Metal can Throw rug Masking tape Rubber bands How to:
|
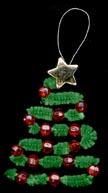 |
Pipe Cleaner Christmas Tree Craft
What you will need: Green pipe cleaners, Red beads, star button, and wire. What to do: String red beads on a pipe cleaner about one inch apart. When all the beads are in place bend the pipe cleaner in the form of a tree as pictured. String a star button on to the top and bend the pipe cleaner end down to secure it. Use a short piece of wire to hang the three. Secure the wire by bending it around the button back. If you don’t want to use buttons, glue star gems to the top |
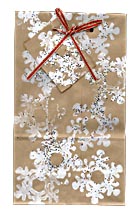 |
Gift Bags with gift tags Craft |
 |
Pine Cone CD Christmas Tree
|
 |
Paper Bag Invitations You will need: paper bags hole punch markers yarn large-eyed needle scissors Cut rectangles out of the paper bag as large as you want the invitations to be. Using a hole punch, punch holes all the way around the edges of the card. Thread some yarn through the large needle and "sew" all the way around the card. Tie a bow with the two ends of the yarn at the top of the card. On the front, write what the invitation is for. On the back of the card, you can write information such as the date, what to bring and where the party will be along with your phone number in case they need to contact you. |
| Make this Craft and we will
send you some free stickers! |
Easy Christmas Jar Candles Materials Needed: Used Christmas Cards (can also use stickers), Baby Food Jars, Glue, Rubber Band, Salt, ribbon, votive candles Instructions: Cut out a pretty picture from an old card or use stickers; it should be small enough to fit on the side of a baby food jar. Cover the back of the picture with glue and glue it to the jar. Put a rubber band around the jar to hold picture in place till glue dries. Remove rubber band. Using a paintbrush, cover the outside of the jar with glue. Sprinkle salt over all of it to make the jar glisten. Let dry. Optional: Tie a piece of curling ribbon around the rim. Put candle inside. |
| Make this Craft and we will
send you some free stickers! |
Orange Juice Ornament Materials Needed: Frozen orange juice can lid, White lace or frill to go around the perimeter of the lid, about 6", Hot glue gun, White Elmer's-type glue, Holiday-color glitter (or any color), Photo of your child or a loved one that fits in the juice can lid, About 6" of red or green ribbon Instructions: Smear white glue and cover the juice lid on one side. Sprinkle on glitter (shake off excess). Let dry. Cut the photo in a circle or small square to fit inside the juice can lid. Glue in place on top of the glitter, but leave space around it so you can see the glitter. Hot glue the lace/frill around the rim of the juice can lid. Make a loop with the ribbon, and hot glue it to the back of the juice can lid as a hanger. Make sure your photo is right-side up first! Give as a gift (great to give to grandparents!) or hang them on your holiday tree. Have fun! |
| Make this Craft and we will
send you some free stickers! |
Recycled Gift Tags Materials: Used Greeting Cards, Ribbon, Markers Instructions: Very Simple! Cut out the picture or scene on the front of a greeting card. Pinking shears or other fancy edged scissors work wonderfully! Punch a hole in the top, left-hand edge of the picture or scene. String a 4 to 5-inch piece of ribbon through the hole and tie it into a loop. On the back of the picture or scene, write "TO" and FROM". Make sure you leave enough room to write the giver and recipients's names. Any shape or size picture will work, just make sure you have enough room to punch a hole and write "TO" and "FROM" on it |