
 |
Futurstic Grunge
- Open Photoshop, make your foreground color to white and background color to black, now create a new document with measurements 1920 px x 1080 px and the Background Contents option to White.
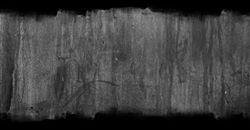
- Now drag the �Grunge� image into photoshop and resize it to fit the screen.
- Now use the Horizontal Type Tool and click type in �TEXT� using Acens as the font and 500 pt as the font size.
- Now open Windows > Character, and then change the settings exactly like this.
- Now merge the image layer and the background layer (CTRL + E), then add a levers adjustment to the �Background� layer with these exact settings.
- Now add a drop shadow to the �TEXT� layer with these settings.
- Now add a Outer Glow to the �TEXT� layer with these settings.
- Now add a Bevel & Emboss to the �TEXT� layer with these settings
- Now add a Satin to the �TEXT� layer with these settings.
- Now add a Color Overlay to the �TEXT� layer with these settings.
- Now add a Gradient Overlay to the �TEXT� layer with these settings.
- Now set the Pattern Overlay to rock patterns and you chosen rock pattern to the �TEXT� layer with the following settings.
- Now drag the �Bolts� image onto photoshop, place as many as you want to place but make the bolts far from each other like this.
- Now use the rounded rectangle tool and make a rectangle beside the bolts but inside the text like so.
- Now apply an Inner Shadow to the shape with these settings.
- Now apply an Outer Glow to the shape with these settings.
- Now apply an Inner Glow to the shape with these settings.
- Now apply a Satin to the shape with these settings.
- Now apply a Color Overlay to the shape with these settings.
- Now select the shape using the Path Selection Tool and press CTRL + ALT + T on the keyboard and resize and move the shape to other parts of the text. It might look something like this when its done.
|
|