|
Breast Cancer Awareness Barb
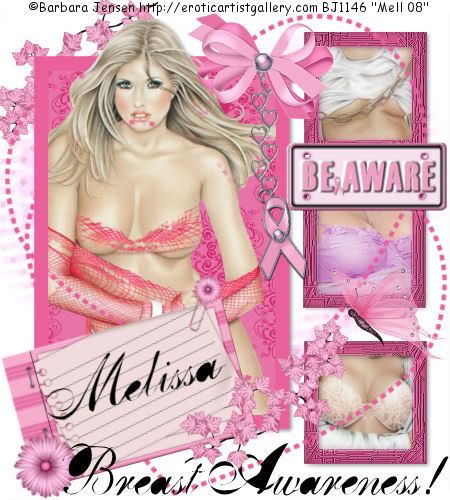
Tools needed
PSP- I used PSP 9 but it should work with all.
Tubes/Images of choice: I am using the art of Barbara Jensen who is a PTU artist. You must have a licence to use her art. You can find her art at her site HERE.
Font/s of choice: I used a font called BreastBomb
Mask of choice: I used a mask made by Chelle at Weescotslass Tutorials.
Scrapkit of choice: I used a free scrapkit called Breast Cancer Awareness made by Bluey from Bluedream Designs which can be downloaded from her site.
Lets get started!!!
1. Open a new transparent image 450 x 500
2. Select a dark color of choice and make sure its your foreground, background null, width 15.00 . I used the color ##ea609b
3. Select your rectangle preset and draw out a long rectangle, seen my tag for reference. Convert to raster
4.Now draw out 3 small squares, converting all to raster and placing them next to the rectangle we just made. Merge together these squares.
5. Duplicate this layer and on the duplicate I want you to magic wand inside the width of each rectangle.
6. Now go toTextures, Straw Wall and use the following settings and then Select None.
7. Now magic wand inside of each square, Selections, modify expand by 3 and paste as a new layer a paper of choice from the kit.
8. On your squares layer, Selections invert and hit delete on the paper layer. Select None.
9.Now repeat steps 7 and 8 for the large rectangle. Select None when finished.
10. Magic wand inside of the rectangle again, Selections Modify Expand by 1
11.Layers new raster, Open your tube of choice and paste into selection. Select None. Move this layer below the rectangle.
12.Merge visable your tube,rectangle and paper and give it a drop shadow, I used 2,2,40,5.00 Black
13. Now back to the squares, Magic wand inside of the first one, Selections, Modify Expand by 2.
14. Open up another tube of choice, Copy and paste as a new layer, resize and position, Move this below the square but above the paper.
15. On your square layer go to selections invert, hit delete on your tube layer and select none.
16. Repeat Steps 13,14 and 15 until all 3 squares are filled, then give your Straw wall layer a drop shadow of 2,2,40,5.00 Black.
17. Merge visable all the sqaures,square papers and tubes.
18. Layers new raster layer and flood fill with color of choice or paper of choice, I used one from the kit.
19.Now Layers, mask layer from disk, select your mask and click ok.
20.On your layers palette delete the mask layer and merge group. Resize if needed to make bigger.
21.Select your preset shape Heart, foreground color of choice, background null, width 5.00 and line style Dot.
22. Draw out a large heart and convert to raster, Position, duplicate and mirror and position.
23.Bring both layers to the top and erase and bits showing on your tubes
24. Now add some embellishments of choice from the kit. Give each of them a slight drop shadow.
25. Add your correct �Information
26. Add your text of choice and any wordart.
27. If your done, File Save as and save your tag.
Your Done!!
Thankyou for trying this tutorial
This Tutorial was written on the 10th October 2008 by Mell aka Babylicious36
ALL TUTORIALS ARE REGISTERED WITH TWI.
This tutorial is written using my imagination and is in no way copied from any other tutorial. Please do not Steal.. You may print this out for future use.
This page was assembled by Mell aka Babylicious36
Artwork � Barbara Jensen http://eroticartistgallery.com BJ1146 | 
