u-brackets down.
| Suspension Techniques Rear Sway Bar Install | |||||||||||||||||||||||||||
|
|||||||||||||||||||||||||||
| Before you get started you are going to need to enlarge the holes on the angle brackets that attach the the spindle. A dremel makes the job quick and easy. At this time you can also use the grease provided with your sway bar and grease the hell out of all of the bushings. | |||||||||||||||||||||||||||
| Your first step is to jack up the car and put it on jackstands. Next you want to remove the rear wheels. | |||||||||||||||||||||||||||
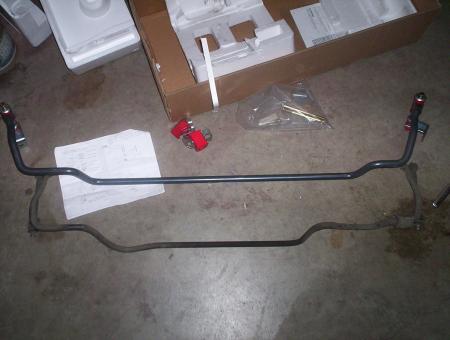
| Next remove the factory rear sway bar and endlinks and put it aside. You will need to keep the passanger side bolts for the bracket/bushing. | |||||||||||||||||||||||||||
|
|||||||||||||||||||||||||||
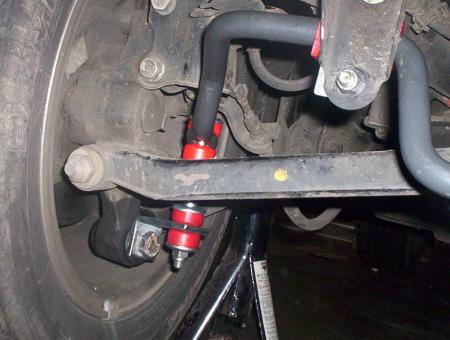
| Now you can remove the bolt that attaches the spindle to the trailing arm. It is a 21mm, I highly reccomend using WD-40 and air tools for this part. Once it is off, put the bolt through the smaller side of the angle bracket, and proceed to put the bolt through the trailing arm/spindle. Hand tighten this bolt. | |||||||||||||||||||||||||||
| Now jack up both sides of the suspension at the same time, to approximately ride height. Assemble your endlinks and install them onto the angle bracket, handtighten the endlinks down. | |||||||||||||||||||||||||||
|
|||||||||||||||||||||||||||
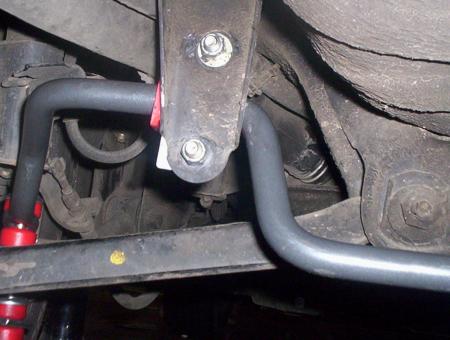
| With the suspension still jacked up you can now install the u-bracket into place. This piece replaces the factory bracket/bushing. On the passanger side you use the original hardware, the drivers side comes with all new hardware. It can be hard to get this positioned right, but it should eventually line up. After everything is lined up, tighten the bolts on the u-brackets down. |
|||||||||||||||||||||||||||
|
|||||||||||||||||||||||||||
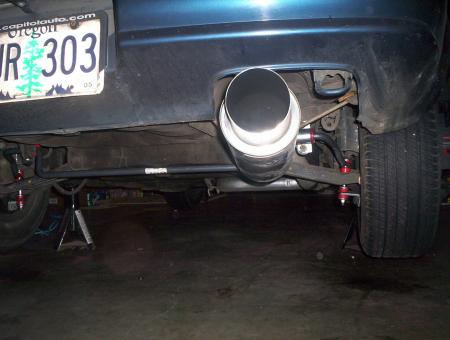
| Now you can tighten down the spindle bolts, and the endlinks. Tighten the endlinks until they begin to buldge out a little bit. But don't crush them. After everything is bolted down tight, lower the suspension, put the wheels back on, lower the car down and go test it out. | |||||||||||||||||||||||||||
| Home | |||||||||||||||||||||||||||
| Back to Installs | |||||||||||||||||||||||||||