| The following notes and pictures show how I
repot my Cymbidium orchids in Victoria Australia. Further examples and
other orchids will be added to this page as time permits. Please email
me if you have any specific enquiries.
MORE ORCHID CULTURE INFO |
||
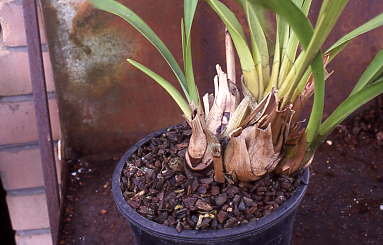
| This first example shows a Cymbidium which
needs to be repotted for two reasons. Firstly, it has reached the side
of the pot and run out of room, and secondly, it has a number of old
leafless bulbs (back bulbs) which would be better removed. One of
the back bulbs has a small new growth which will be taken off and potted
up separately.
Step 1 is to remove the plant from the pot. To loosen it if necessary I invert the plant and tap the rim of the pot on the edge of the bench until it comes out. |
 |
|
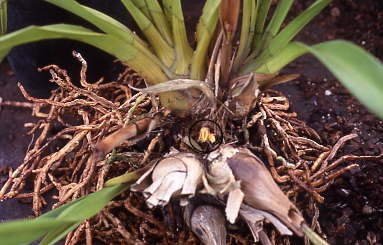
| The picture to the right shows a top view of
the plant with the 3 backbulbs circled. The new growth off the left hand
backbulb can also be seen.
The roots have been teased out and most of the old potting mix has been removed. |
 |
|
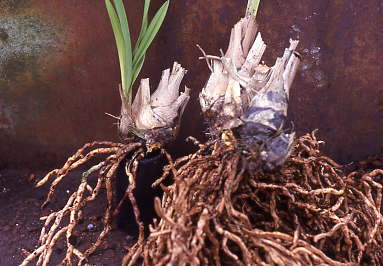
| In this picture the backbulbs have been
broken away from the green bulbs. The two parts of the plant will
then be carefully pulled apart so as to do minimum damage to the roots.
NOTE As a general guide most growers try to have a minimum of 3 green bulbs with leaves on each part of the plant. This gives the active part of the plant a better chance of flowering the following year. (In this case there were only 2 bulbs with leaves so I may not get flowers until the year after next.) |
 |
|
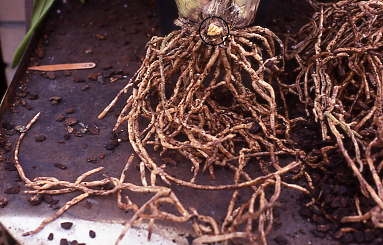
| This picture shows the roots on the active
part of the plant to the left and the remainder to the right. Any old
dead roots have been removed. (If the root feels solid between finger
and thumb it should be left on the plant. If it squashes flat it should
be removed.)
The rhizome which joined the two halves of the plant can be seen circled in this picture and the one above. I generally break the rhizome rather than cutting it to avoid cross infection caused by unsterilised cutting tools. |
 |
|
| This shows the remainder of the plant.
The bulb with the new growth has been broken away from the other backbulbs and dead roots removed. The other bulbs will be separated into single bulbs, have ALL roots removed, and if they feel solid they will be potted up into some orchid mix in the hope that they will shoot and produce a new plant in time. Backbulbs should be cleaned up by removing the remainder of the old leaves. This should be done carefully so as not to damage the new growth or dormant eye on the bulb. The easiest way is to split the leaf down the centre from the top and then pull the two halves sideways. |
 |
|
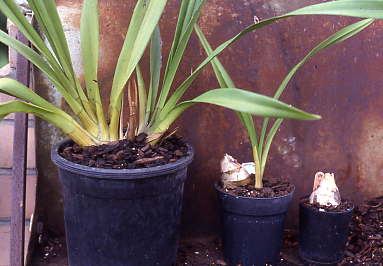
| Put a small amount of potting mix in the
bottom of the pot, enough to cover the drainage holes, then place the
roots into the pot and try to spread them out so the mix can get in
amongst them. Fill up with mix, tapping the sides of the pot to help to
settle and distribute the bark.
The final result. When positioning the plant in the pot it's best to make sure the plant is placed with the oldest part (where the backbulbs were removed) as close as possible to the side of the pot so there is room for the new growths to grow and fill out. |
 |
|
| General notes
The pot should be chosen to match the root system. In this case the roots of the main plant would not fit easily into a 6 inch pot so a 7 was used. I do not like to use a pot which is too big for the root system. The potting mix I use is 5-10mm chunks of pine bark. To this I add approximately one teaspoon full of Canunda Shell per 7-8 inch pot as I believe it counteracts any acidity buildup in the pot This is optional). On top of the pot I spread one teaspoon full of slow release fertiliser so that fertilising is done each time I water. Watering is done every 2 weeks or so in winter up to once per day in the heat of summer. Summer watering is usually done in the evenings. My growing area has shadecloth sides and roof, 70% GO TO index for MORE ORCHID CULTURE INFO |
||