NOVATION NOVA BEEP MOD
If you own a Novation Nova, you'd know what I'm talking about. If not, let me tell you about it. Everytime you press a button on the Nova, it beeps. Any button. Even the audion buttons. And there is no way to mute it. Now if you program your own sounds, the beep can become extremely annoying! I contacted Novation and asked if there was any way (maybe a combination of buttons, or OS patch..) that would disable the beep (I mean there must have been at least one person in the world other than me that have complained about this..); They said no. (..apparently not); This is when I decided that something must be done.
WARNING!! READ ME FIRST
1 - The following is a step-by-step guide on how to modify your Nova to get rid of the annoying "beep" forever!
2 - Go through everything first to have an idea of what you're getting into. Do you have the skills (and the heart) to do this?
3 - If you haven't opened / fixed any electronics device before now, I recommend that you don't try this!
4 - If you're not sure whether you want to do this, that is not a good sign! don't! as you can seriously damage your synth!!!
5 - once you get started, read the whole step before you proceed to action.
6 -This has worked for me, on my Nova. It might not work on yours. Therefore I take no responsibility whatsoever for any damage this modification may cause to
your synth. You are on your own!
YOU HAVE BEEN WARNED! Still with me? ok, moving on.

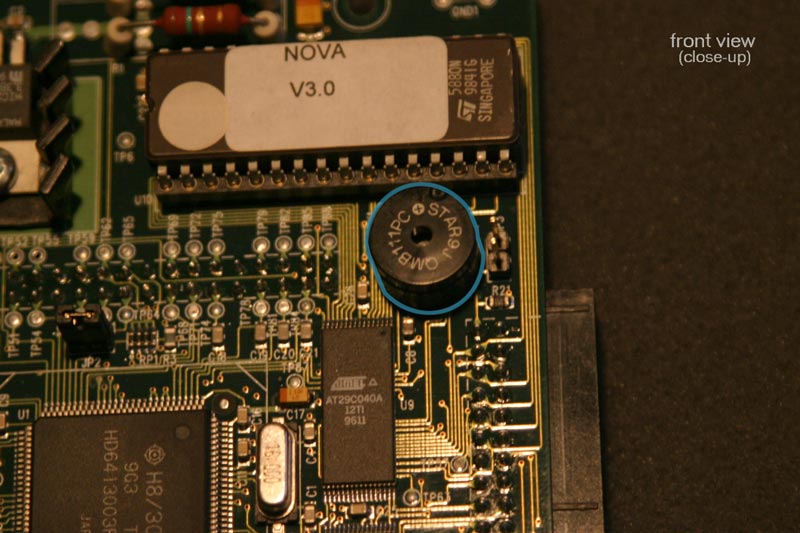
Take a good look at this black cylindrical object. Tthat's it! That is the source of the "beep". It's like a little pc speaker (from now on I'll refer to it as the "little-speaker"). It measures: 11mm (d) x 8mm (h).
I'll show you how to dissassemble the Nova and locate/remove it and get rid of the "beep" forever.
- a slim philips scredriver (+)
- a soldering iron + solder
- a needle-nose pliers
- someone to help, specially when removing the little-speaker (I did this alone, but it wasn't easy!)
- to be very careful (again before you do anything foolish, remember you can "kill" your synth.)
Section A: OPENING THE NOVA
0 - Before you do anthing, unplug the Nova power supply.
1 - Using the Philips (+) screwdriver, unscrew screw #1 (pic below) from the bottom side of the Nova (picture below) and place it in a safe place. (you don't want to lose any of them!)
When doing this I suggest you place the Nova on a soft surface (a mouse pad, a small pillow...) to avoid damaging the front panel. (PS I only placed the Nova on my desk to take the pics :)
2 -
unscrew screw #2
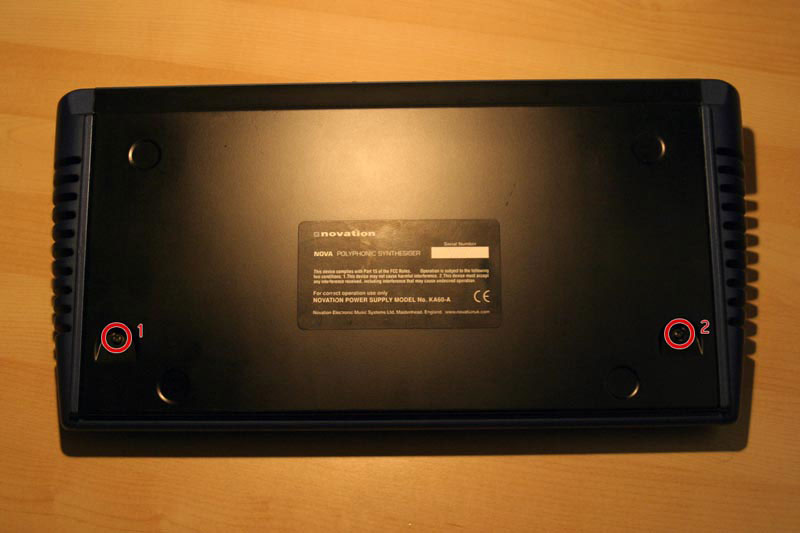

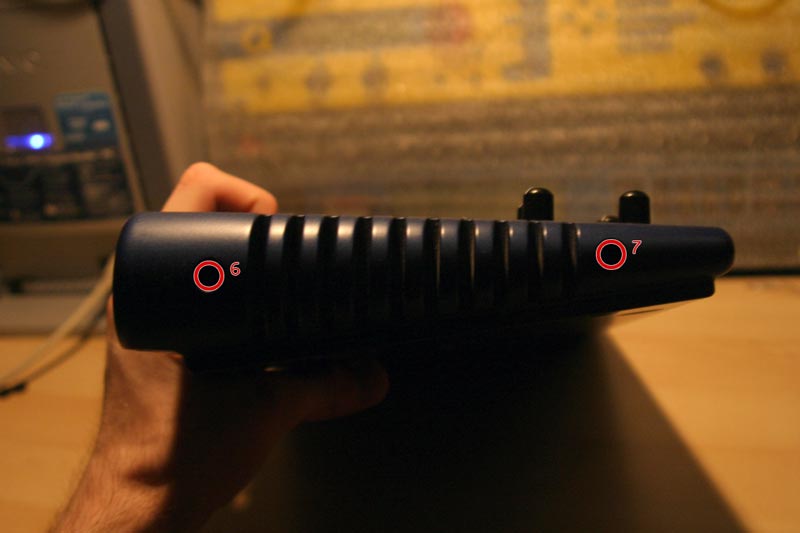
8, 9 - On the right side, unscrew screw #8, #9 (no pic)
(you will have to remove both sides to be able to remove the bottom-metal-cover of the Nova)
10 - After you remove all screws, place the Nova on its face (bottom facing up). Hold the black-metal-cover from the rear side (that is the side with midi / audio connectors) and gently lift it up to a 45 degree angle just to release the cover (don't go any durther). Once it's released lift the black-metal-cover up.
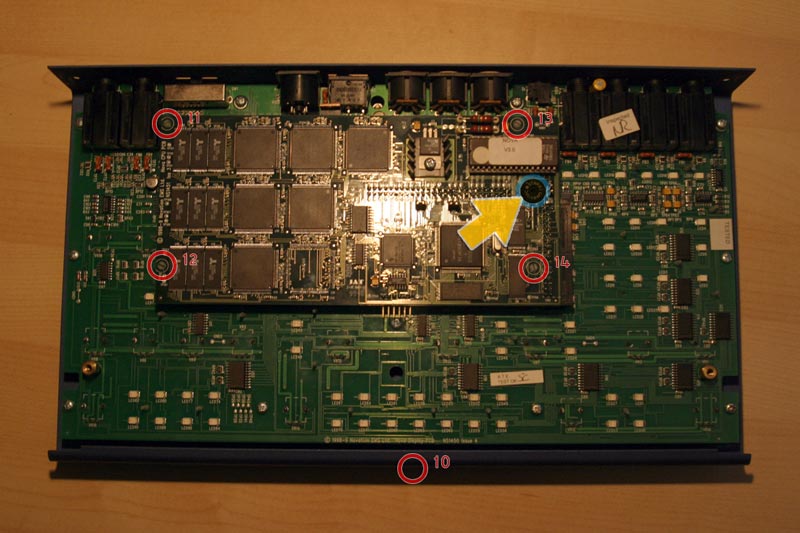
As you can see, the nova has 2 boards (small one on top of main). The yellow cursor shows you where the little-speaker is located. (this is what we need to remove). Unfortanutely you don't have access to its contact points from here. You will have to unplug the small board from the main board to be able to work on the little-speaker.
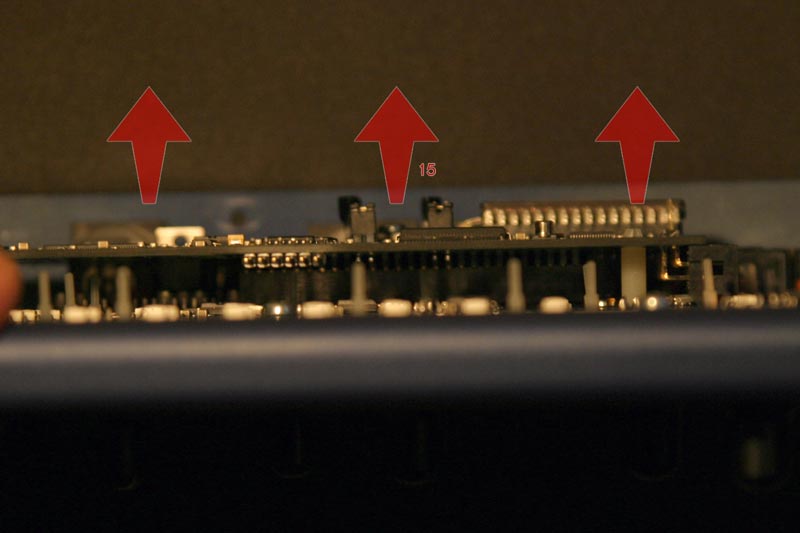
11, 12, 13, 14 - The small-board is fixed to the main one with 4 point-holders (#11, #12, #13 and #14 in pic below) and a central connection (visible in next pic: 15). You will need to use the needle-nose pliers to release the small-board from these points one by one!! Remember we're only releasing the small-board from the place-holders, we're not ready to detach it from the main board yet.
To do this, place your left-hand index finger under the small-board and use the pliers (with your right hand) to bring the 2 sides of the point-holders together, while gently pushing the board up with your index.
Section C: REMOVING THE LTTLE-SPEAKER
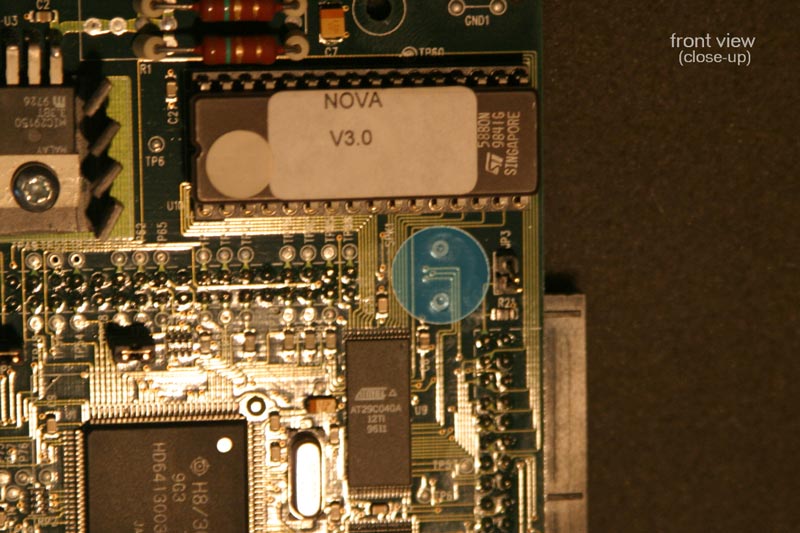
17 - If you turn the small-board, you will see the little-speaker's 2 contact points (#16, #17 in pic below).
You will need your soldering iron now to melt these two points to release the little-speaker from the small-board.
The blue circle shows you the position of the speaker (on the other side). The green arrow shows a blue resistor connected to the same 2 points as the speaker. You have to make sure this stays there (if it's accidently removed, you have to solder it back to its place)
Removing the small-speaker from the small-board wasn't easy (mainly because I was working alone). But if you have someone helping you, things can go much smoother. Let him/her hold the board for you while you hold the soldering iron with one hand, and the little-speaker with the other.
Start with point #16 and keep the iron on it until it melts, once it does pull the litte-speaker a little bit and switch to point #17, do the same.. Switch between point #16 and 17# while pulling on each contact point of the little-speaker alternatively. It will detach progessively, so take it easy and be carful not to burn the board (or your hands) with the soldering iron. :)

19 - Phew, that wasn't so hard, was it? Now to put it back together..
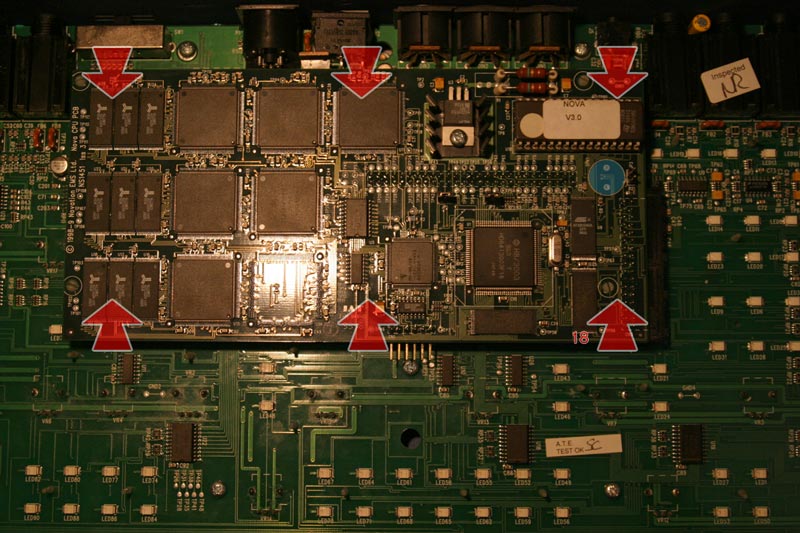
Place the small-board on top of the main-board, while making sure that the holding points (of step 11, 12, 13, 14) are aligned with the holes, and the pins are aligned with the central-connector on the main board. Once in positioin, gently press down to plug it in. Apply pressure on different areas of the board (like the red arrows in the pic), and make sure the small-board goes all the way in.
Section E: CLOSING THE NOVA
20 - Finally, put back the black-metal-cover in place (just for protection), don't put the screws back just yet. Connect the power supply, turn on your Nova just to make sure that everything is good before you close it. Go into Program Mode, press any button... oh good, It's working. Notice anything different?!
No Beep!!? it's a miracle! :P
21 - Turn off the Nova, unplug the power supply, put the all screws back... You can take it from here... right!?
and voilà!
ENJOY A LIFTIME OF BEEPLESSNESS!
PS if you haven't updated your Nova to the latest OS (v4.1), you don't know what you're missing. it's like a totally new synth!
CONTACT
you can find me at www.futureproducers.com
(mostly in Hardware Synthesizers section, nickname: Bluedays)
peace
USEFUL NOVA LINKS
Official Novation site (mp3 demos, OS updates, manuals..)
DanceTach Novation Forum (Novation reps post there!)
Synthfreak.de (free patches for Nova / Nord Lead 2 / Virus / MicroQ...)
Novation Synths (Yahoo User Group)
Novation Gear (Yahoo User Group)
Novastaion1 (mp3 demos, OS archive, articles..)
Nova User Place (Nova SoundDiver 1.2, docs...)
Copyright © 2006 bluedays