|
 1 open up your transparent image,
I am using 300 x 200 (remember the larger your image the longer
loading time this tag will take) 1 open up your transparent image,
I am using 300 x 200 (remember the larger your image the longer
loading time this tag will take)
2 Choose your tube and size to fit
your image, (dont forget if you resize goto effects-sharpen-sharpen
3. copy and paste your tube as a
new layer into your transparent image, it is now perfectly centred
and we can minimise it for now
4. Open up new image same size as
for your tube(in this case 300 x 200) and choose your text tool
type in your name in font and colours of your choice I used Rockwell
condensed, vector and anitalias checked and pulled out my text,
then inner bevel, again your choice.
5. Open up another image, and again
copy and paste your text as a new layer into your new image, again
perfectly centred you can get rid of the other text image we dont
need it now.
6 bring up your tube image and on
both your images goto layers-merge-merge visible.
7. Save both these images where
you can find them easily and name them image1.psp & image2.psp.
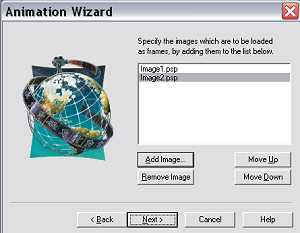
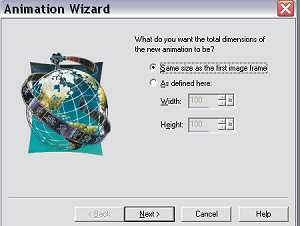
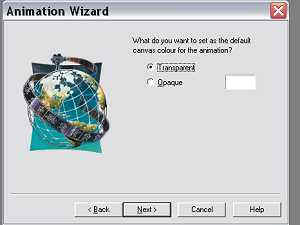
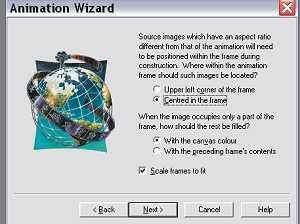
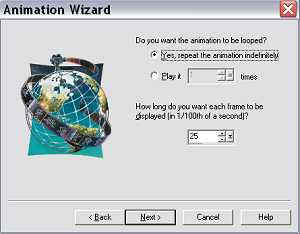
8, open up Animation shop and goto
File-animation wizard at the following settings:
9. click on add image, locate your
saved images and add them:
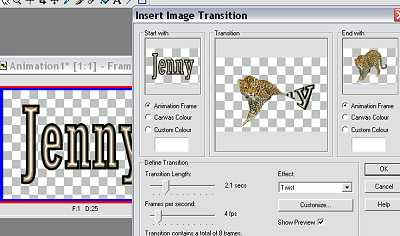
10. click next and finish. Now click
on your first frame and then right click and choose insert image
transition-twist settings as:
and make sure your tube twists into your text, click ok.
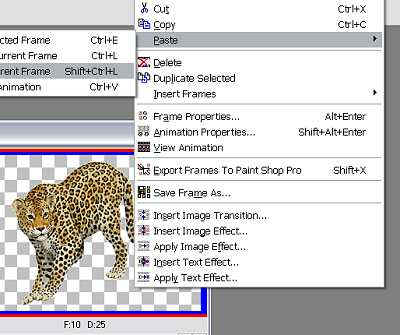
11.Now go back to your very first frame then
click on it and then right click then choose copy, goto your last
frame click on it, right click and
Paste-after current
frame;
12. Go to your last but one frame,
(should be your tube) and click-right click on it-insert image transition
and twist again, ok.
13. View your animation, if there
are no jumps in your animation, well done you got it right first
go, (I practised this so often and kept inserting the last image
transition in the wrong place.)
Thats it you are done apart
from saving. (save as a Gif)
I resized my animation by 75% here
it is:(2002 Neme5is)
|