For
this tutorial you will need
Paint Shop Pro
7,
and this zip file Unzip
the selection to your selection folder and open the other images
in your PSP window.
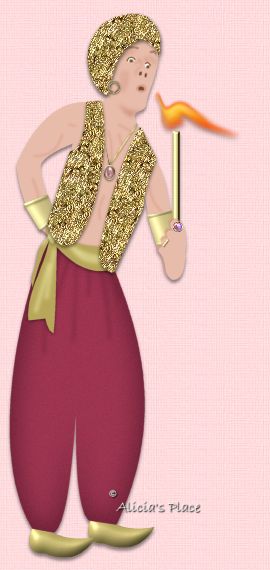
1. Open a new image 270x570, go to Selections>Load from
disk>APcirc1.sel flood fill with color #E8BCAA.
2.
Add a new layer and load Selection APcirc2.sel, flood fill
with the color of your choice for the pants, I am using #9D344F
do not deselect, add a new layer and go to Effects>3D Effects>Cutout:
Color #671F33, Horizontal and Vertical "6", Opacity
"80" Blur "34.5", add a new layer and repeat
the Cutout but change the Offsets to -6. (NOTE:
The color of the cutout depends on the color of the pants, if
you are using a different one you need to choose a darker tone
from that color) Turn off visibility of Layer 1
and merge visible, load the same selection again and go to Effects>Noise
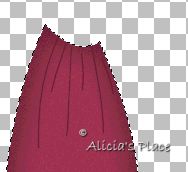
"4". Add a new layer, change your foreground
color to the same of your Cutout and Null for your background
and with your Draw Tool
Freehand Line, Width 1, Antialias Checked and Create as Vector
UNchecked draw some vertical lines (see screenshot) go to Effects>Blur>Gaussian
Blur: "2". Make sure visibility of Layer 1 is
off and merge visible again, you can name this layer Pants.
Save.
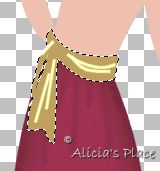
3. Add
a new layer and load APcirc3.sel, flood fill with color #B8A65A,
add a new layer, change your foreground color to #FDFCBC and
background to Null, and with your Draw Tool
same settings as before just change the Width to "3"
draw some lines (see screenshot) then go to Blur>Gaussian
Blur "2" and lower the opacity on this layer to 60.
4.
Add a new layer and load APcirc4.sel, repeat step
3. Turn off visibility of all layers except the last 2 and merge visible,
add a drop shadow: Color: Black, Vertical "1", Horizontal
"0", Opacity "50" and Blur "4.7". Turn off
visibility of Layer 1 and the Pants Layer and merge visible, add a drop shadow
with the same settings, you can name this layer Belt. Save.
5.
Go to Layer 1 and add a new layer, change the color of your
Foreground to #DCA592 (Background Null) and with your Draw Tool
same settings as before just change the Width to "2"
draw some lines on the body and arms and go to Blur>Gaussian
Blur "1", and lower the opacity to 80. Turn
off visibility of Pants and Belt layers and merge visible, you
can name this layer Body. If your lines went out of the
body, load APcirc1.sel again, invert selections and hit the
Delete key. Save.
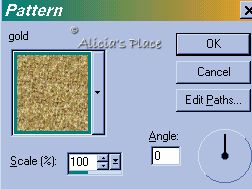
6.
Go to the belt layer and add a new layer, load APcirc5.sel, flood fill with the
gold pattern with the following settings:
Deselect
and add a drop shadow: Vertical "2", Horizontal "0", Opacity
"50" and Blur "4.7" name this layer Vest. Save.
7.
Open the face tube provided in the zip file, copy and paste as a new layer,
position the face and name this layer face. Save.
8.
Add a new layer and load from disk APcirc6.sel, flood fill with the gold pattern
same settings as step 6, deselect. Add a drop shadow same settings as
before but change Horizontal to "1". Save.
9.
Go to the body layer and add a new layer, load APcirc7.sel, flood fill with
color #E8BCAA and add a drop shadow: Color: #D39584, Horizontal &
Vertical "-2", Opacity "80" and Blur "2.4"
10.
Go to the body layer again and add a new layer, change your
Foreground to Null and Background to any color you want for
the stick (I used #FDFCBC) and with your Preset Shapes Tool
Rectangle, Antialias Checked, Create as Vector UNchecked draw
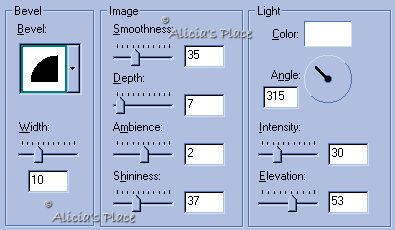
a rectangle, go to Effects>3D Effects>Inner Bevel and
apply the Metallic Preset.
11.
Go to the pants layer and add a new layer, load from disk APcirc8.sel and flood
fill with color #B9AA65 deselect and apply Inner Bevel with the following
settings:
Move
this layer under the pants layer, copy and paste as a new selection and position
the other shoe. Save.
12.
Add a new layer and apply the fire tube, Scale 50, and rotate
it with the Deformation Tool
13.
Now you can add all the jewelry you want, I used a different layer for each one,
for the earring I just draw a white ring and then applied Blade Pro, the
chain and the bracelets are included on the zip file if you want to use it.
I
hope you enjoyed this tutorial, if you have any questions or
comments please email me