
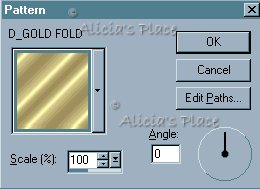
First I want to thank Dee for been so kind and let me use her Gold Fold Pattern for this tutorial. Thank you Dee!!!
For this tutorial
you will need Paint
Shop Pro 7, Eye
Candy, and this zip
file ![]()
You'll also need BladePro or Super BladePro. I used a gold_shiny preset. I'm not sure if it came with Super Blade Pro or if I downloaded the preset. If you don't have this preset, I found a gold shiny preset that is available Here and Dee has one similar too, or you can use any other preset you would like
Unzip the selections on your PSP selections folder, if you don't have it you'll need to create one, the D_Gold Fold into your PSP Pattern folder and save the tube in your favorite folder.
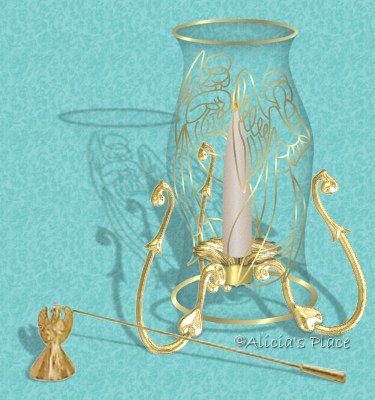
1. Open a new image 375x400 transparent, add a new layer and name it angel1 go to Selections>Load from disk>angel1.sel, if needed: Click on the Magnifing Glass>Zoom in and Flood Fill inside the selections with the D_gold fold pattern, deselect.
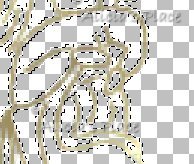
2. Add a new layer, name it angel, go to Selections>Load from disk>angel.sel and flood fill as you did before, deselect.
3. Add a new layer, go to Selections>Load from disk>base.sel, repeat the flood fill, deselect.
4. Add a new layer, go to Selections>Load from disk>body.sel, go to Effects>3DEffects>Cutout: Color Black, Vertical 2 and Horizontal -2, Opacity 40, Blur 30, Fill interior with color NOT checked.
5. Add a new layer, go to Selections>Load from disk>base.sel, flood fill with the gold pattern, do not deselect and with the eraser tool erase the top of the ellipse, deselect
6. Add a new layer, go to Selections>Load from disk>bodytop.sel, repeat the cutout, deselect.
7. Add a new layer, go to Selections>Load from disk>top.sel, flood fill with the gold pattern, deselect.
8. Turn off visibility of the first 3 layers and merge this last five layers visible and call it glass.
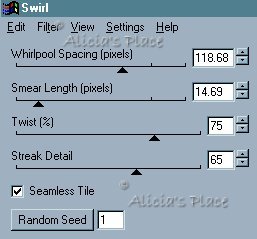
9. Add a new layer, go to Selections>Load from disk>basecandle.sel flood fill with the gold pattern, go to Effects>Plug-in Filters>Super Blade Pro and apply the gold_shiny preset, do not deselect, go to Plug-in Filters>Eye Candy 4000>Swirl and apply the following settings, then add a Drop Shadow: Color Black, Vertical 1, Horizontal 0, Opacity 59 and Blur 3.5, deselect.
10. Add a new layer, go to Selections>Load from disk>basecandle1.sel flood fill with the gold pattern but this time change the angle to 315, go to Colors>Adjust>Gamma Correction make sure Link is checked and apply 0.61, if you want it darker you can apply this twice, add a Drop Shadow same as step 9, move this layer under the previous layer and merge this two layers visible and name it base candle, move this layer between the two angels layers, go to the glass layer and erase the part of the ellipse that is on top of this base candle.
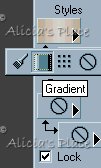
11. Go back to the base candle layer and add a new layer, go to Selections>Load from disk>candle.sel. Change your Foreground to #BCA892 and your Background to #D8D4CE, and on your Styles change to Gradient using the following settings

Flood fill the candle and go to Effects>Noise>Add 4% Uniform. Duplicate this layer and move one under the base candle layer, be sure you are on the one that is on top and with the Eraser Tool erase the bottom of the candle. To add a flame in here, go to your Tubes tool and with the fire tube scale 12% add the flame on top of your candle (NOTE: you can do this on a separate layer so you can move it the way you want it) Close visibility of layer1, angel, angel1 and glass layers and merge the rest of the layers visible, name the new layer Candle.
12. Go to the angel1 layer and add a new layer, go to Selections>Load from disk>versaille.sel, flood fill with white and apply BladePro with the Gold shiny preset, add a new layer and Load from disk>versaille1.sell, flood fill with white and repeat the BladePro preset, merge this two layers and name it versaille1, go to the glass layer and erase the part of the ellipse that is on top of the versaille.
13. Make sure you are on the glass layer and add a new layer, Selections>Load from disk>leave1.sel, flood fill with white and repeat the BladePro preset, add a Drop Shadow same settings as before, name this layer leave1.
14. Go to the candle layer and add a new layer, Selections>Load from disk>versaille3.sel, flood fill with white and repeat the BladePro, add a new layer, Selections>Load from disk>versaille 4.sel flood fill with white and repeat the BladePro, merge this two layers visible and name it versaille2. Go again to the glass layer and erase the ellipse on top of the versaille.
15. Make sure you are on the glass layer and add a new layer, Selections> Load from disk>leave2.sel, flood fill with white and repeat the BladePro and the Drop Shadow, name this layer leave2.
16. Go to layer1 and add a new layer, Selections>Load from disk>versaille 5.sel, flood fill with white and repeat the BladePro, add a new layer and Selections>Load from disk>versaille6.sel, flood fill with white and repeat the BladePro, merge this two layers and name it versaille3.
17. Before you merge your layers make sure they are in the correct order:
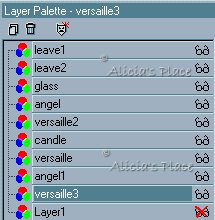
Merge layers visible and your Candleglow is ready.
I hope you enjoyed this tutorial, if you have any questions or comments please email me
Copyright Terms and Conditions
No Part of this Tutorial shall be Copied - Distributed - Placed on a CD - Sold - or Copied onto another Website.
Webpage, Graphics, and Tutorial are © Alicia's Place - August/2001
All Rights Reserved