KVCD Guide
Links - A Link To All The Files You Will Need
VirtualDub
BeSweet
BeSweet GUI
TMPGenc
KVCD Templates
Step. 1 - Extracting Audio
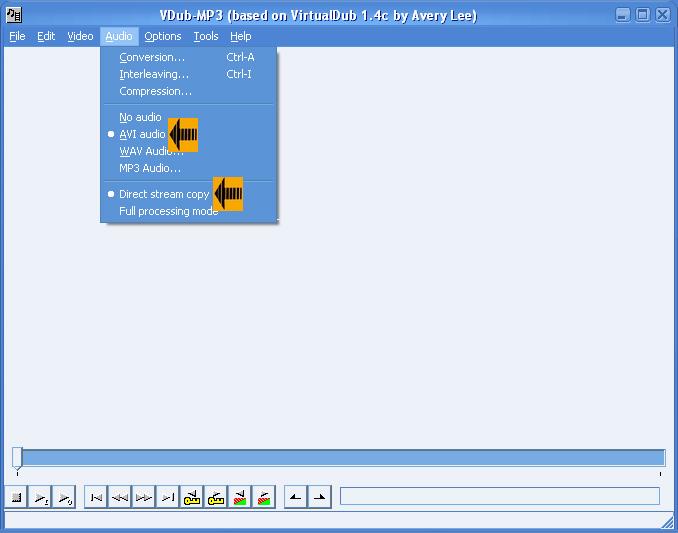
Open up your file with Virtual Dub. Once you have done that go to the Audio menu and make sure you have it set for "AVI Audio" and "Direct Stream Copy". When done setting those options go to the File menu and select "Save WAV...". You know have the audio extracted.
Audio Settings
Step.2 - Extracting The Video
Open your file with Virtual Dub. Once you have done that go to the Audio menu and make sure you have "No Audio" selected. Once you have done that go to the Video menu and select "Direct Stream Copy". Once that has been done go to the File menu and select "Save Avi...". You know have the video extracted.
Video Settings

Step 3. - Coverting the WAV to MP2
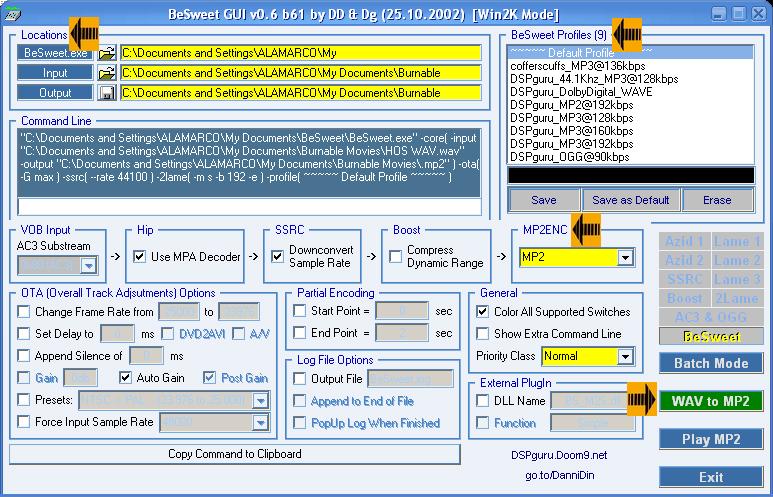
Open up BesweetGui. At the top right you may select the bitrate in which you want to encode your audio to in the "BeSweet Profiles (9)" menu. When done that go to the "Locations" menu. In "BeSweet.exe" click the little folder and direct it to where ever you may have installed BeSweet.exe to. Next go the the "Input" part of Locations and click on the little folder. Click on WAV/MPX (3rd from top) and direct it to the WAV file you made in Step 1. When done that go to "Output" in Locations and click the little disk. Click MP2 at the bottom and then direct it to where you want to your file to put put when completed and give it a name. After completing that go to the option directly below the "Save" button from Besweet Profiles (9). The title of the option should default to be saying "Lame" in the scroll down menu scroll down to MP2 (*Note* that when you select MP2 from the scroll down menu the title of the option will change to "MP2ENC"). Now you should note the green button saying "WAV to MP2". Click that button and it should open up Besweet and start converting.
Besweet Settings
Step 4. - Encoding With TMPGenc
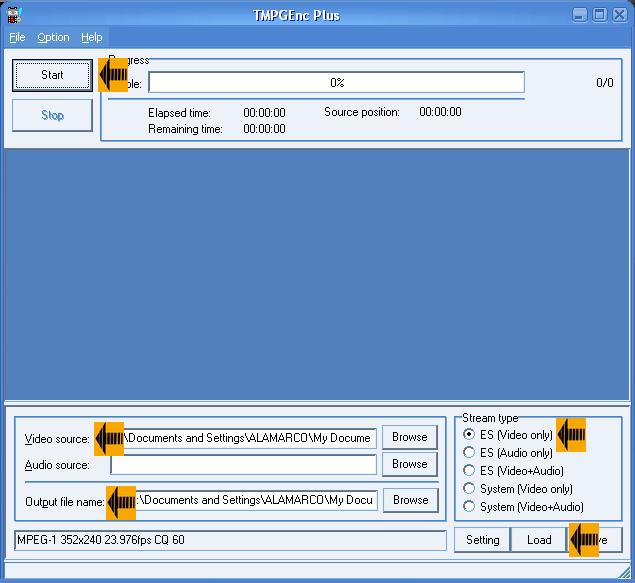
Open up TMPGenc and close the Wizard if you have it auto-opening. At the bottom right corner you will see a "Load" button. Click this button and load the template you wish to use. When done that go to "Video source" and direct it to the .avi you have made in Step 2. Leave "Audio source" blank. Next go to "Output file name:" and direct it to where you want your file to be placed when done and give it a name. When done that make sure the "Stream type" (bottom right) is set to "ES (Video only). You are now ready to encode. Hit the "Start" button on the top left and it will start encoding.
TMPGenc Settings
Step 5. - Adding The Audio and Video
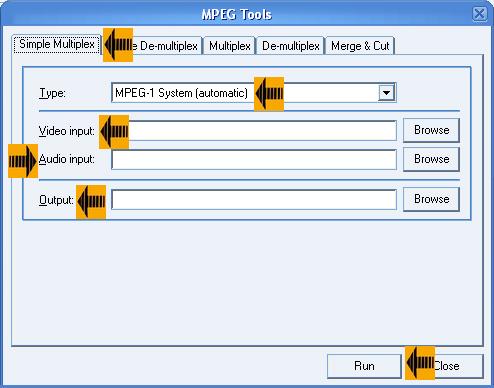
Open up TMPGenc and go to the File menu and select "MPEG Tools...". Now go to the "Simple Multiplex" tab (should come up as default). Leave the "Type:" as MPEG-1 System (automatic). Next go to "Video input:" and direct that to your newly converted video created in Step 4. Next go to "Audio input:" and direct that to the MP2 file you created in Step 3. Next go to "Output:" and direct that to where you want your finally product to turn up and give it a name. Finally hit the "Run" button (bottom right) and it will start the process of adding the files together.
MPEG Tools Settings
Congratulations! You have just made your very own KVCD. Now all you need to do is burn it.