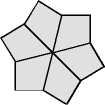
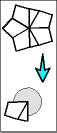
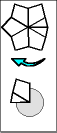
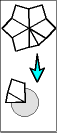
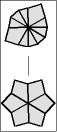
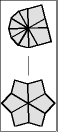
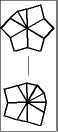
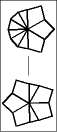
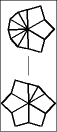
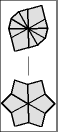
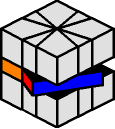
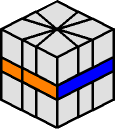
Square 1 is a mixture of small wedges, large wedges, and two trapezoids. The two trapezoids belong in the equator (middle layer) of the puzzle, and must be joined together:
| like this: |
 |
or like that: |
 |
|||||||||||
 |
 |
 |
 |
 |
 |
 |
 |
 |
 |
Note: There is no need to memorize the above table; it is merely an example.
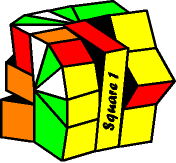
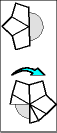
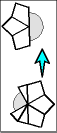
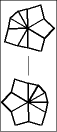
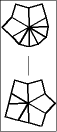
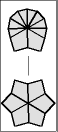
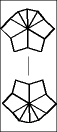
Once one layer is filled with 6 large wedges, then it is time to memorize the chart below to transform the puzzle to its final shape, the CUBE; or at least practice it enough so it becomes second nature.
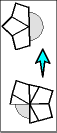
The 5 possible starting postions are shaded in gray. Find your pole position and follow the arrows until you arrive at the finish line. To make a move, start off by setting the top and bottom layers just like one of the diagrams, then give the entire right side a twist. After that, turn the top and/or bottom layer so that they match the next diagram, before doing the twist again.
 |  |
 | |
 | |
 | |
 | |
 | ||||
 |
||||||||||||||
 |
|  |
|  |
||||||||||
|
||||||||||||||
 | |
 | |
 | |
 | ||||||||
||||||
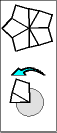
| ...and if the equator still needs fixing... | 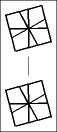 | |||||||||||||
NOTE: the gap between the layers represents the front edge;
i.e., the front edge of the top layer points down,
the front edge of the bottom layer points up,
and finally, the "line-thingy" in the middle is the "slice" in the equator.
There are two different types of notation here. The first is what I call Descriptive Notation, which seems to be the accepted notation in most Square-1 web sites, so there is no sense for me to invent yet another one. The other was created by Jaap Scherphuis, which I prefer mainly because of its clarity and simplicity. Besides, it's a lot easier to type! Anyway, you only need to choose one of them.
Descriptive |
A SINGLE VOLUME OF MORAL |
Jaap |
t+ |
Rotate the top layer 30 degrees
(1/12 of-a-turn) clockwise. Note: a small wedge is 30 degrees wide. |
(1,0) |
t+2 |
Rotate the top layer 60 degrees
(1/6 of-a-turn) clockwise. Note: a large wedge is 60 degrees wide. |
(2,0) |
t+3 |
Rotate the top layer 90 degrees (1/4 of-a-turn) clockwise. | (3,0) |
t6 |
Rotate the top layer 180 degrees (half-way around) | (6,0) |
t-3 |
Rotate the top layer 90 degrees (1/4 of-a-turn) counter-clockwise. | (-3,0) |
t-2 |
Rotate the top layer 60 degrees (1/6 of-a-turn) counter-clockwise. | (-2,0) |
t- |
Rotate the top layer 30 degrees (1/12 of-a-turn) counter-clockwise. | (-1,0) |
R |
Rotate the entire RIGHT SIDE 180 degrees (half-way around). | / |
b+ |
Rotate the bottom layer 30 degrees (1/12 of-a-turn) clockwise. | (0,1) |
b+2 |
Rotate the bottom layer 60 degrees (1/6 of-a-turn) clockwise. | (0,2) |
b+3 |
Rotate the bottom layer 90 degrees (1/4 of-a-turn) clockwise. | (0,3) |
b6 |
Rotate the bottom layer 180 degrees (half-way around) | (0,6) |
b-3 |
Rotate the bottom layer 90 degrees (1/4 of-a-turn) counter-clockwise. | (0,-3) |
b-2 |
Rotate the bottom layer 60 degrees
(1/6 of-a-turn) counter-clockwise. Note: a large wedge is 60 degrees wide. |
(0,-2) |
b- |
Rotate the bottom layer 30 degrees
(1/12 of-a-turn) counter-clockwise. Note: a small wedge is 30 degrees wide. |
(0,-1) |
Basically you get the idea: t for top and b for bottom; plus for clockwise and minus for counter-clockwise, followed by the number of increments (1,2,3... etc.); and finally R for turning the right side. When using the JS notation, you can combine both top and bottom moves within a single set of parenthesis. To learn more about Jaap Scherphuis' notation, I strongly suggest that you visit his Square 1 page:
NOTE: A clockwise move for bottom layer spins in the opposite direction of a clockwise move for the top layer. Imagine holding a jar with the lid on the top. To close the jar, you must turn the lid clockwise, twisting it to the left. Now imagine holding a jar upside-down. To close the same jar, you must also turn the lid clockwise, but now it twists to the right instead.
NOTE continued: The same goes for the counter-clockwise move; as they also spin in opposite directions for both top and bottom layers. To remove the lid, you must turn it counter-clockwise. If you are holding the jar right-side-up, then you must twist to the right. If you are holding the jar upside-down, then you must twist to the left.
I know this is all very confusing, but just pretend that for every clockwise move, you're screwing a lightbulb in; and for every counter-clockwise move, you're unscrewing a lightbulb out.
Because the Square 1 puzzle has a tendency to mutate into so many bizzare shapes, I will try to keep things as orthogonal as possible; in other words, I almost promise to keep the top and bottom layers square throughout the solution. I also almost promise to keep each move itself at right-angle increments, with the minor exception of the +1 or -1 moves that lead and trail for each sequence.
Once the puzzle is transformed into a cube, you only have to memorize ten sequences to solve the colors, starting right NOW...
Now that we are aquainted with the notation, it is time to learn your first lesson by solving the equator.
 |
|
 |
Desc. notation: | JS notation: | ||
b- R t6 R t6 R b+ |
(0,-1)/(6,0)/(6,0)/(0,1) |
This is probably the most important move to memorize, as there will be times when the equator accidentally gets out of shape. After the move is over, the equator is square again, and the top and bottom layers are left exactly as they were before.
Before we continue, I must give credit where credit is due:
First of all, many kudos go to Jaap Scherphuis for helping me polarize the cube, which you will have to do later on yourself during the course of this solution. Just as he is indebted to Robert Richter for transforming the puzzle into cube, I feel equally indebted to him for teaching me how to get the the puzzle from odd parity to even parity. In the meantime, you should seriously consider visiting his home page; the single most comprehensive puzzle site on the web:
Another round of applause goes to Christian Eggermont, the web-site that started it all! A decade ago, this was the only puzzle site available at the web. Today, it is still considered as the mecca for many cubists:
Christian Eggermont's Puzzle Page
NEXT: Solve the Top Corners