The first thing you will have to do is get a bin file containing your current bios. You can do that by using the programming utility that is appropriate to you motherboard, such as awdflash (make sure you use the latest version) or pflash (i believe this is for asus boards)
Once you have that file, we will call it bios.bin you can start. Using any image editor you will need to create a monochrome image with a maximum size of 136x126 pixels. Note, however, that in photoshop file, the bitmap filter is slightly fucked, so the resulting image was not a proper size according to bmp2epa utility. As a suggestion, you should use a black background and white image, trust me, this will look better.
Next, once your image is done you execute the bmp2epa in the following manner:
bmp2epa.exe new.bmp new.epa
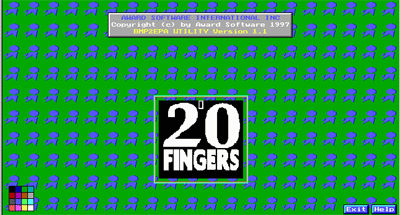
If the file is properly made you will see a
screen like this
here you will be able to change the white (your foreground color) to any combination of the 16 colors listed on the bottom left. Once you have done this, press F10 and say yes to save and exit.
Now that your logo file is done, you have to add it to your bios code. This is done quite easily. You will need to use the cbrom112.exe file which you can download from the main page.
cbrom112.exe bios.bin /epa new.epa
if everything goes successfully you will not get an error message and a compression ratio of the embedded code will be displayed.
Now all you have left to do is flash your bios with the updated bios.bin file. Remember that before you make any changes, you should save a backup of the original bios. To flash you will once again use the flashing utility that came with your computer.