RAP5 Disassembly Instructions
Step by step instructions on how to do a standard breakdown of the RAP5 (MP5) paintball marker for routine cleaning/maintenance. You should NEVER, break open the actual "core" of these markers. Only APS certified personnel should attempt to work on the core. If you have a problem that is NOT fixed by this routine breakdown and maintenance, then please contact either RAP4 or APS.
This page is has alot of pictures in it. I tried to keep them smaller in size to help the people with dial-up connections, but it still may take a minute or two to fully download. Please be patient. I know it will be worth your time.
Thank you!
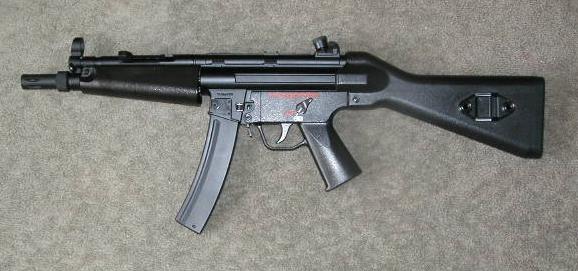
Ah, the RAP5 paintball marker. When I first received my RAP5, I looked over the poorly constructed manual prior to examining the marker itself. After reading the manual (if you can call it that), I was even more confused than before I read it. So, I tinkered around with the gun until I got it working the way I liked it. While this is pretty easy to do, most people will be a bit hesitant about opening up a brand new marker. So, I decided to whip up this page to show the step by step process on how to disassemble the RAP5 for routine maintenance.
(Click on the pics for a larger one!)
NOTE: Before working on ANY type of firearm (real or not), make sure it is NOT loaded!!
Ok, now on to the good stuff!
 First thing you need to do is make sure the marker has the safety
ON! The RAP5 paintball marker has a select fire switch located on either side of
the receiver, just above the trigger. The three positions are "Safe,
Semi-Automatic, and Full Automatic." These settings are displayed via three
different icons on the side of the gun. The bottom most icon shows, in white, a
bullet with an "X" thru it. This is your "safety." In this position, the marker
should NOT be able to be fired. The next position is "Semi Automatic" mode, and
can be engaged by rotating the select fire switch up one position. This is
represented by a single bullet painted in RED. In
this mode, the marker will fire one time with each depression of the trigger.
The last and final position is "Full-Auto." This is represented by a long string
of bullets painted in RED, and can be engaged by
rotating the select fire switch up past "semi-auto" until it locks in the
"full-auto" position. In this mode, the marker will keep firing as long as the
trigger is depressed. It will stop firing when the trigger is released.
First thing you need to do is make sure the marker has the safety
ON! The RAP5 paintball marker has a select fire switch located on either side of
the receiver, just above the trigger. The three positions are "Safe,
Semi-Automatic, and Full Automatic." These settings are displayed via three
different icons on the side of the gun. The bottom most icon shows, in white, a
bullet with an "X" thru it. This is your "safety." In this position, the marker
should NOT be able to be fired. The next position is "Semi Automatic" mode, and
can be engaged by rotating the select fire switch up one position. This is
represented by a single bullet painted in RED. In
this mode, the marker will fire one time with each depression of the trigger.
The last and final position is "Full-Auto." This is represented by a long string
of bullets painted in RED, and can be engaged by
rotating the select fire switch up past "semi-auto" until it locks in the
"full-auto" position. In this mode, the marker will keep firing as long as the
trigger is depressed. It will stop firing when the trigger is released.
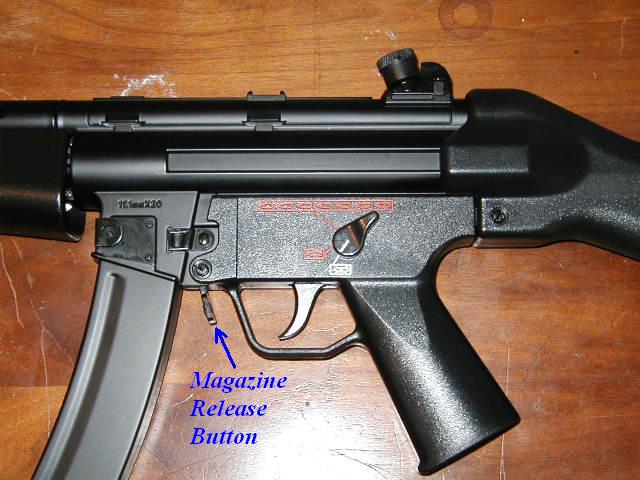
The next thing you must do before proceeding with the
disassembly would be to remove the magazine. (If the magazine has not yet been
installed or has already been removed, then please skip this step. But please
feel free to check out the cool pics!) This can be done by pressing the
"Magazine Release Button" located just forward of the trigger guard. Press the
button TOWARDS the magazine and gently slide the magazine down and out of the
marker.
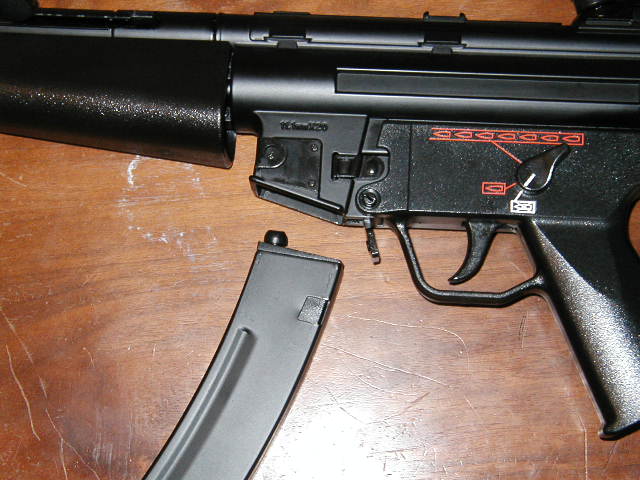
Magazine has been released...
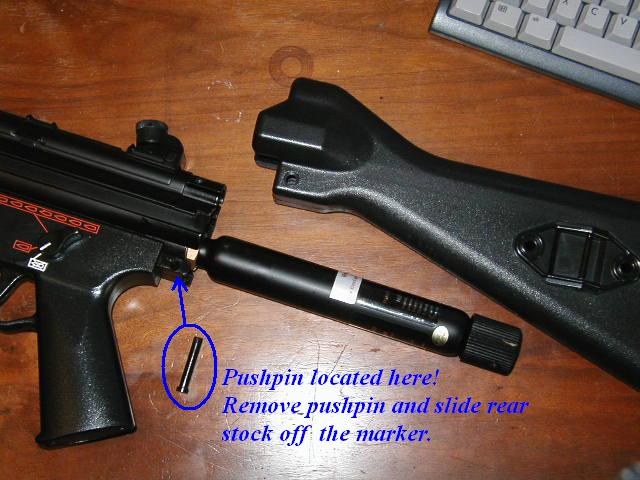
Next step is to locate the rear "PushPin." This is located just behind the grip frame, at the base of the rear stock. Slide this pin out (No tools should be necessary.) and then slide the rear stock off the back of the gun. This will expose the internally mounted 45gram CO2 tank. The CO2 tank will have a large knurled knob on the back of it. While it is still attached to the marker, turn this knob clockwise until it can not turn anymore. This will close the CO2 tank's valve, preventing anymore gas from entering the marker. Once you are sure that the tank has been shut off, you can then remove the tank from the marker. (See the Note below)
NOTE: If the marker had been gassed up, you may want to vent the remaining gas after shutting off the tank. With the tank off, flip the select fire switch up into the "semi-auto" position and, with the marker pointed in a safe direction, proceed to shoot until no more gas is present in the marker. (The gun will simply stop cycling when empty.)
The 45gm CO2 tank can now be removed by
unscrewing it counter-clockwise. There may be a small puff of escaping air as
the tank is removed. This is Ok. It is just the gun venting the remaining gas
from its system. Now that the tank has been removed, it would be a good time for
you to check the oring located on the top of the tank for any
chips/cracks/dents, etc. If in doubt, replace it.
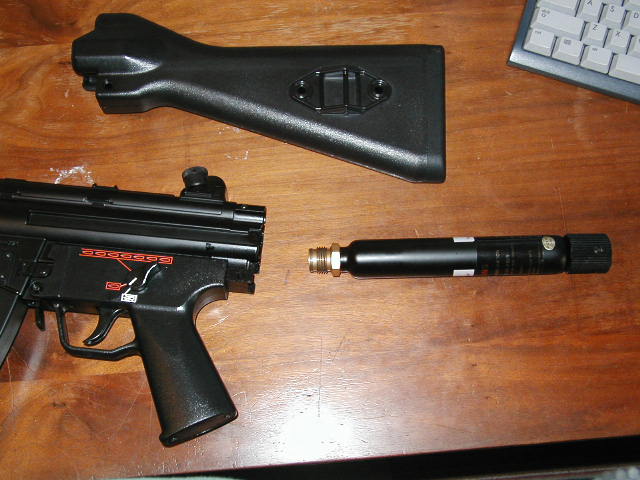
Whew, now that we got that out of the way...
Now we can start the rest of the disassembly.
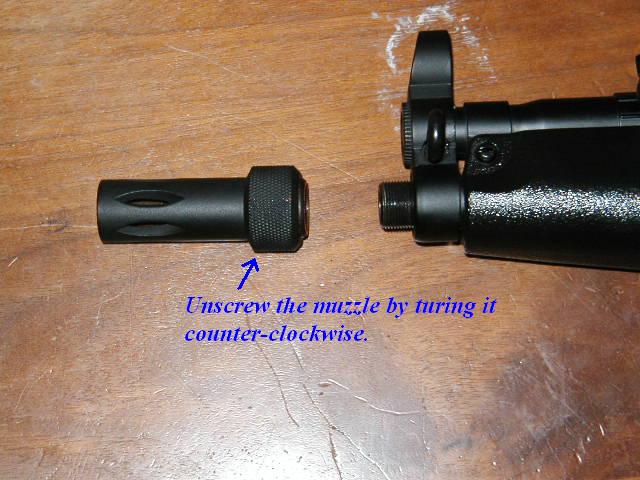
First thing you will need to do is to remove the front muzzle break. (Flash
hider, compensator, whatever...) This is done by simply unscrewing it from the
barrel. (Counter-Clockwise) Be sure to watch out for the small washer that is
between the barrel and the muzzel.
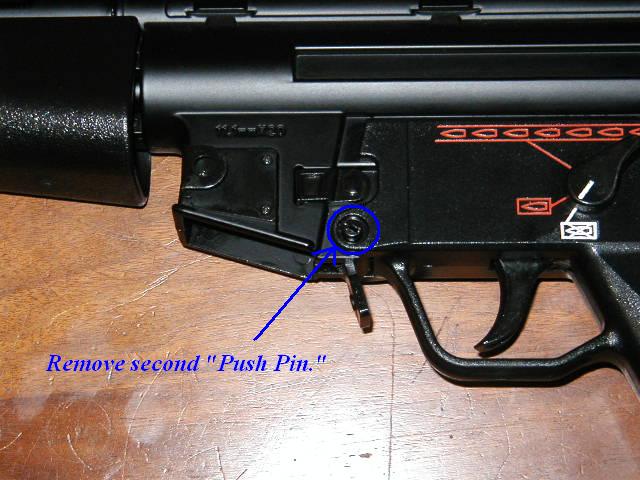
Locate and remove the second "Push Pin." This one is located just
in front of the trigger guard, right above the magazine release button. Again, no
tools should be required to get the pin out.
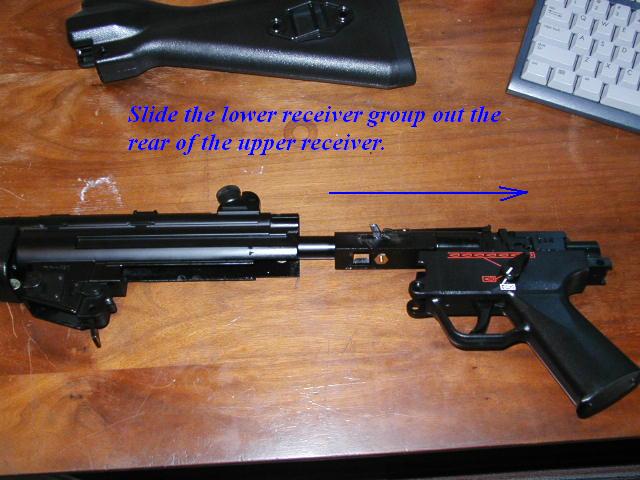
With the second push pin removed, you can then slide the lower
receiver group out the rear of the upper receiver. The lower receiver group will
consist of the gripframe, core, and barrel assembly.

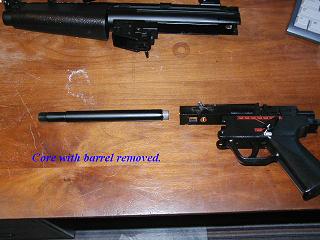
Now you can unscrew the barrel from the core. Turn the barrel
counter-clockwise to remove the barrel. With the barrel removed, now would be a
good time to clean any broken paint, shell, dirt, or whatever else may be in
there out. Barrel maybe cleaned by rinsing with warm/hot water, followed by a
clean soft cloth down the barrel. Make sure you thoroughly dry the barrel.
Once the barrel is removed, you are done! This is probably as far
as you should go in breaking down your RAP5. Do NOT attempt to break down the
core of the RAM. This should only be done by APS trained personnel.
Now that you have it disassembled this far, it would be wise to inspect all the visible parts for any damage. Inspect the shell ejector and spring for any signs of wear or damage. You can also make any changes to the ROF and/or velocity screws at this time as well. (More on that in a future article.)
Now, once you have it all cleaned up, you are ready to put it back together. Reassembly is just the opposite of disassembly. (Duh) Follow the same steps backwards to reassemble the marker. However, I must make a couple of pointers to take note of during reassembly.
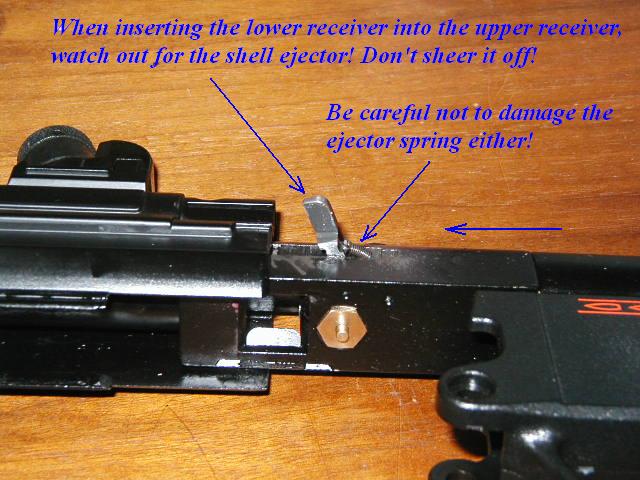
When reassembling the the marker, watch out for the case ejector.
This is the piece that will be hanging out the right side of the marker. (See
pic!) It is possible, if you are not paying attention, to slide the lower
receiver into the upper receiver and sheer that piece right off! You must press
the ejector down into place, and hold it there while you slide the lower
receiver into place.
NOTE: Watch out for the ejector
spring too! If not done properly, the spring could get damaged or come undone
from the ejector arm. (It happened to me.)
So, what are the steps in reverse??
Screw barrel into core.
Slide lower receiver back into upper receiver. (Watch for the ejector arm!)
Insert front push pin.
Screw muzzle back onto barrel. (Watch for small o-ring.)
Drop 5-6 drops of oil into the rear ASA. (Air Source Adaptor - Its the part the tank screws into.)
Screw CO2 tank into ASA.
Slide rear stock over CO2 tank.
Insert rear push pin.
That is it. Your done! Just load up the magazine and go have fun!!