The Morris Mini was introduced in October 1959 and was a departure from automotive designs of that era. By using a 2-box styling, they produced a four seat compact car about 3 meter in length that used a front engine,front wheel drive layout to keep the passenger compartment flat.It initially had an 848cc,34hp engine, which allowed a speed of 115km/h. This outstanding design allowed 80% of the overall car length for driver and passenger space, which provided room for 4 large adults to be seated comfortably.Its patented "Hydrolastic" 4 wheel independent suspension system was another of its excellent innovations. This superbly balanced car also performed well on racing circuits, and John Cooper of British racing fame,souped-up the engine and introduced it to the public as the Morris Mini Cooper.
Colours I used
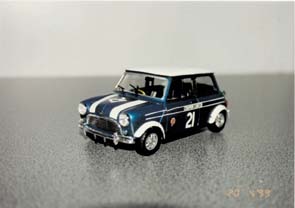
BODY - Metallic Blue (TS19, THE CODE NUMBER FOR THE PAINT),
ROOF - Pure White (TS26),
INTERIOR SEATS - Matt Black (TS6),
You are excited.It's your very first modelling kit you recieved! You are about to start when BOOM ! The moment you opened that kit, You freaked out ! Now that happened to me too when I just started.The minute I opened that box , I told myself that I cannot do it .It's simply too hard , too complicated ! But I decided to give myself a chance and trust me it's not as difficult as I would imagine it to be ! All you need is a little boost in that hidden confident,lots of patienct to spare and a little imaginations! The kit on this page took me about 5 days to complete and I make several changes to it as I go along.The orignal colour wasn't Metallic Blue but green.Well, the good thing about miniature building is that you have priority over everything ! Yes ,everything !
To start off, read the instructions thoroughly before assembly.Now this is a very important point to note otherwise you'll have a lot of problem as you go along. Next,DO NOT,I repeat DO NOT detach the parts unnecessarily otherwise being told.I normally like to do the body first course the paint takes time to dry.To make my painting more effective,it is always good to start of with a base colour.I used a primer which is actually just a white colour surfacer or you can also use a white coloured paint. Spray lightly , it doesn't matter if it look uneven course that is just a base colour for you to work on.Leave it for a couple of hours to dry under airly space area.Spray the required colour that you want your model to be.I normally have like 3-4 coats of spray Lacquer having each coats with ample time to dry like 6 hours or more.I used modelling wax to give it that finished touch . You can easily get the wax from any modelling shop.
The instructions booklet is very useful course it actually tells you the specific colour that you should used.So follow the instructions very carefully.It is always good to check on the information about the model.That should give you a clearer picture and a better understanding about the kit.A successful minature model is one that have an identical look to a real one !So the more effort you put in,the better it's going to be ! Applying Decals or simply 'stickers" can be rather tricky.Cut off decal from sheet.Dip the decal in water for about 10 sec and place on a clean cloth.Hold the backing sheet edge and slide decal onto the model . Move decal into position by wetting decal with fingers. Press decal gently down with a soft cloth until excess water and air bubbles are gone.