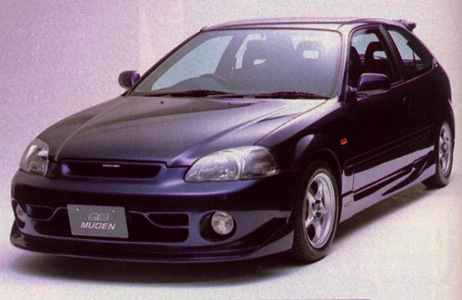
Clear Corner Lens (1996-1999)
Painted Rear Lights
Painted Brake Calipers

Clear Corner Lens (1996-1999)
Thanks to Scott Heileson of Scott's 97 Honda Civic Site
Estimated Time: 3-4 hours
Tools:
Phillips screwdriver
10mm socket & ratchet
flat-tip screwdrivers (2)
knife
hairdryer
silicone
REMOVING THE BUMPER
To remove the bumper to gain access to the lights, you first need to remove the retaining bolts and screw on the bottom of the bumper. First, remove the black screw that holds the airbox to the bumper on the passenger side of the bumper.
Remove the two bolts placed just off center of the underside of the bumper.
Next, you will need to remove the plastic retainers on the top part of the bumper. Pop open your hood and you will see them at the top part of the bumper, as pictured below. For 96 civics, unscrew the screw, then pull out the retainer. For 97 civics, use a flat tip to pop up the smaller tab, then pull out the whole retainer.
Next, you will need to remove the screws that are on the ends of the bumpers, accessible from inside the wheel well. Use a Phillips screwdriver. There is one screw on both sides.
Remove the bumper carefully by pulling it off on each side, then holding it by the center.
REMOVING THE HEADLIGHT
There are 4 bolts that hold the headlight in place. Two on top, and one on each side, as pictured below. Remove them.
You will also need to remove the corner lamp light, as well as the headlight connection. Turn the corner lamp socket to the left to free it, and pinch the headlight connector to remove it.
OPENING THE HEADLIGHT
Now that you have the headlights removed, place them in a clean working area, so as to minimize the dust factor.
Use the hairdryer on the clips to soften them allowing them to bend instead of breaking.
To begin the opening of the headlight, use the flat tip screwdriver to pry open the first clip on the headlight, the one nearest the black rubber molding.
Get the screwdriver deep into the headlight, but keep the tip aimed as near the gray plastic backing of the assembly, to make sure that you don't break the chrome headlight housing with the tip of the screwdriver. Use leverage to pry the gray plastic piece away from the clear headlight piece.
While using leverage to pry the two pieces apart, use a small knife or razor to cut the factory glue.
Continue prying and cutting. Don't probe too deep with the screwdriver. You can crack the chrome housing
Pull the two pieces of the headlight apart, carefully!. The factory glue should come apart easier, but if it is still difficult, pry and cut the glue on the bottom of the headlight.
REMOVING THE ORANGE PIECES
Now that you've managed to get the headlight open, time to remove the orange pieces. To get at the orange pieces, you need to remove the chrome housing from the clear headlight lens. There are two screws which hold the lens and the chrome housing together. Remove them.
To remove the orange bulb cover, remove the screw that holds it in place,
then make sure you replace the screw in the same hole, it will look better than if you leave the screw out.
Next, to remove the orange reflector, there is one screw that holds it in, make sure you replace this screw in the same place too, so you don�t lose it.
Put the housing, lens, and the entire headlight back together,
screwing in all necessary pieces. You need to squeeze the headlight together, and make sure all of the clamps fit back on as they did
originally.
You need to re-seal the headlight with some kind of silicone or caulking agent to make sure water doesn't get in.
Let it dry in the sun for a little bit before reinstalling the headlight and bumpers.
Painted Rear Lights
Thanks to El Langa
Estimated Time: <1 hour (day to dry)
Tools:
masking tape
Testors transparent red spray enamel (found at most hobby stores)
Take off the rear lights by opening the trunk and unbolting the four bolts that hold each light
in place.
Disconnect both bulbs from each of the lenses by twisting counter clockwise about 20 Degrees. In order to get to the bulbs of the inner lenses (the ones on the trunk lid) you must first remove a plastic cover which is supported by two screws.
After all lights are taken off, clean them with some rubbing alcohol (or plain water if you prefer).
Then you must use some masking tape to cover everything around the lens (the part that is not
supposed to be painted). Use a neatly cut piece of masking tape to cover the reverse light.
Once the masking tape is on place the lens on a piece of newspaper somewhere where there is no dust or wind blowing.
Place the can about 5-6 inches from the lens and start painting with nice easy movements of the wrist. Paint one thin coat and let dry for about 10 minutes, then repeat with 2-3 more coats.(let the paint dry 10 minutes between each coat) Make sure each coat is thin, otherwise it will start to run and you'll have to start over. If this happens don't freak out just remove the paint from the lens with rubbing alcohol and start over.
Repeat the process with each of the four lenses.
After all lenses are completely dry (let them sit for a day if possible), re-install them the same way you took them off.
Painted Brake Calipers
Thanks to Teresa Morrison
Estimated Time: 1 hour
Tools:
Jack
Lug wrench
Newspaper
Masking tape
High temp spray paint
Jack up the car. Be sure to put a block of some kind behind the back wheel if necessary.
Remove the wheel using the lug wrench.
Clean the caliper using a degreaser. I used lacquer thinner and it worked great.
Tape off the entire wheel well and surrounding brake area using the newspaper and masking
tape. Be sure to cover the rotors really well.
Apply the paint using nice, thin, even strokes. Allow time (approx. 15 minutes) between
coats. I did 3 coats and that seemed sufficient.
After you are sure the calipers are dry remove the newspaper and tape. Then put the wheel
back on, take off the jack and you are ready to roll!
Last Updated:
June 2, 1998