
FIG. #1
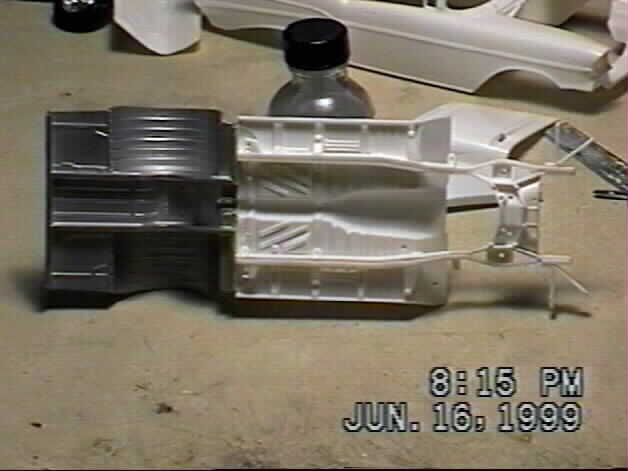
FIG. #2
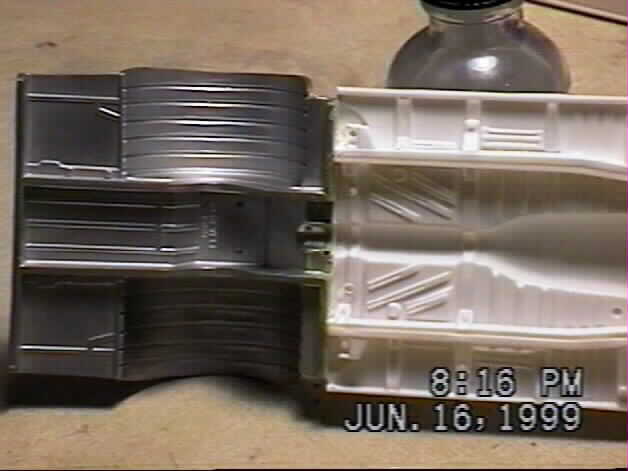
FIG. #3
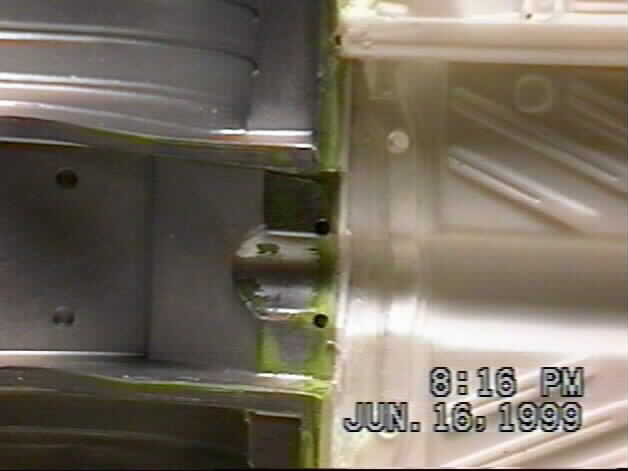
FIG. #4
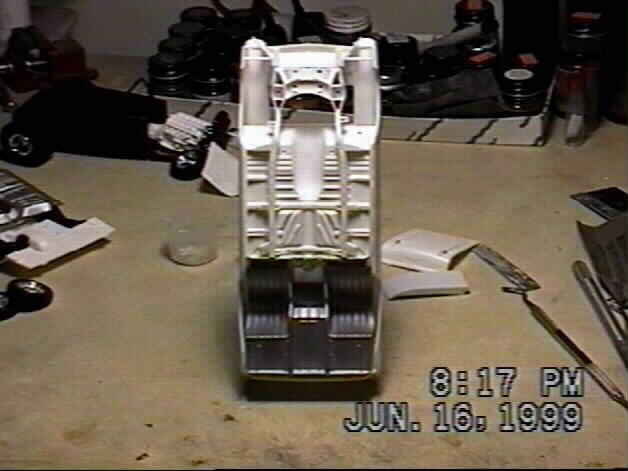
FIG. #5
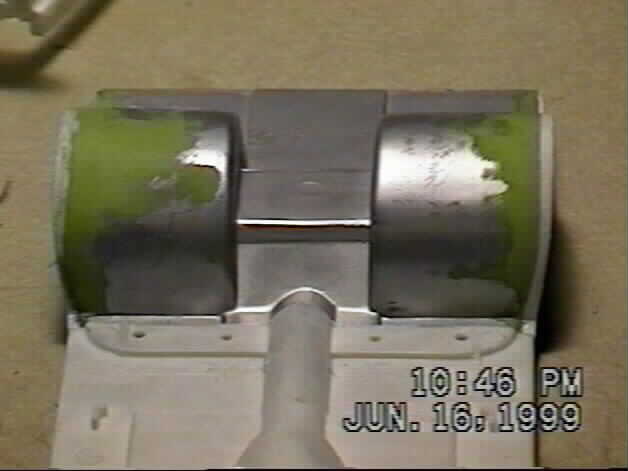
FIG. #6
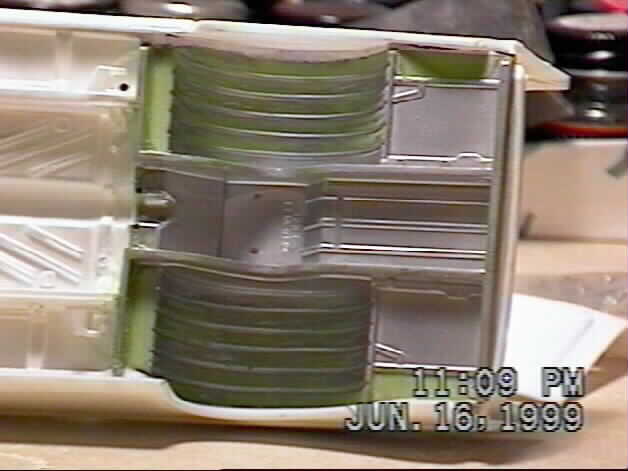
FIG. #7
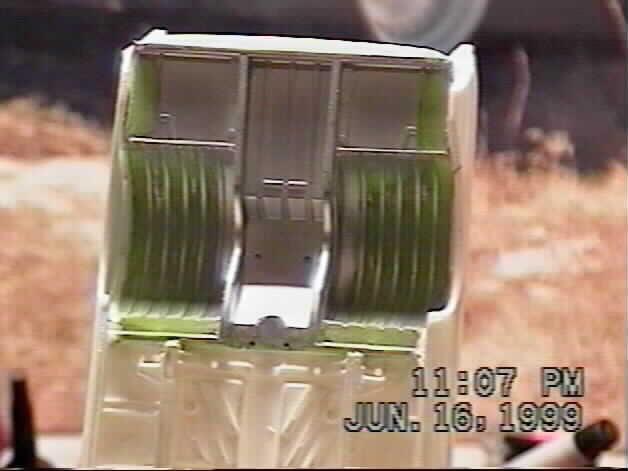
FIG. #8
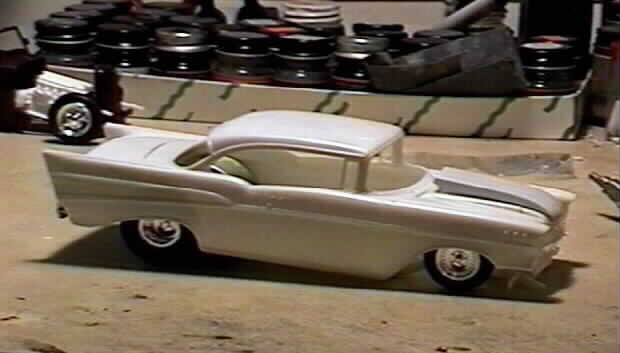
FIG. #9
After going over the parts in the �57 Pro-Shop Kit, I decided to �Back-Half� the car due to the nice detail and separate front suspension parts (i.e. Upper and Lower A-arms etc�).
The �Donor� kit I�m using is from the Revell Malibu SS Pro-Street �Max-Rat�, Kit #7147. It has a nicely detailed Pro-Street chassis and I will also be using the big block Chevy motor from it with some parts box items.
So far I have cut the �57 floor pan directly in front of the rear wheel wells and tin the same location of the �66 chassis (FIG.#1). This was done with a small cut-off wheel on a Dremel tool, but could be done with a hobby say also, the straighter the first cut the better. The �66 chassis is all molded together, and the �57�s is a separate floor pan and frame. I tacked the frame rails of the �57 to the cut floor pan with super glue gel (just a dab, this will be removed and properly glued a little later). I am not planning on throwing out to many dimensions at this point because of the different donor kits that might be in use. Normally I don�t measure, I have a pretty good eye and rely on that for more speed (it�s been good so far!).
Now it is time to trial fit the rear half to the �57 frame and floor. You will need to fit the �57 chassis in under the body in the correct location, then overlay the rear half, paying careful attention the where you need to make the next cuts to the frame and floor of the �57. Make your marks using a fine tip permanent marker. Remove the chassis and make your cuts. Remember to take off less material fit final fitting for the parts. It is easier to remove the plastic than it is to replace it if you remove to much. The �66 rear has a nice molded in cross member that the �57 frame will be attached to (just like doing a real car). I used a flat micro file and a piece of 600 grit sandpaper glued to a scrap piece of bass wood for fine adjustments and squaring up the pieces. For a tight fit between the front and rear halves, I tend to leave the straightest part alone and work the other to where it fits and is positioned correctly. (FIG #2, #3 & #4). Now in doing most all of these type conversions there will be gaps between the body and frame and if you removed to much at the joints don�t worry. Test fit your completed chassis under the body. Pay attention to where if fits and where it doesn�t. Mine has anywhere from 1/32� to 1/8� (0.8mm to 3.2mm) gaps that need to be filled at the joint of the halves and between the body and rear frame, from the front of the wheel wells back. To some of you just building a �shelf� model this is fine. For those of you that are thinking of entering a contest, it is unacceptable. Dig out the .40 styrene after pulling some measurements cut straight strips the width of your largest measurement (mine were 1/8� so the strips were that width). I then started at the front of the wheel well and with the plastic weld cement started to affix small stretches and letting them cure as you go (FIG#6, #7 & #8 finished views). Doing it this way you are able to make bends and contour with a single strip rather than working with 20 small puzzle pieces that will never look right when done without lots of putty and sanding. (FIG #9) is a shot of the body on the new Pro-Street chassis with Wheels and Tires sitting loose.
This has the frame done, next is the Rear suspension, then the front both will be covered in the next lesson. Just a note, on builds like this I wait until I have all the scratch built stuff done FIRST before painting anything. You will see the reason as we go, you will have to handle the parts a lot and it saves some headaches down the line. TRUST ME � been there, done that! Don�t want to do it again! ;-)
At anytime if you have any questions feel free to add it to the message board on this site or you can e-mail me direct at: [email protected] If the question is a good one I will post it on the site with your permission. I know that some people are shy about asking questions, thinking they are �Dumb� questions. Let me tell you there are NO dumb questions, only dumb answers!
Till Next Time,
Pat Dunnivan