How to Swap an R-200 Differential Into the Early Z
This page details how to install an R-200 differential assembly into an early Datsun
Z.
Background
My '72, 240-Z came stock with an R-180 differential. The
"R-180" indicates a 180mm ring gear. This is a great diff - it's light
weight, fairly strong and typically carries a 3.36 final drive ratio. However,
converting to an R-200 has its benefits. First, the R-200 is stronger and less
likely to break behind a powerful engine. Secondly, it can frequently be found with 3:55
and 3:90 ratios. If you want to be quick, low gears are what you need. And
third, if you ever want to install an '87 through '89, Turbo-Z limited-slip differential,
all that will be required is the center section.
Hunting for Parts
When hunting for R-200 parts, try to get all of the parts at once from a
280-Z. Piecing things together from multiple Z's and ZX's will cost more time and
money. For example, if you get a differential from a ZX, you will still need the
R200 moustache bar and halfshafts from a Z as these parts are different.
Additionally, the pinion flange of a 280ZX R-200 has a 2.0" pilot, while old Z's have
a 2.25" pilot. This means you would have to swap pinion/companion
flanges. Regardless of how you decide to obtain the parts, I think you will find the
following table useful in identifying the best donor candidates.
| Model |
Year, Trans, Gear Ratio, Differential |
| 240Z |
70-73 MT (3.364) (R180)
70-73 AT (3.545) (R180) |
| 260Z |
74 MT (3.364) (R180)
74 AT (3.545) (R180) |
| 280Z |
75-76 (3.545) (R200)
77-78 MT (3.545) (R200)
77-78 AT (3.545) (R180) |
| 280ZX |
79 MT 4 Spd, (3.364) (R180)
79 MT 5 Spd, (3.364) (R180)
79 AT (3.545) (R180)
80 MT (3.545) (R180)
80 AT (3.545) (R180)
81-83 w/o Turbo,MT (3.9) (R200)
81-83 w/o Turbo,AT (3.545) (R180)
81-83 w/Turbo (3.545) (R200) |
| 280ZX (2+2) |
79 MT 4 Spd, (3.364) (R200)
79 MT 5 Spd, (3.7) (R200)
80 MT (3.9) (R200) |
The Swap
Click the images below to enlarge:
 |
|
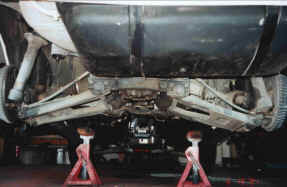
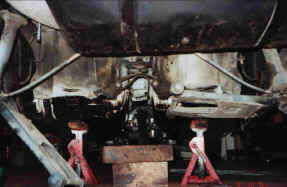
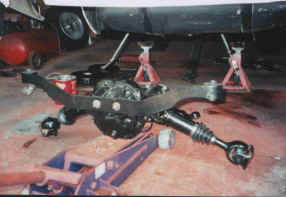
| Here’s a shot of my ’72 Z before and after removal of the R-180 differential
assembly. Note that the exhaust has been
removed also. |

|
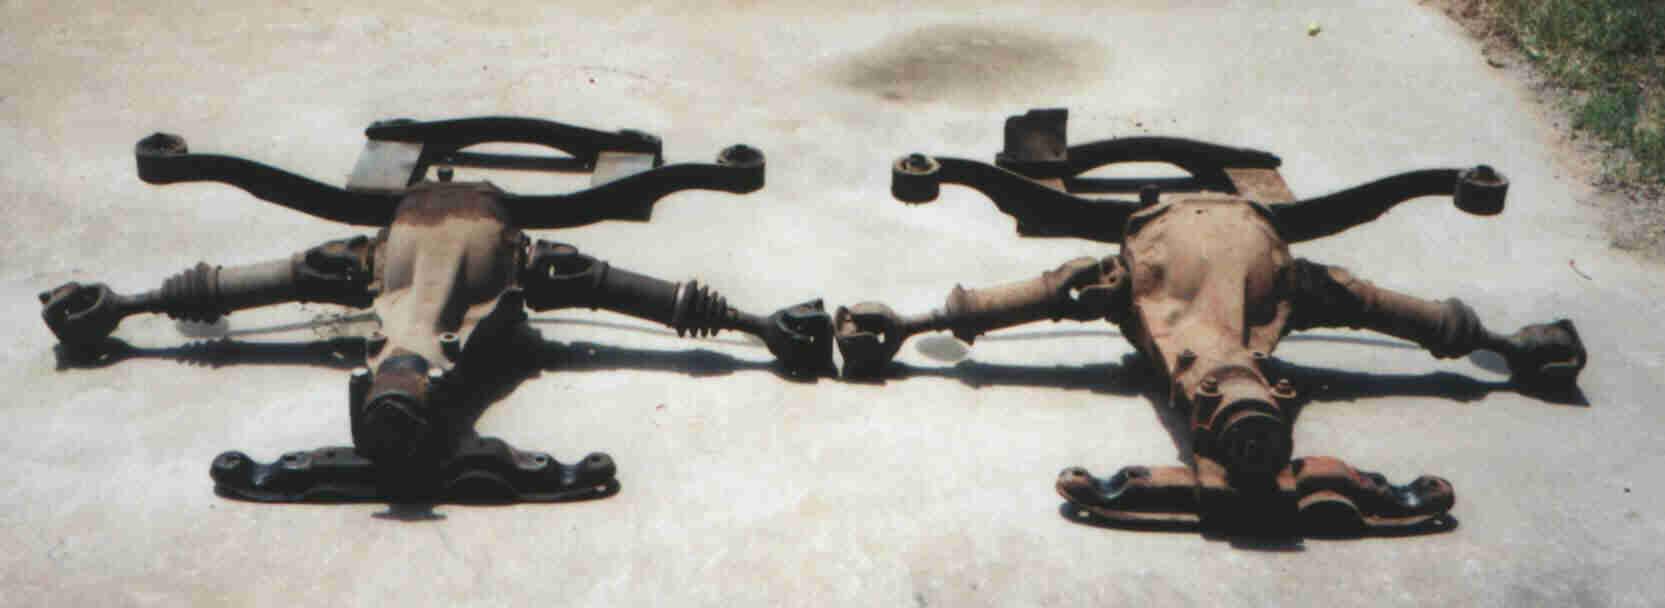
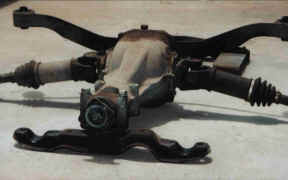
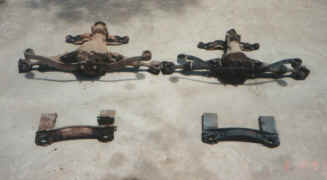
| On the left is a late 1972, R-180
rear-end assembly and a 1977 R-200 on the right. If
you want to perform the swap in a weekend, be sure to pull the assembly as shown. This is the easiest and quickest way to remove and
install all necessary components. In fact,
there are only two assemblies that must be removed. The first is the control arm
hanger assembly (seen in the back of this picture). It is held on with a total of
eight hex head (14mm) bolts. The second is the rear-end assembly, complete with
halfshafts and front crossmember. It is held in place by four hex head (14mm) bolts
at the front crossmember, and two hex (17mm) nuts at the moustache bar. Of course, you will also have to remove the eight
halfshaft bolts using two 14mm open-end wrenches, and the four driveshaft bolts. |
|
|
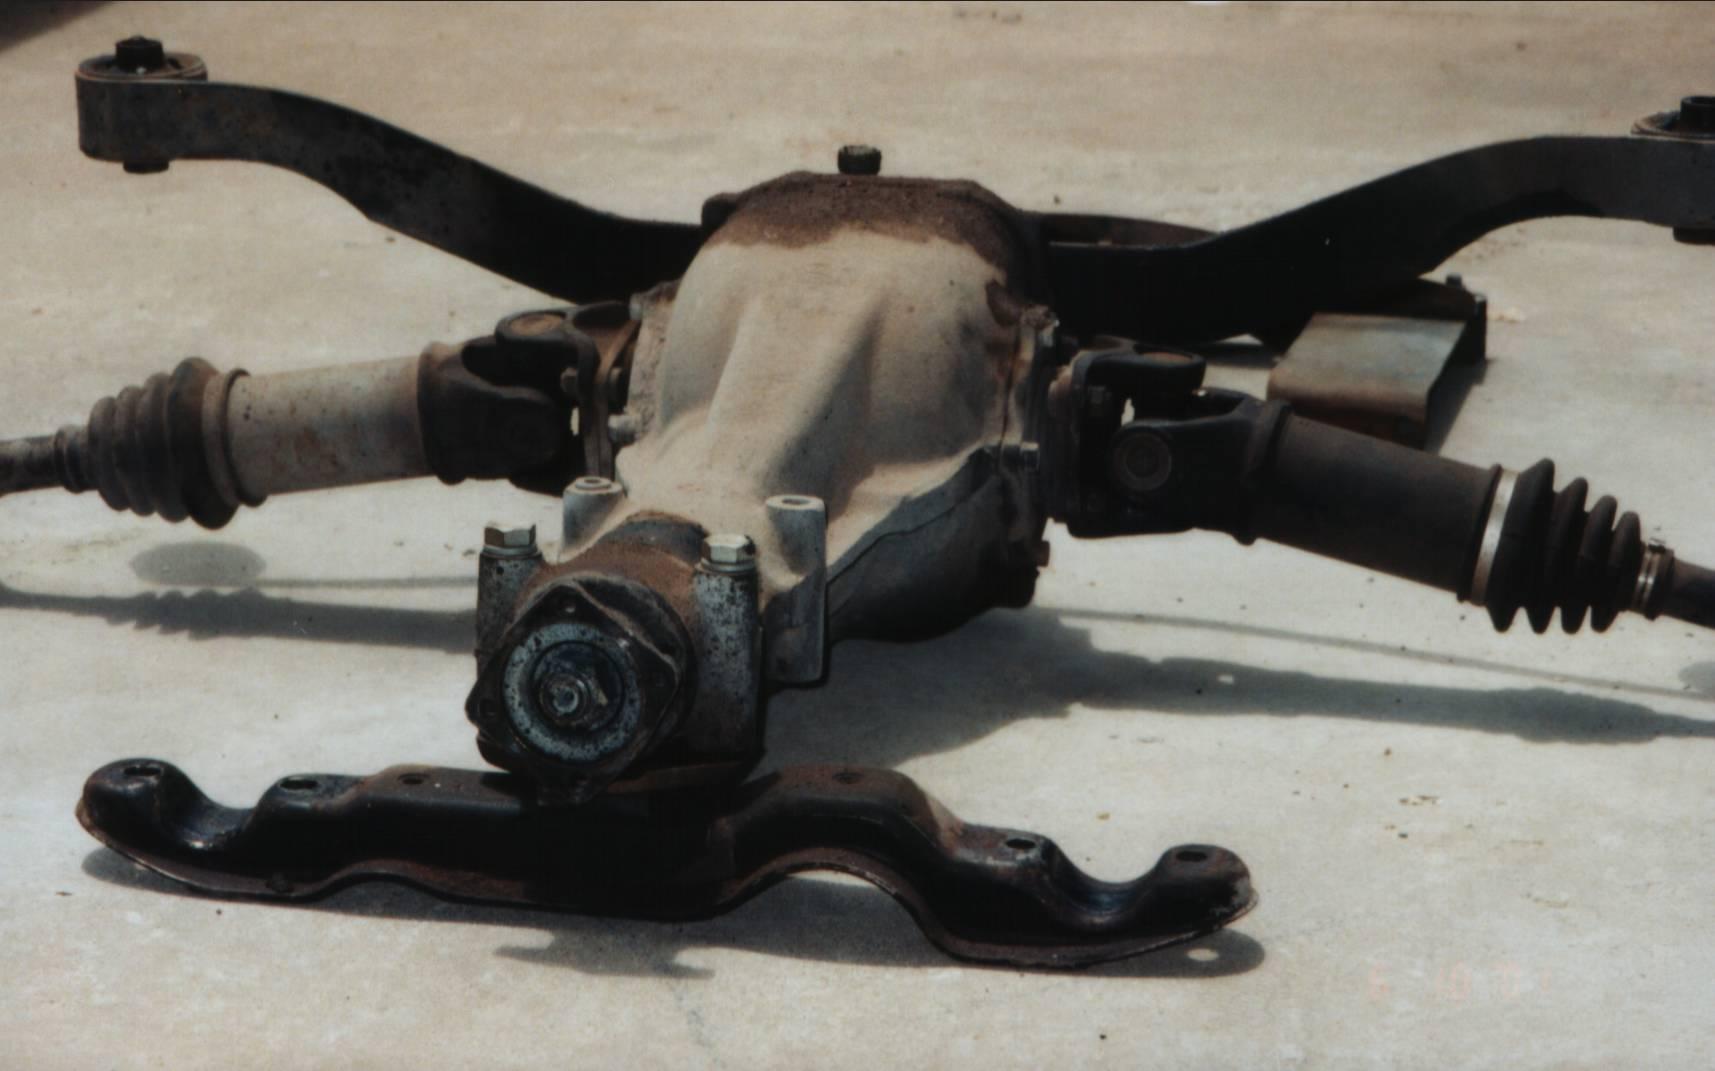
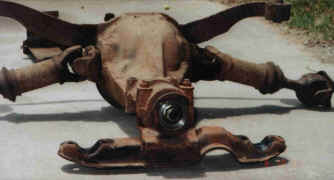
| At first glance, the assemblies look
very similar. However, the R-200 on the
right has a wider center, offset toward the driver’s side. To accommodate the offset, Datsun engineers
designed the driver’s side halfshaft 3/8” to 7/16" shorter than the
passenger side. For this reason, be careful
not to mix these up and don’t use R-180 shafts on an R-200. Here’s
a bit of trivia for you. Early R-180’s
(like the one in the pic), have the halfshaft bolted to a flanged stub axle at the
differential. This is the same method used on
R-200’s (see pic). However, later
R-180’s have a different setup. Instead
of a flange, the stub axle has a U-joint yoke built in!
The Datsun engineers did this to speed assembly at the plant. Instead of bolting the flanged stub axle to the
halfshaft with four bolts, the halfshaft is already attached as a result of installing the
U-joint. Just one more reason to have the
salvage yard pull the entire assembly as shown. This
way you get everything you need!
The front crossmember is slightly different between these two, but completely
interchangeable. The one on the left has two humps for dual exhaust, later styles
have only one. |

|
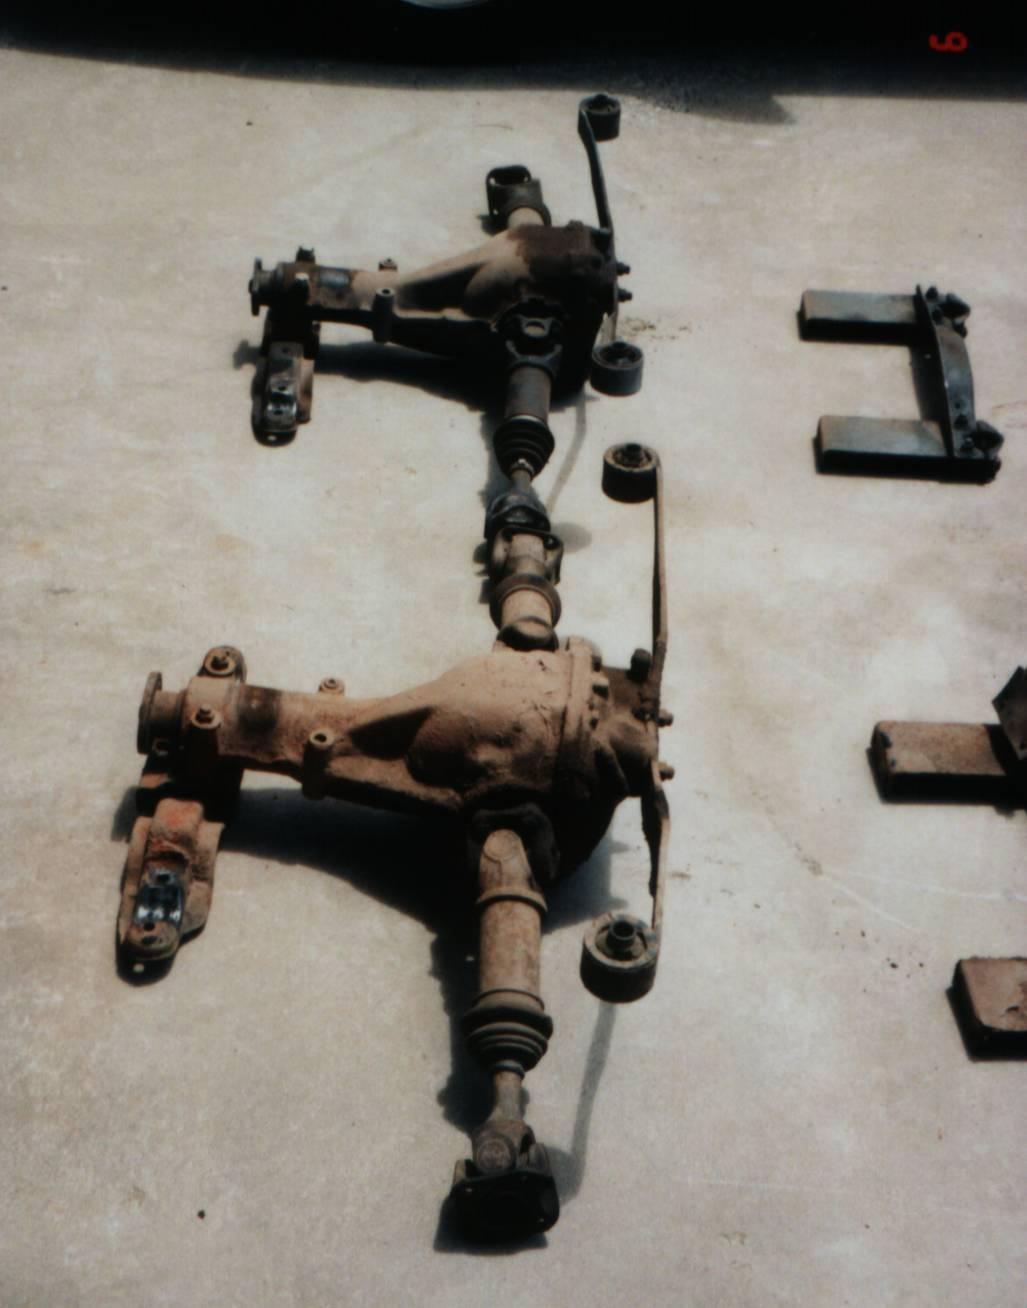
Notice in the picture how the moustache bar
attachment point is further back on the R-200. This is due to the the larger ring
gear. To accomodate the different attachment point, an R200 moustache bar has a
distinct jog in the metal. This jog provides
clearance between the bar and control arm hanger assembly. Additionally, the bushing
end coils face forward. |
|
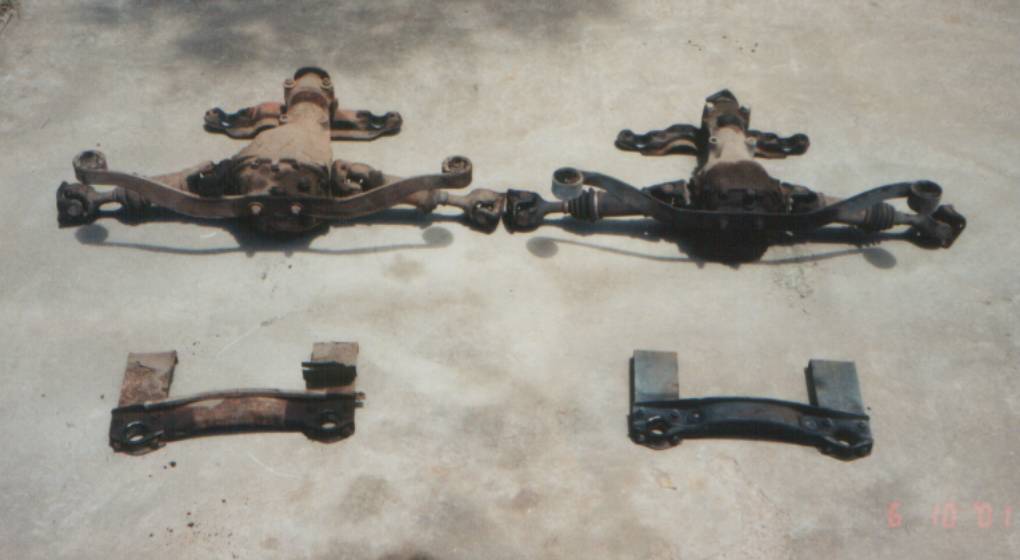
There is no difference in the control arm hanger
assembly for the late R-180 and R-200. However,
it is different on ’70 to early ’72 cars. Early
bars do not have a curve in the middle to clear the roundness of the differential. In fact, the whole differential is mounted forward
to clear this straight bar. This imparts
excessive angle in the half-shafts, reducing their life and causing annoying vibration. |
Finishing Up
|
At this point you should consider: 1) Changing the differential fluid and gasket;
2) Replacing inner axle seals where the half-shafts mate with the differential; 3)
Rebuilding the halfshafts, i.e. new U-joints and boots; 4) Installing a new front
differential mount/isolator; and 5) painting components.
I did all of these things and also rebuilt my rear suspension while I had
everything apart (this made the project last a couple of weeks). Put it
back in the same way you took it out and tighten all of the hardware to the proper torque.
|
Assuming that you forego painting, resealing, etc.; this swap can be performed
in one day – no problem! The speedometer
will need corrected by changing the speedo gears located at the tail of the transmission. To find the correct ratio, just use the
speedometer calibration program: Speedometer
Calibration.
That’s it, good luck!
|